 FREE 1 to 3-Day Delivery on Orders $149+ Details
How To Install An MMD Decklid Panel For Your 2013 or 2014 Mustang
Installation Time
45 minutes
Tools Required
- Torx T15 Bit
- Flat Head Screwdriver
- Needle Node Pliers
- Flashlight
- Plastic putty knife or similar instrument

Shop Parts in this Guide

Installation Instructions:
1. Open the trunk and remove the 2 screws holding the decklid on.
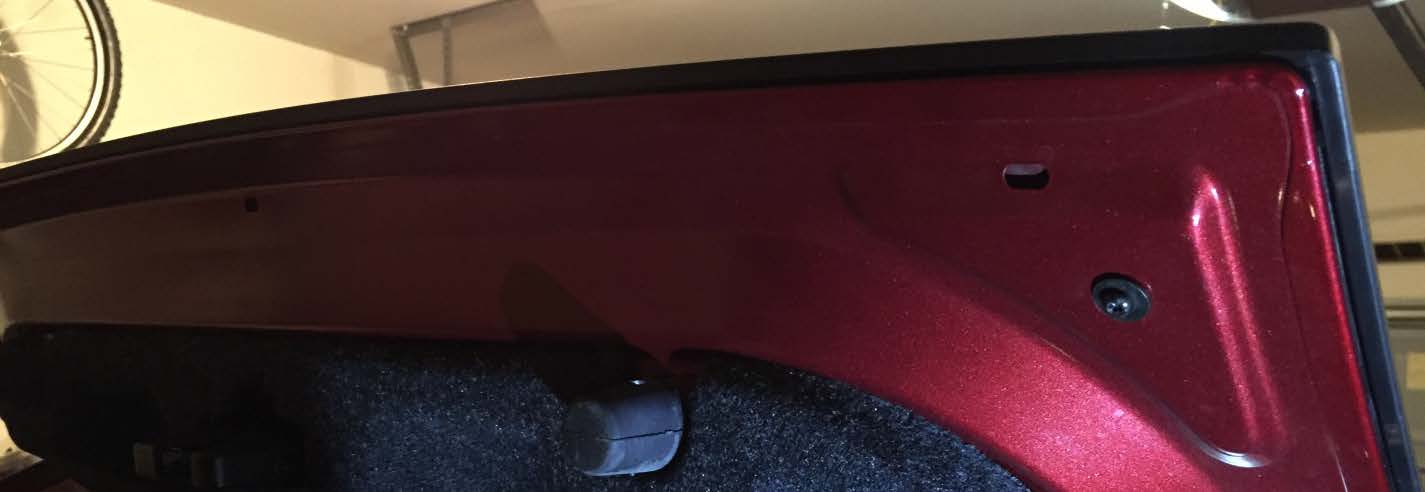
2. Using a plastic putty knife, or a similar instrument, pry up 1 corner of the decklid from the trunk. Shine a flashlight down until you see 1 of the clips connecting the decklid panel.
3. Push the top of the clip firmly with a screwdriver until it pops. Repeat the process down the line. There are 6 clips on top, and 4 clips on the bottom.

4. Once all the clips have been popped, the panel should easily be removed from the trunk lid.
5. Place the panel face down on a towel or soft surface.
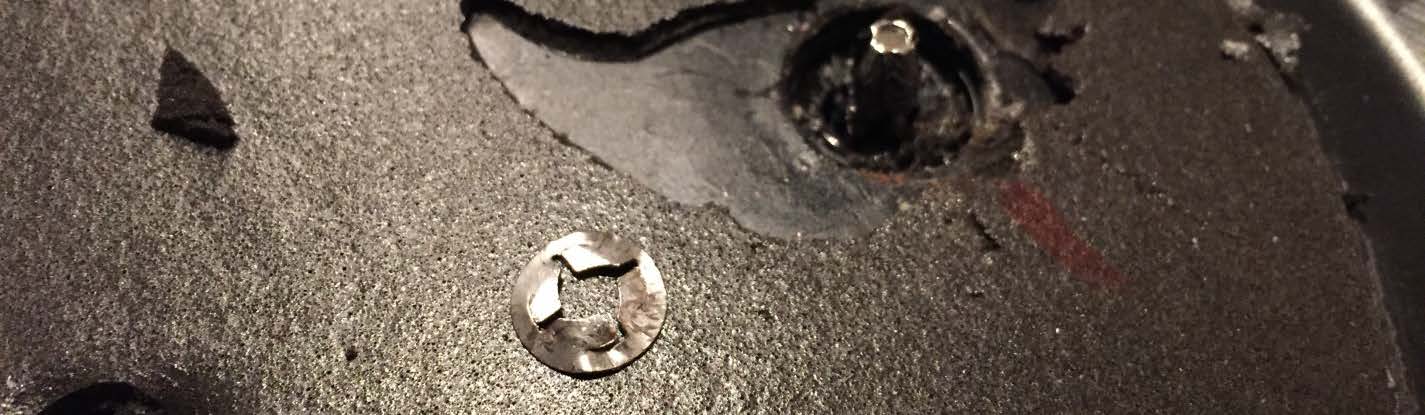
6. Remove some of the padding from around the studs attaching the emblem to the decklid. Now you will need to carefully pry the clips up each stud until they slide off.

7. The easiest way is to bend the teeth back slightly freeing it from the stud and allowing it to slide off easier. I used a combination of a large flat head screwdriver and a small pair of needle nose pliers to get the clip up. Be very careful when removing the clips, you will need these to attach the emblem to the new MMD Trunklid Panel.
8. Once each clip is off, use the pliers to flatten it back out to as close as it was before removal as possible.
9. Flip the panel over. The emblem is now only held on by double sided tape.
10.Take your plastic putty knife and start to pry up the emblem.
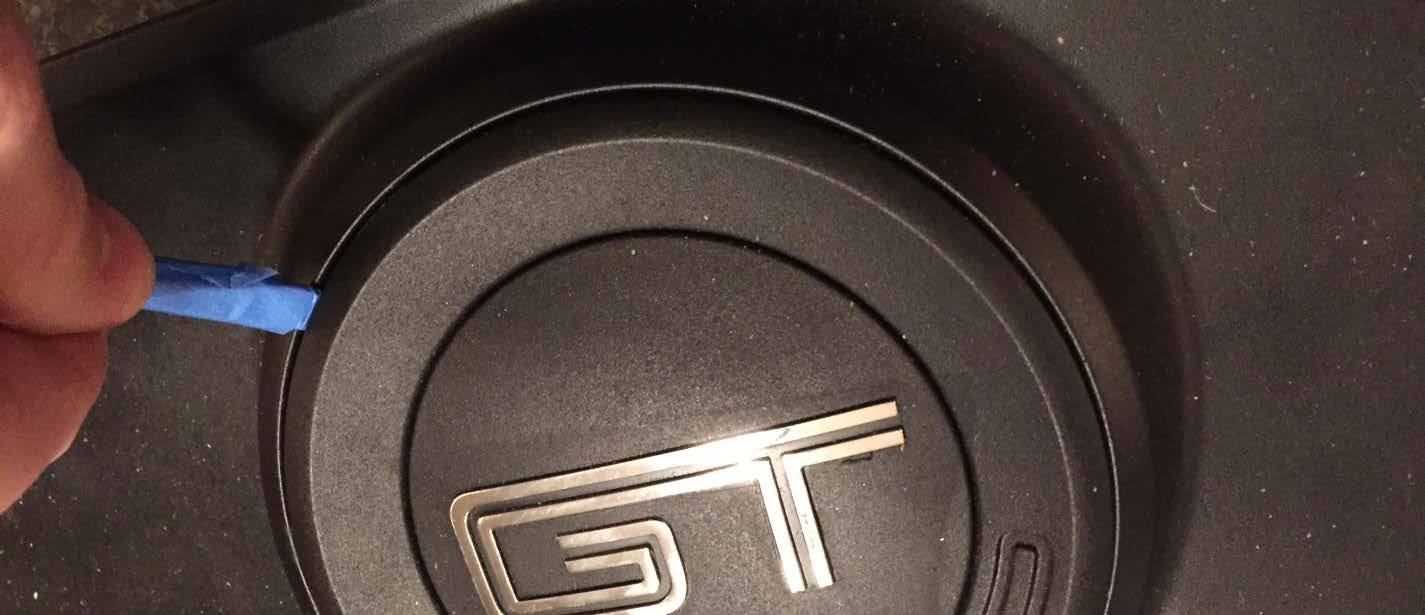
11.Once the emblem is removed, set it aside and grab the new MMD Decklid Panel. Be sure not to touch the double sided tape on the back of the emblem.
12.Place the emblem on the new MMD Decklid Panel and press down firmly around the entire area, once it’s secured, flip it over, resting on a towel or soft surface.

13.Now you need to re-attach the clips that you removed earlier. I used my needle nose pliers to push on either side of the clip and force it down over the stud. Get the clip as close to the panel as you can. Repeat for each clip.
14.Once the cap is attached, we are ready to install it on the truck lid. Give the area on the trunk lid a thorough cleaning and then use the included alcohol wipes to make sure there is no dirt left. Do a test fit and make sure everything fits correctly.
15.Once you are sure it fits, removed the back from the tape on the new MMD Decklid Panel and lightly set it in place until you feel the studs line up.
16.Now attach the 2 original screws into the new panel. Be sure not to overtighten them.
17.Press firmly around each edge of the new panel to secure it in place.
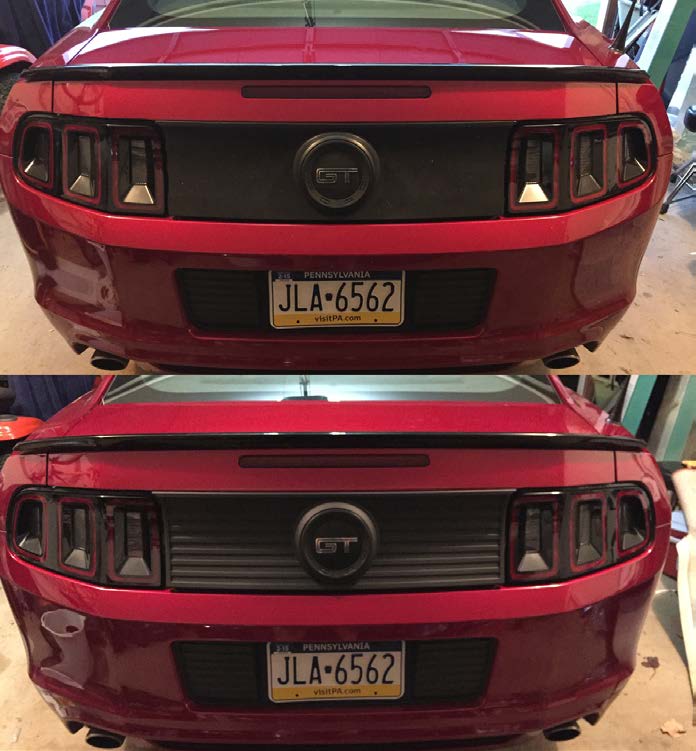
18.Done! Enjoy the look of your new ride!
Installation Instructions written by AmericanMuscle Customer Ryan Geraghty 11.04.2014

