 FREE 1 to 3-Day Delivery on Orders $149+ Details
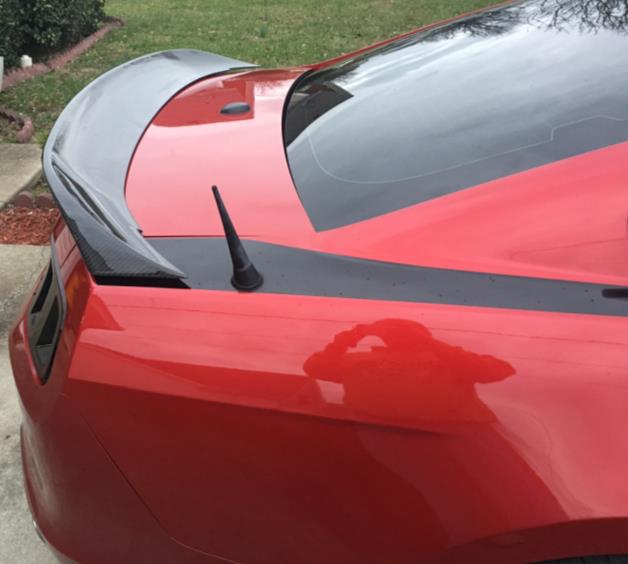
How To Install a MMD Ducktail Spoiler - Carbon Fiber - on your 2010-2014 Mustang
Installation Time
3 hours
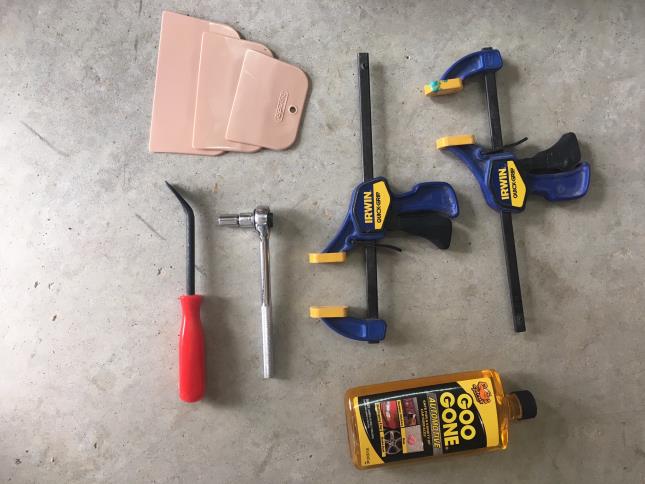
Tools Required
- 10mm Socket wrench
- Phillips +/- Flat head screwdriver (may be needed)
- Automobile trim/clip removal tool
- Plastic or firm rubber chisel – Bondo rubber scraper set works well.
- Clamps with rubber, non-abrasive grips
- Non-abrasive adhesive remover – Automotive Goo Gone works well.
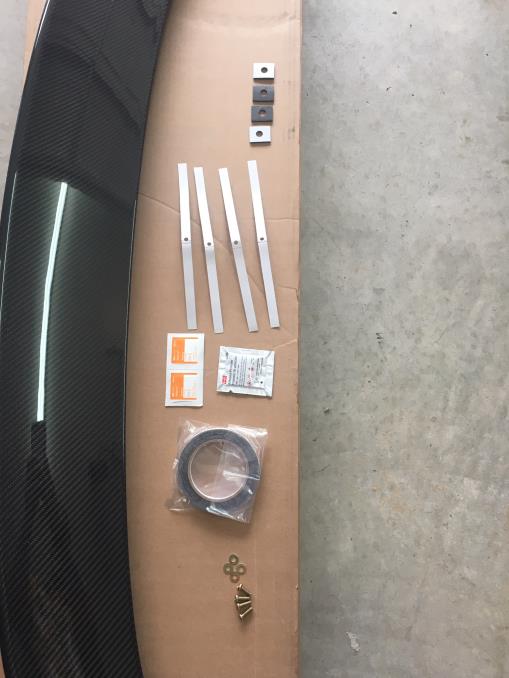
Supplies Included:
MMD Ducktail Spoiler (1)
6mm-1.0 x 16mm Pan Head Bolts (4) – It may be necessary topurchase 6mm-1.0 x 12mm bolts (see instructions)
6mm Washers (4)
Self-adhesive foam pads (4)
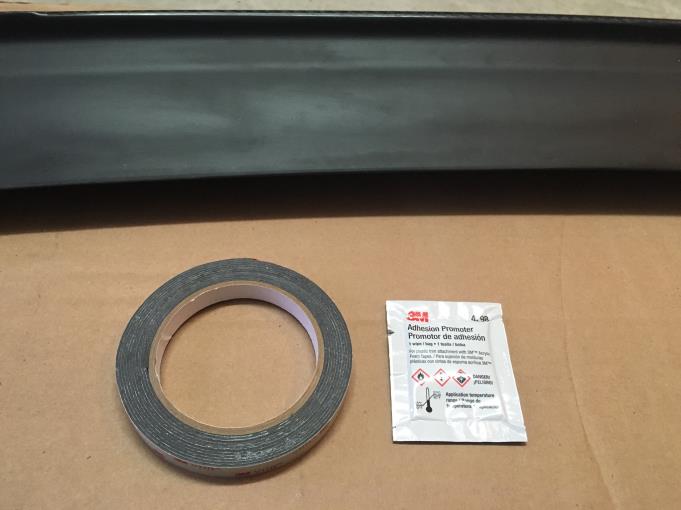
3M Double-sided foam adhesive (1 roll)
Alcohol Cleaning Wipes (2)
3M Adhesive Promoter Wipe (1)
Self-adhesive strips (4) – uncertainty of use
Keep the insulating wrap used in packaging for protection during installation.
Removal of trunk liner
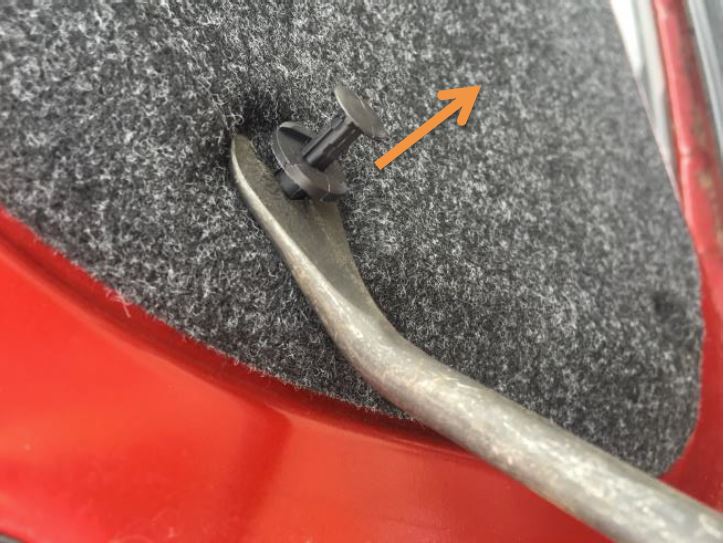
1. Remove the 13 plastic clips of the trunk liner using a clip removal tool. The center pin pulls up (but not removed) which allows the clip to be removed in entirety.
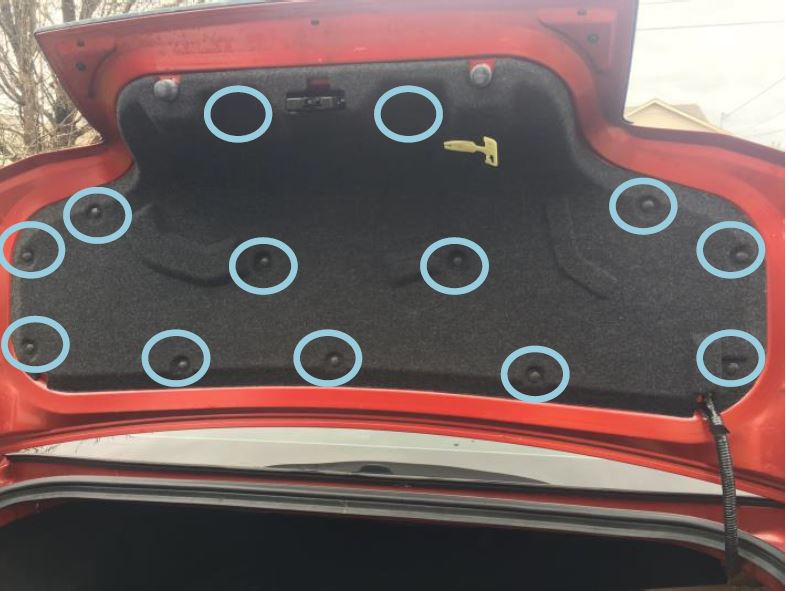
2. Remove the liner, being careful of the emergency trunk release lever and the trunk latch mechanism.
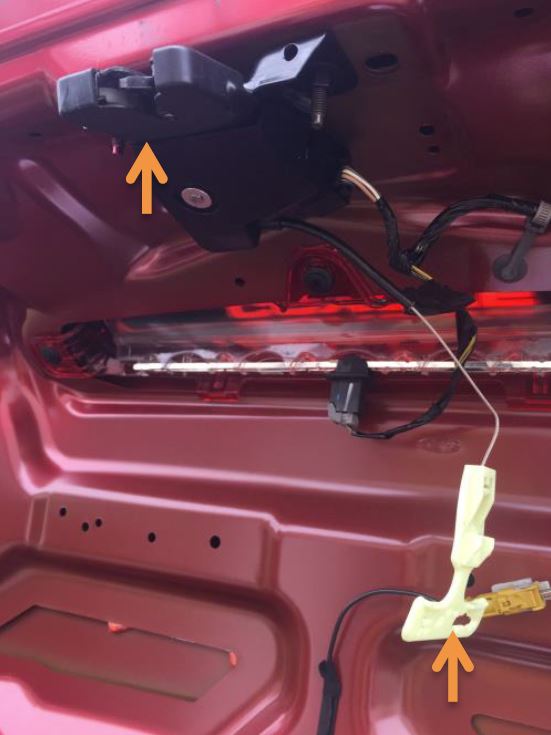
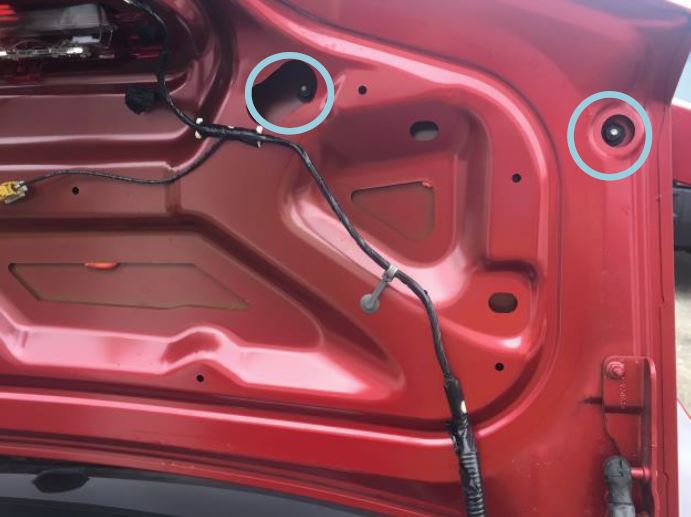
Removal of Factory Spoiler
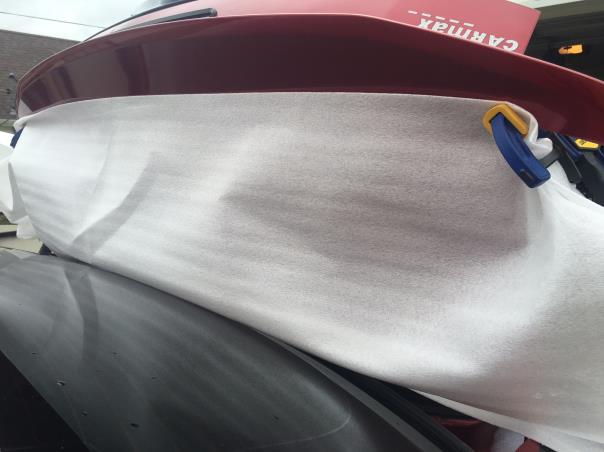
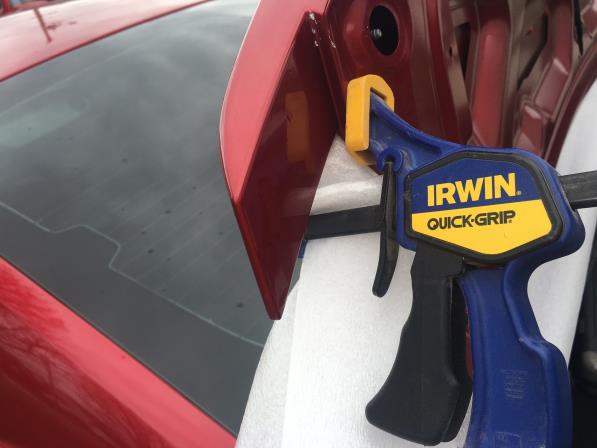
Either have assistance with supporting the spoiler while removing, or use soft-grip clamps to support the spoiler during removal. The insulating packaging wrap may be used as an added protective cover for the clamps.
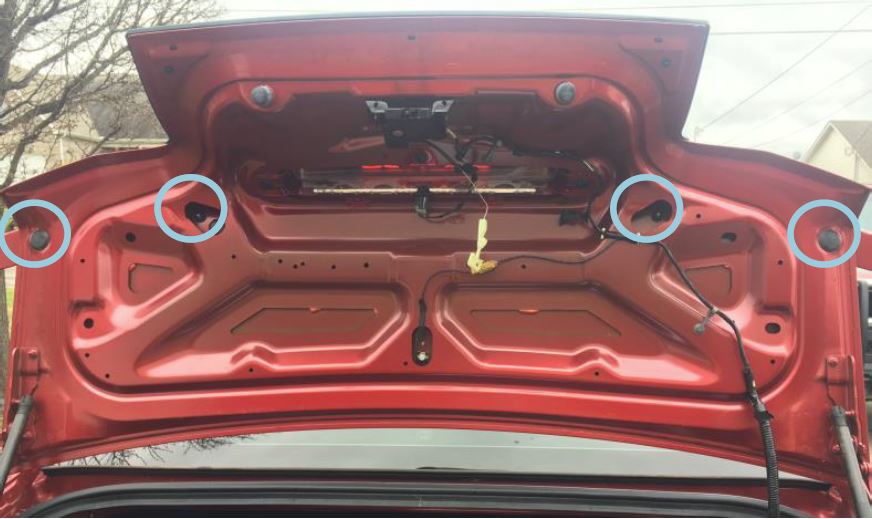
2. Using the 10mm socket wrench, loosen each of the 4 nuts securing the spoiler to the trunk lid. Two of the nuts are exposed by careful removal of black plastic plugs using a prying tool. After loosening, remove the nuts carefully while ensuring support of the spoiler to avoid damage to the vehicle.
3. Close the trunk lid and carefully separate the adhesive material between the spoiler and trunk. This step requires patience and time to avoid scratching the paint of the vehicle. Combining Bondo scrapers and adhesive remover works well for this step. It is recommended that the scrapers be used to pry from the trailing edge to decrease the chance of scratching the paint of the trunk. Use caution if prying from the leading edge. Gentle pressure may be applied to lift the spoiler from the trunk after all adhesive has been separated.
After successful removal of the spoiler, there will be adhesive tape still attached to the trunk. Carefully clean all remaining residue from the trunk using a scraper and adhesive remover. Applying LOW heat with a hair dryer or heat gun while scraping may assist in removal of the material. This step requires time and patience.
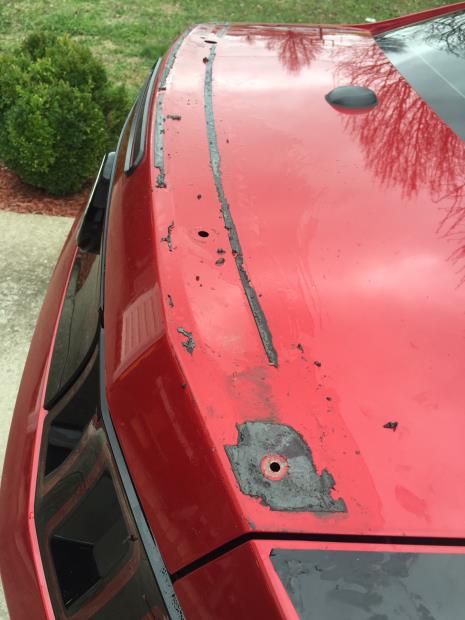
5. When all residue is cleaned from the trunk, wipe the area that the new spoiler will be applied using the alcohol pads.

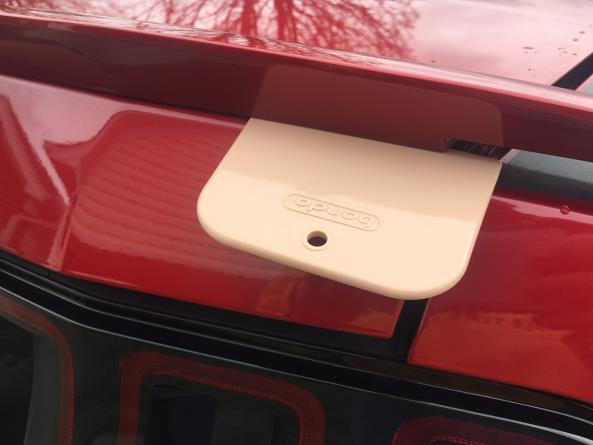
Installing the New Spoiler
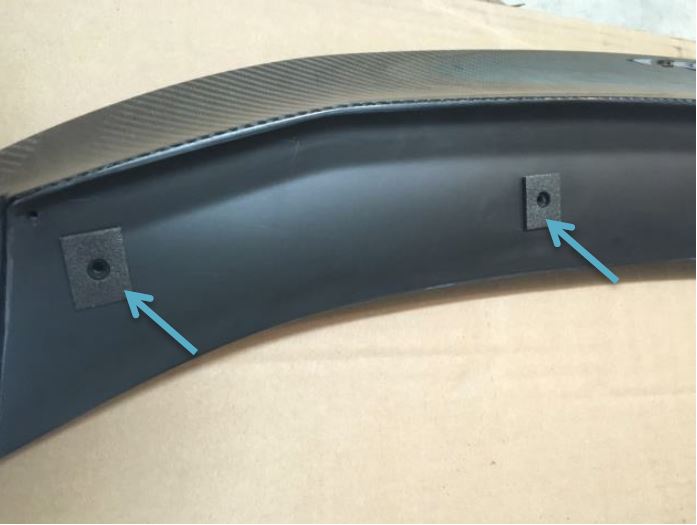
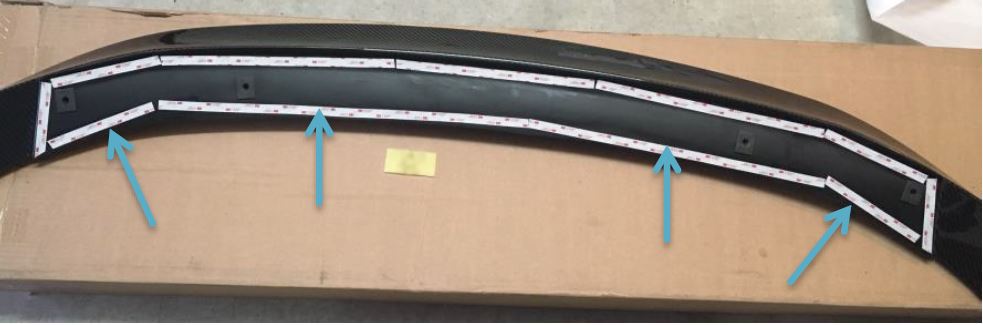
1. Apply the 4 foam pads to the bottom surface of the spoiler around the threaded insert holes.
2. Wipe the border of the bottom surface of the spoiler with 3M adhesive promoter and allow to dry for 60 seconds.
3. Attach 3M double-sided tape around the entire border of the bottom surface of the spoiler. NOTE: Prior to completion of the next step, it is recommended to try a dry fitting for alignment and sizing of the bolts. The provided bolts were too long for my installation, thus shorter bolts were required to be purchased and used instead. When all pieces appear to have proper fit, proceed with the next step for final installation.
Remove the adhesive backing and align spoiler with the holes in the trunk. Using 6.0mm-1.0 bolts to secure the spoiler to the trunk. DO NOT allow adhesion of the double sided tape until the spoiler is aligned in proper position. IT IS NOT EASILY REPOSITIONED!!!
After tightening all 4 bolts, close the trunk and apply pressure down on the spoiler to ensure complete adhesion of the tape.
Reinstalling trunk liner
Reinstall the two plastic plugs over the spoiler bolts.
Reposition the trunk liner, ensuring repositioning of the emergency trunk release lever and the latch mechanism.
Replace all 13 clips to secure the liner.
