 FREE 1 to 3-Day Delivery on Orders $149+ Details
Moser 31 Spline Mustang Axles for 8.8in Rear w/ Studs ('05-'11 GT; '07-'09 GT500) - Installation Ins
Installation Time
1 days
Tools Required
- Jack
- 4 Jack Stands
- Tire Iron or 13/16 Head w/ Torque Wrench
- 10mm Wrench
- 13mm Wrench
- 15mm Wrench
- 8mm Wrench
- High Temp (red) Silicone Gasket Maker or Differential Gasket
- 4 Quarts of Gear Oil(Dry fill 4.25 pts of 75W-140 synthetic rear axle lubricant, with Track-Lok requires addition of 4oz of friction modifier XL-3.)
- 3 Oil Pans, Biggest one at the Center Under the Differential and Smaller at the Ends
- 2 ABS Rings
- Wheels Stops or Equivalent (bricks)
Installation
Note:
For simplification of the job it is better to order ABS rings from dealer, instead of trying to remove it from factory axles. If not careful it is pretty easy to damage oil seals when removing axles from housing.
Removal:
1. Have vehicle at the leveled surface.
2. Break loose lug nuts on real wheels, but do not remove them.
3. Place wheel stops under front wheels and jack up the rear to the height that would allow comfortable operation under the vehicle.
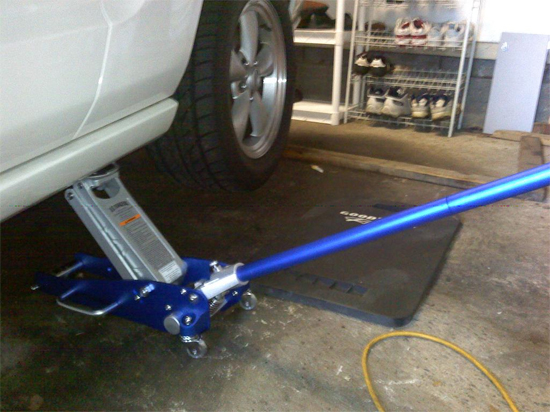
4. Place stands under the frame

5. Jack up front of the vehicle (can be done at later time when filling up the differential fluid)
6. Remove rear wheels.
7. Make sure that e-brake is off. Using 13mm head with ratchet remove bolts holding brake caliper.
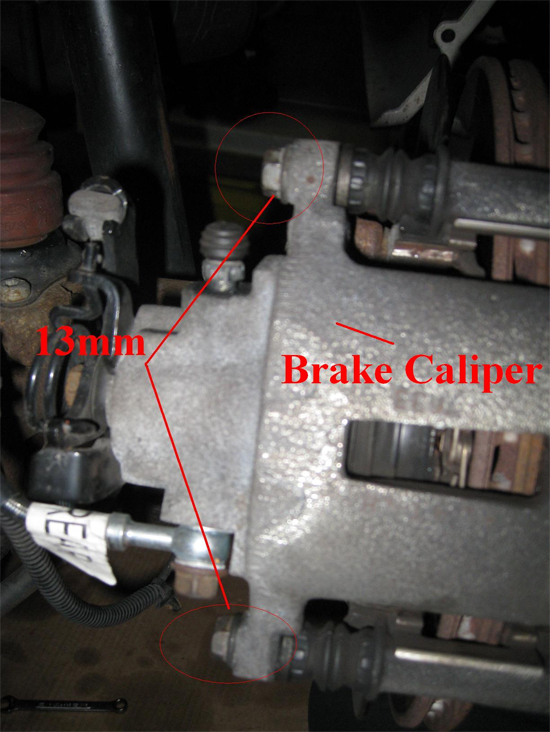
8. Carefully remove the caliper and place out of the way, but so it's not dangling to avoid damaging brake lines.
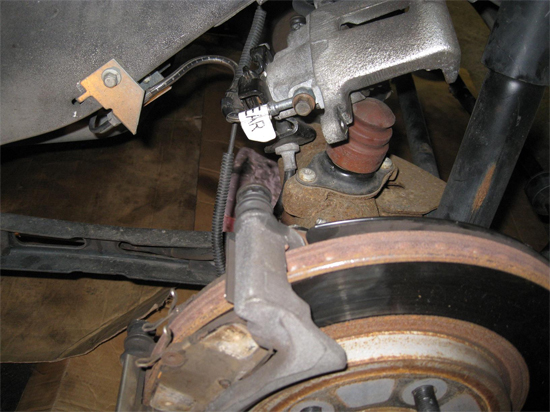
9. Using 15mm head with ratchet remove caliper brace.
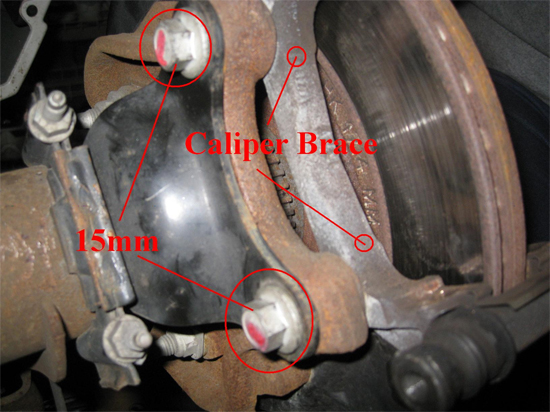
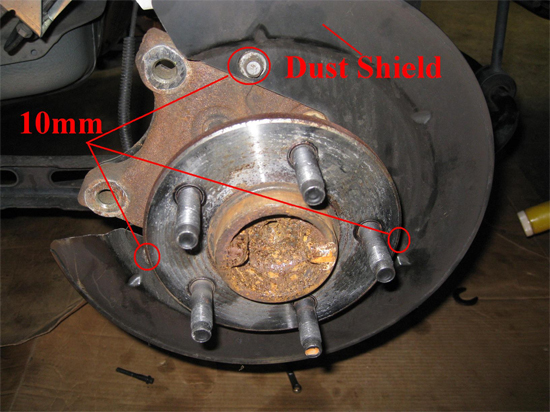
10. Remove the brake rotor, if never taken off before rotor might have a washer-like stopper on one of the wheel studs.
11. May use 10mm head with ratchet to remove dust shield for cleaner operation and to avoid damaging it in some way.
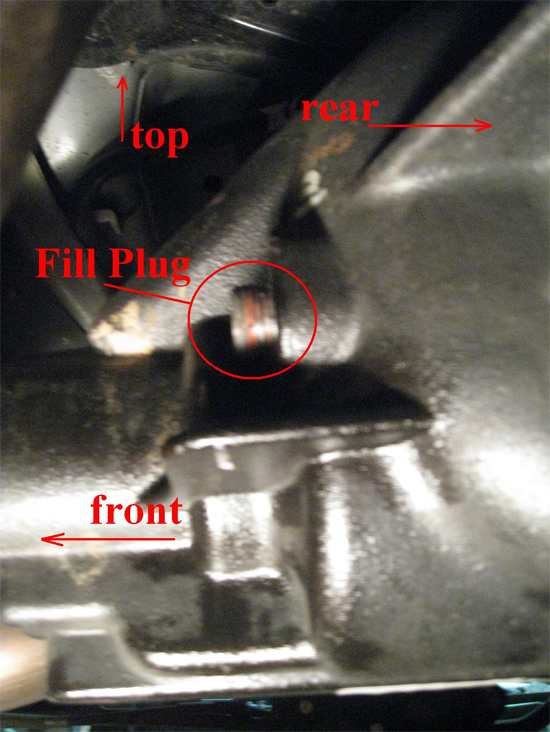
12. Move under the differential and locate the fill plug that's toward the front of the vehicle, on the driver's side towards the top of differential housing. May want to place oil pan underneath and prepare some rags. Use ratchet without head to insert into the plug and remove it. This is done before opening the housing to avoid situation where fluid is drained, but there is no way of removing the fill plug to actually fill new fluid.
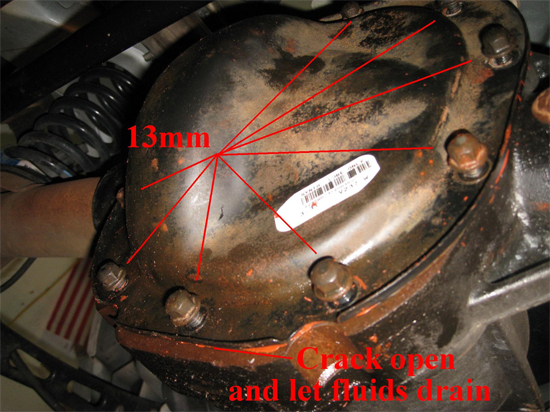
13. Make sure that oil pan covers area under the differential housing and Using 13mm head and ratchet loosen bolts holding differential cover. Pry the cover and allow fluid to drain into the pan. Then remove the cover completely.
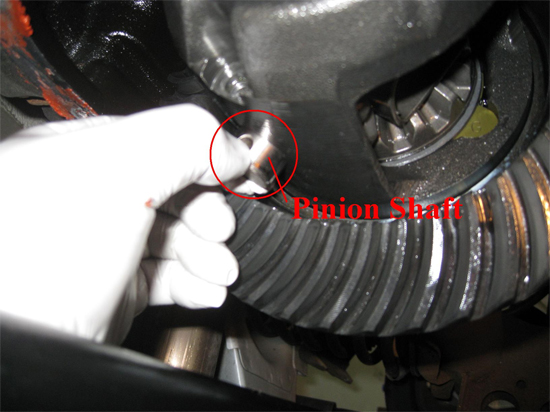
14. Locate lock bolt inside the differential housing, may need to rotate axles, best done when car is not in gear (neutral). Using 8mm wrench remove the lock bolt.
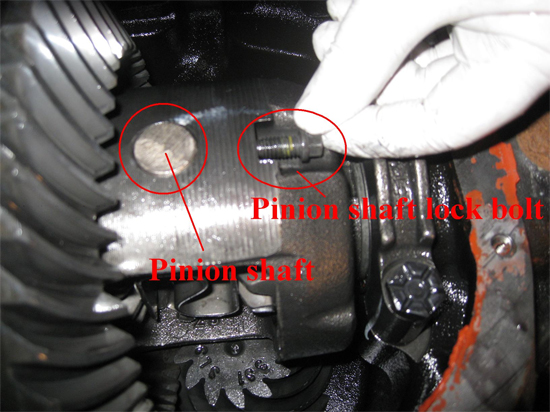
15. Slide the pinion shaft out of the differential case. In my situation it easily slid out to the opposite direction of where the lock bolt is located. Press the pinion shaft in and rotate assembly so that it could be pulled out.
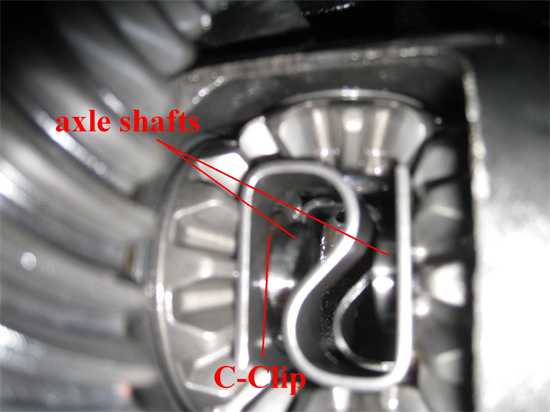
16. Rotate assembly so that have an easy access to the c-clips, press axles in from sides to remove c-clips. Magnet tool can be used to pull c-clips out Or can rotate clips and then push or pull them out.
17. Place oil pans at ends of axles and pull axles out, supporting shafts on exit in such manner, so not to damage oil seals.
18. Now ready for installation of new axles. Most aftermarket axles come without ABS rings and some do not have wheel studs pressed in. Press on ABS rings onto new axles and press in wheel studs. Moser axles ordered through AmericanMuscle.com had wheel studs pressed in, and have provisioning (but do not have) ABS rings pressed on. Can take axles with ABS rings to machine shop to get them pressed on. OR using blowtorch, heat the ABS rings which will make them expand and place them onto the new axle in same manner as it was on the original axles. Allow ABS rings to cool down naturally and they will shrink clamping down onto the axle.
19. Slide new axles into the housing, careful not to damage oil seals.
20. With axles pressed in place C-clip into the grove similar to one on the original axle. Slide axle out a little so that C-clip wouldn't fall out.
21. Insert pinion shaft into the differential case and tighten differential lock bolt (to 22 in-lbs if able).
22. Clean differential cover, put silicon gasket maker or gasket onto the cover and install it.
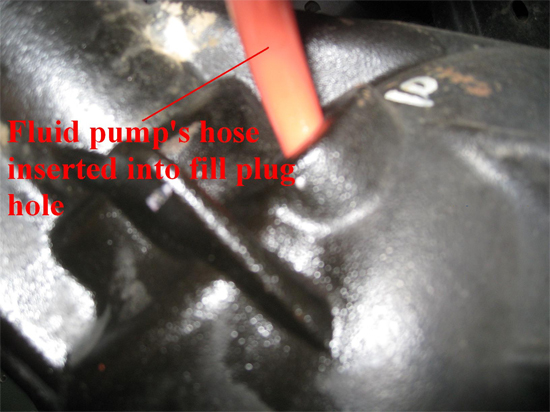
23. Fill rear axle lubricant through the fill plug using fluids pump. Measure used: filling until comes to the level of the fill plug or coming out.
24. Bolt in the fill plug.
25. Continue with installation of the dust shields, rotors, caliper brace, caliper and wheels, reverse order of disassembly.
26. When vehicle is lowered, torque lug nuts to standard 100 lbs (or required amount specific to your vehicle).
BONUS
1. If oil seals are damaged would need to use axle oil seal removal tool, or take an old flat head screwdriver and hammer and pry seal off.
2. To install oil seal, carefully and evenly hammer it into place, preferably, using flat piece of metal in between hammer and the seal so not to damage it with hammer.
3. Bearing removal would require special axle bearing removal tool, or can manufacture one analogous to it.
4. To install bearing, can use old bearing as a driver to hammer the new one into place.
Installation instructions provided by AmericanMuscle customer Ilya Tarasov 9.29.09
Related Guides
-
Installation
-
Installation
