 FREE 1 to 3-Day Delivery on Orders $149+ Details
Mustang Billet Grille Kit ('99-'04) - Installation Instructions
Installation Time
30 minutes
Tools Required
- Phillips Screwdriver
- Flathead Screwdriver
- 1/8" (or similar size) Drill Bit
- Marking Tool (Punch/Sharpie)
- Vehicle Jack
- Jack Stands
Installation
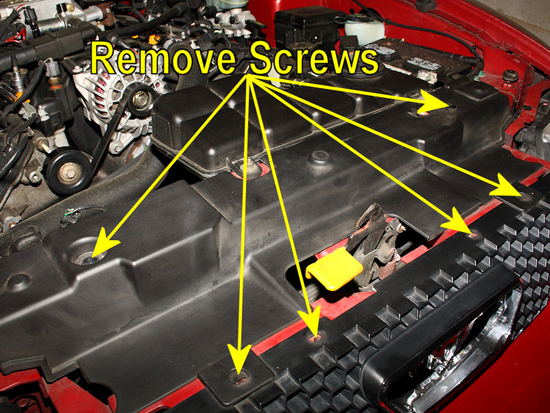
1. The first step is to raise the hood and remove a few screws. While you can do this installation without removing the radiator cover, it certainly helps to have it out of the way for added clearance behind the factory grille. There are six screws and clips that hold the factory grille and radiator cover in place.
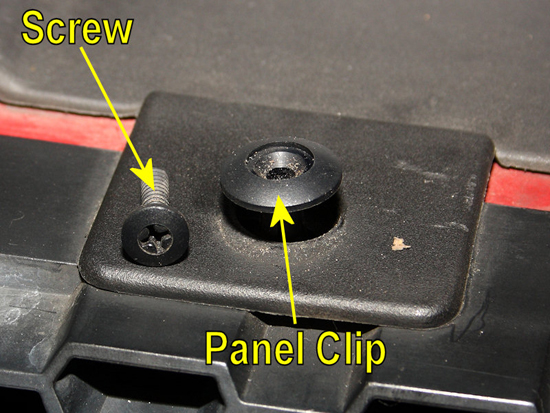
2. The screws are plastic, and sit inside a recessed washer-like clip. Once the screw is removed, you can pry the clip straight up with a flathead screwdriver. As the screws and clips age, you may find that the screw simply turns without coming out. If this occurs, use a small flathead screwdriver to pry the screw up as you’re turning it. This should allow the threads on the screw to grip and then screw out of the washer-like clip.
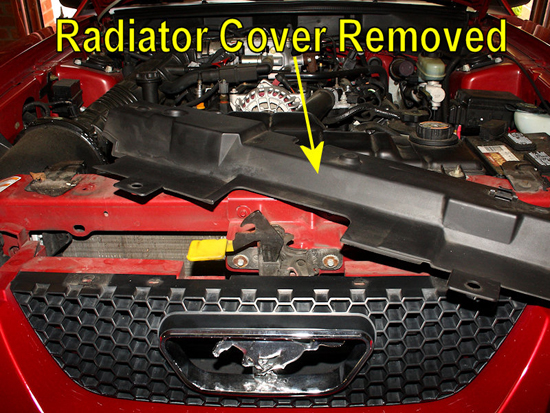
3. With the screws and clips removed, pull the radiator cover off and set it aside.
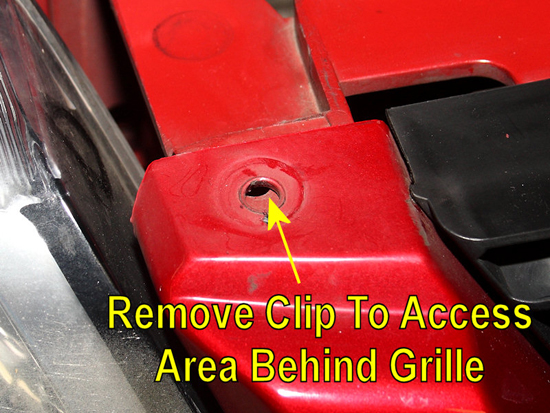
4. There are two more screw and clips on each side of the grille. Remove them, just as you did the others. Once removed, you can flex the factory grille away from the car allowing you access to the area behind the factory grille.
5. The Billet Grille uses a screw, nut, and metal plate to secure itself to the factory grille. The factory grille will be sandwiched between the plate and the billet grille.
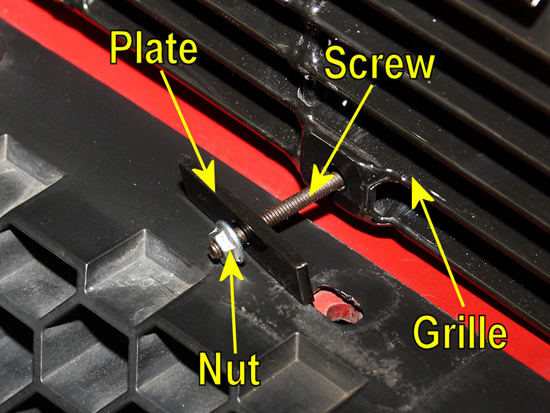
6. Once the grille is positioned against the front of the factory grille, install the supplied hardware to hold it into place. All you need to use to tighten the screws down, from the front, is a Philips head screwdriver. You can easily prevent the nut on the backside of the grille from turning with your fingers. Once completed, reinstall the radiator cover and factory fasteners you removed earlier.

7. Now it’s time to focus on the lower grille. Installation for it will be even easier than the upper grille, as there’s nothing to remove beforehand. It will help you to raise your Mustang up in the front though. So grab your jack and a couple of jack stands. Make sure that your rear parking brake is set to prevent the vehicle from moving before you jack it up.
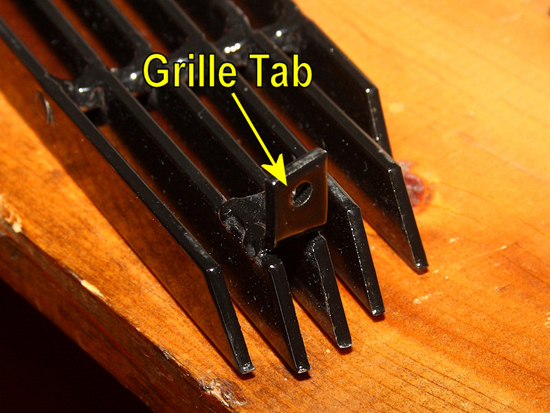
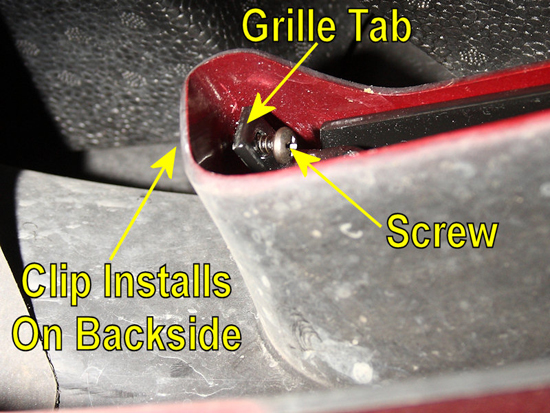
8. Examine the lower grille. You’ll find tabs on each side. Screws will pass through these tabs to secure the grille in place.
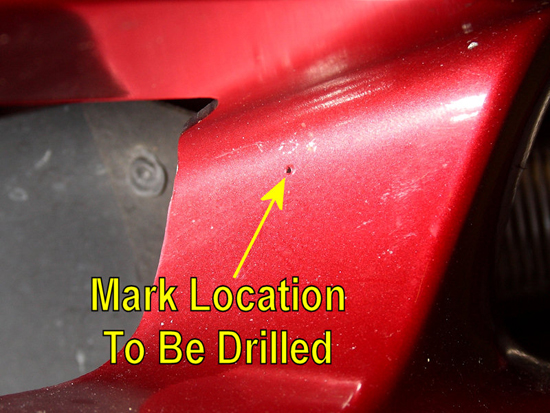
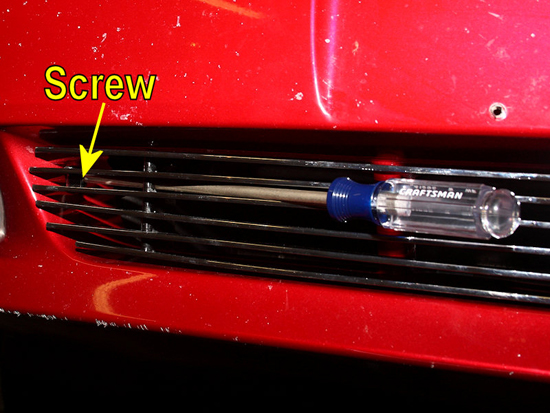
9. Position the grill in place, and then mark the spot for the holes you’ll drill. I used a punch, but you could just as easily use a Sharpie permanent marker or similar marking tool. Then use a drill bit, an 1/8 inch bit works well, to drill holes for the screws.
10. When installing, the screws will pass through the tab on the grille, then through the bumper cover, and then be held in place by the supplied metal clips.
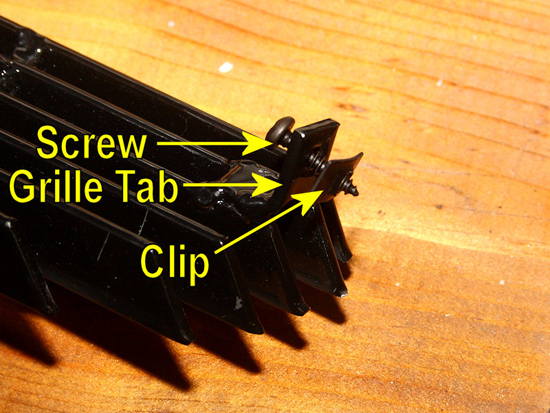
11. Place the grille into the car’s bumper cover, and thread the screws on each end down into the metal clips. The clips will go on the backside of the bumper cover. This step is easiest accomplished while under the car, which is why the car was raised earlier.
12. To tighten the screws, a long screwdriver passed through the front of the grille is an easier method than trying to tighten the screws up from the backside of the bumper cover.
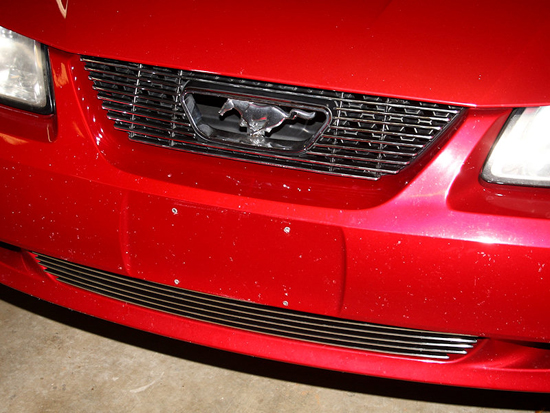
13. Now, lower your Mustang back down, and go enjoy the freshened appearance offered by your billet grille combo!
Installation instructions provided by AmericanMuscle customer Eric Hege 5.28.09
Related Guides
-
Installation
-
Installation
-
Installation
