An often-overlooked part of your Mustang’s handling is the front-end suspension geometry as many Mustangs (especially lowered ones) suffer from bump steer problems. An easy and relatively inexpensive upgrade that will eliminate bump steer and improve handling is a bump steer kit. This guide will over what you need to know when it comes to Mustang Bump steer kits.
Shop Mustang Bumpsteer Kits
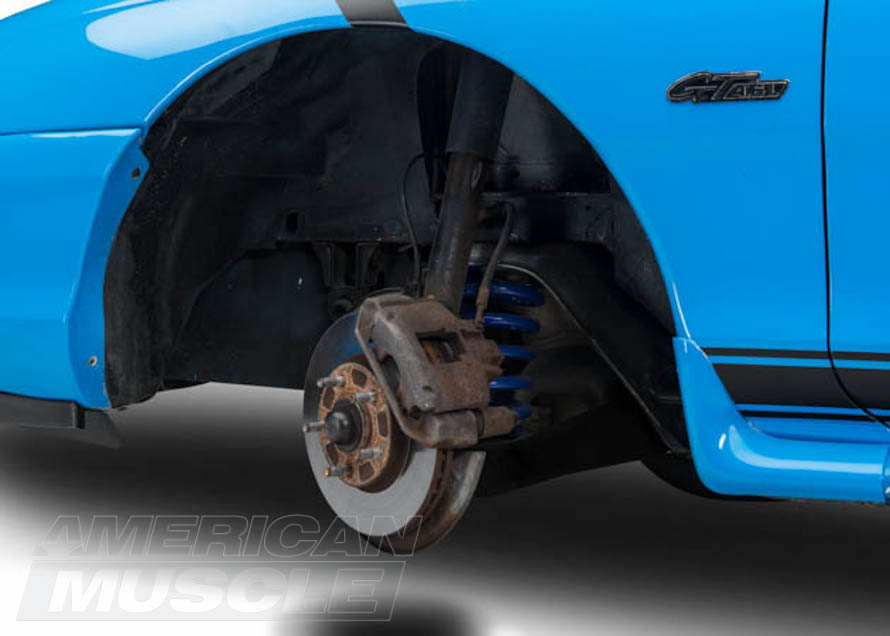
The only input to your pony's steering should be you. Keep your Mustang's geometry in check with a bumpsteer kit.
Shop Bumpsteer Kits
What is Bumpsteer?
Bumpsteer is when your wheels try to steer themselves without you moving the wheel at all. Bumpsteer arises when the tie-rods get out of alignment due to a change in toe angle from the suspension either being raised or lowered. Bump steer occurs when your Mustang hits a rut or pothole, causing your car to turn. Bumpsteer reduces tire wear and overall handling capabilities, especially on rough roads.
Bumpsteer is designed to be part of the geometry of your Mustang since Ford engineered a specific amount of toe-in or toe-out. When your Mustang is out of alignment, it feels like the suspension is steering the car and not you. There will always be some bumpsteer in a Mustang's suspension, but this can be exaggerated if you're lowered. The use of a bumpsteer kit will help eliminate this, by repositioning the tie rod ends and realigning and correcting the geometry of your Mustang's front end suspension.
How is Bumpsteer Prevented?
To eliminate bumpsteer in your Mustang, the tie rod must fall between an imaginary line that runs from the upper ball joint through the lower ball joint, as well as another imaginary line that runs through the upper a-arm pivot and the lower control arm pivot. In addition, the centerline of the tie rod must intersect with the instant center created by the upper a-arm and the lower control arm. The instant center is an imaginary point created by drawing a line from the upper a-arm ball joint through the a-arm pivot where it is intersected by an imaginary line that extends from the lower ball joint through the inner control arm pivot. Where the two imaginary lines intersect is the instant center.
Why Does My Mustang Need a Bump Steer Kit?
Bump steer kits allow your Mustang to:
- Handle better
- Correct suspension geometry on lowered Mustangs
- Improve toe angle
- Adjusts tie-rod ends
Mustang bump steer kits are a necessary mod for lowering your Mustang as they keep the front suspension geometry in check and your pony pointing straight as you roll down the road. In turns, especially ones that have bumps or rough road surfaces, bump steer kits keep your Mustang from jeering left or right unexpectedly, providing an overall consistency to the suspension system.
Mustang bump steer kits adjust the height of the outer tie-rod in relation to the steering rack, basically by adding adjustable tie-rod ends to dial in the angling.
What Does a Mustang Bump Steer Kit Contain?
Mustang bump steer kits typically contain:
- (2) End links
- (2) Tapered shafts
- (4) Nuts
- (2) Washers
- (12) Bushing spacers
Bump steer kits essentially turn your tie-rod ends into adjustable tie-rod ends, and the whole kit is designed to give you the maximum amount of adjustability without incurring undesired NVH. Mustang bump steer kits can be picked up for right around $200 or less depending upon which manufacturer you choose, but all of them offer adjustability to fix the toe angle of your Mustang.
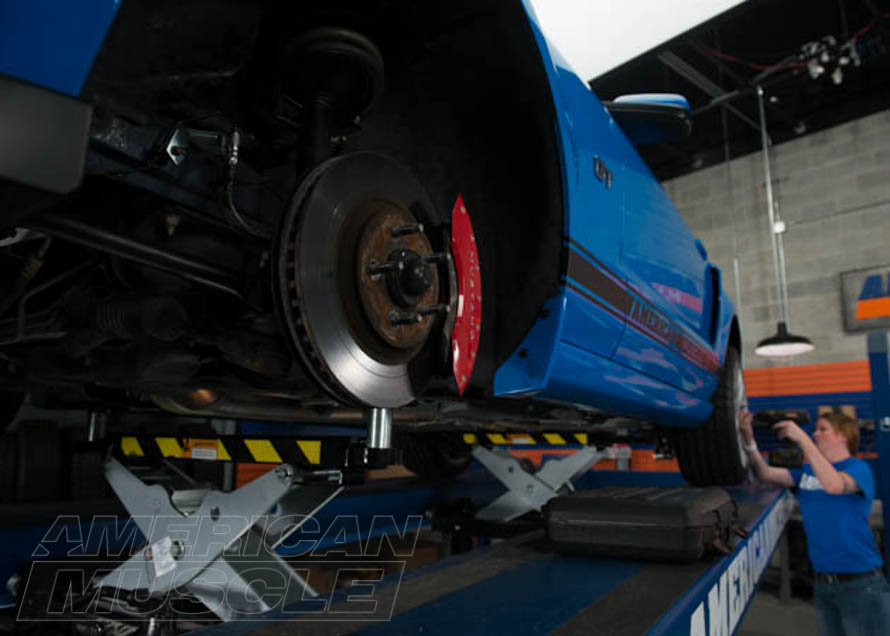
How Hard Is a Mustang Bump Steer Kit to Install or How Much Would It Cost?
Installing a bump steer kit on your Mustang can be a tricky project, but is able to be accomplished in your driveway. Overall, you will need a pretty decent set of tools and a strong understanding of suspension geometry, toe angle specifically. If you were to attempt this install yourself, set aside a solid day’s worth of work to get it done.
If installing a bump steer kit sounds a bit intimidating and you would rather take it to a mechanic and have them properly adjust and align it, then you will be looking at spending about $200-$500 depending upon where you go. As always, its best to get multiple quotes, seek out information online and on forums, as well as by talking to other people who have had the work done themselves.
Do I Need to Get an Alignment After Installing a Mustang Bump Steer Kit?
A general rule of thumb is whenever you adjust or tweak anything with your suspension setup than you will want to get an alignment to ensure everything is setup to spec. If you don’t get an alignment you could get uneven tire wear and less than satisfactory handling that will be inconsistent.
Making the Adjustments
- Set the car at ride height
- Use the proper size tires and air pressures
- Caster, camber, and toe must be set
- Tie rod lengths must be set (here’s where your adjustable bumpsteer kit comes into play)
- Steering should be centered (tie rod ends centered on inner pivot points lower ball joints)
- Steering must be locked down
- Measure from the ground to the lower ball joint or other reliable reference point. Write the number down
- Remove springs and disconnect the sway bar
- Return the suspension to the proper height by using your reference number to the ground
- Obtain a supply of bumpsteer shims
- Bolt on the bumpsteer plate to the hub. Level the plate and note where the dial indicator is on the bumpsteer plate so that you can quickly return to the correct ride height
- Jack the suspension through 2"-3" of both compression and rebound travel and write down your results
Knowing the Symptoms and How to Fix Them
| Symptom |
Fix |
| Toes out in compression and in on rebound all in one direction |
Decrease shim on outer tie rod or lower the inner tie rod |
| Toes in on compression and out in rebound all in one direction |
More shim at outer tie rod or raise the inner tie rod |
| Always toes in both compression and rebound |
Lengthen the tie rod as it is too short |
| Always toes out on compression and rebound |
Shorten tie rod as it is too long |
| Toes out on compression, then in on rebound andthen starts back towards out with more rebound travel |
Less shim at outer tie rod and shorten tie rod |
| Toes in on compression, moves out on rebound and ten starts back towards in with more rebound travel |
More shim at outer tie rod and lengthen tie rod |
Control Arm Removal & Install
Control arm bushings fail early mainly due to improper control arm installation. If the bolts are not torqued at ride height, this will cause the bushings to bind and fail early. Below, you will find the Ford procedure, directly from the ford tech service on installing these. Highlighted is the part that is crucial to the longevity of the bushings. This can be achieved by setting the rear on jack stands to allow the suspension to compress to ride height before torquing.
Removal:
NOTICE: Suspension fasteners are critical parts because they affect the performance of vital components and systems, and their failure can result in major service expense. A new part with the same part number must be installed if installation becomes necessary. If substitution is necessary, the part must be of the same finish and property class. Torque values must be used as specified during reassembly to make sure of correct retention of these parts.
- Mark the rear shock absorber relative to the protective sleeve with the vehicle in a static, level ground position (curb height)
- Remove the muffler assembly(ies)
- Remove the rear spring
- Remove the lower suspension arm and bushing from the body attachment
- Remove and discard the bolt and nut
- Remove the lower arm
Installation:
- Install the lower suspension arm and bushing to the body attachment
- Position the lower arm
- Install a new bolt and a new nut. Do not tighten at this time
- NOTE: Tighten the lower suspension arm and bushing-to-body attachment bolt after installing the spring while the suspension is at curb height
- Install the rear spring
- Install the muffler assembly(ies)
Necessary Torque Specs
| Part |
Nm |
lb-ft |
lb-in |
| Rear shock (upper attachment) |
40 |
30 |
- |
| Rear shock (lower attachment) |
80 |
59 |
- |
| Shock clevis bracket-to-axle nut |
108 |
80 |
- |
| Upper arm-to-frame bolt |
97 |
72 |
- |
| Upper arm-to-axle bolt |
111 |
82 |
- |
| Lower arm-to-body attachment bolt |
150 |
111 |
- |
| Lower arm-to-axle bolt |
150 |
111 |
- |
| Stabilizer bar-to-lower arm bolt |
55 |
41 |
- |
| Parking brake cable bracket |
55 |
41 |
- |
| Axle damper front nut |
90 |
66 |
- |
| Axle damper rear nut |
90 |
66 |
- |
| Axle damper bracket-to-frame bolt |
80 |
59 |
- |
| Pinion bumper mount-to-body bolts |
14 |
10 |
- |
| Bracket assembly-to-differential housing bolt |
48 |
35 |
- |
| Wheel nuts |
129 |
95 |
- |
| Subframe-to-body bolts (Cobra) |
103 |
76 |
- |
| Subframe-to-rear bracket bolts (Cobra) |
103 |
76 |
- |
| Subframe rear bracket-to-body bolts (Cobra) |
80 |
59 |
- |
| Shock-to-lower arm and bushing bolts (Cobra) |
133 |
98 |
- |
| Shock-to-body nuts (Cobra) |
40 |
30 |
- |
| Upper arm and bushing-to-subframe nuts (Cobra) |
90 |
66 |
- |
| Upper arm and bushing-to-knuckle nut (Cobra) |
90 |
66 |
- |
| Lower arm and bushing-to-subframe bolts (Cobra) |
250 |
184 |
- |
| Lower arm and bushing-to-knuckle nut (Cobra) |
115 |
85 |
- |
| Toe link-to-subframe nut (Cobra) |
48 |
35 |
- |
| Toe link-to-knuckle nut (Cobra) |
48 |
35 |
- |
| Stabilizer bar bracket bolt (Cobra) |
55 |
41 |
- |
| Stabilizer bar link nuts (Cobra) |
48 |
35 |
- |
| Rear axle differential rear insulator-to-axle housing bolts (Cobra) |
103 |
76 |
- |
| Rear brake disc dush shield-to-knuckle bolts (Cobra) |
10 |
- |
89 |
| Brake line-to-rear brake caliper bolt (Cobra) |
40 |
30 |
- |
| Parking brake cable-to-lower arm and bushing bolt (Cobra) |
15 |
11 |
- |
| ABS sensor bolt (Cobra) |
23 |
17 |
- |
| Axle shaft-to-hub-retainer (Cobra) |
325 |
240 |
- |
| Wheel nuts (Cobra) |
129 |
95 |
- |
Fitment includes: 1979, 1980, 1981, 1982, 1983, 1984, 1985, 1986, 1987, 1988, 1989, 1990, 1991, 1992, 1993, 1994, 1995, 1996, 1997, 1998, 1999, 2000, 2001, 2002, 2003, 2004, 2005, 2006, 2007, 2008, 2009, 2010, 2011, 2012, 2013, 2014, 2015, 2016, 2017, 2018, 2019, GT, V6, Cobra, ShelbyGT500, Mach1, Bullitt, Boss, LX, SVO, EcoBoost, ShelbyGT350