 FREE 1 to 3-Day Delivery on Orders $149+ Details
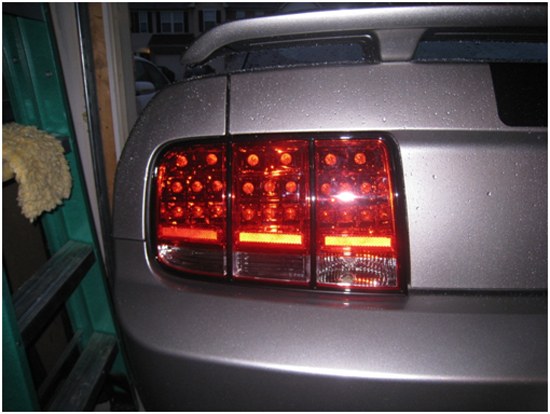
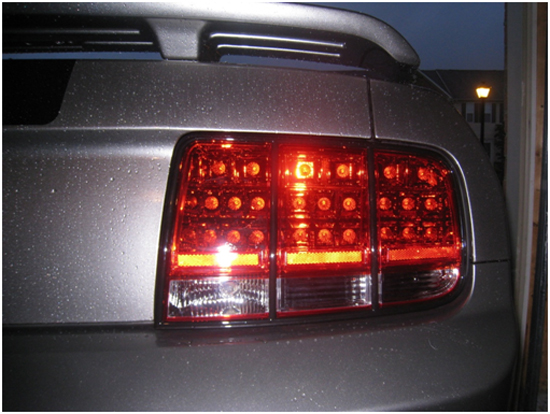
Mustang LED Taillights ('05-'09) - Installation Instructions
Installation Time
2 hours
Tools Required
- Ratchet
- 6 inch ratchet extension
- 7/16 wrench or deep socket
- Flat tip screwdriver
- Needle nose pliers
- Fender cover or towel (optional but recommended)
- Razor
- Flat Tip Screwdriver
- 3M Molding Tape
Installation
Removal of Factory Taillights:
1. Open the trunk.
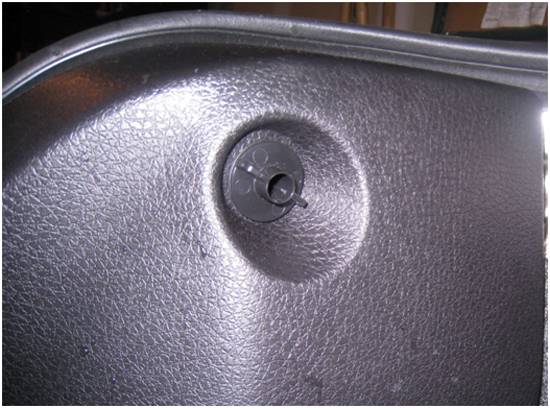
2. Use needle nose pliers or a flat tip screwdriver to lift the center of the four quick fasteners holding the plastic center piece in place. Once the center is lifted out, lift the outer portion out removing the fastener from the plastic center piece.
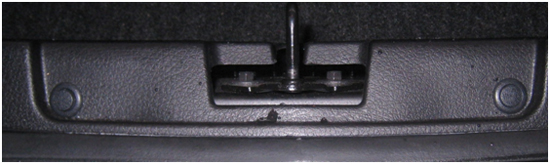
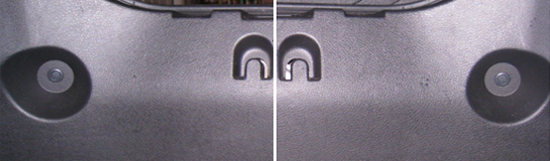
3. While slightly tugging the outer end of the plastic center piece unscrew the plastic clips. This will put tension on them allowing you to unscrew them without damaging the clips. (recommended method)
NOTE:You can also use needle nose pliers to pull the plastic clips straight out, but you will risk one of the plastic clip fasteners breaking in the process
4. Lift the trunk carpet up and prop it up. Lift the plastic center piece out of the trunk and set it to the side. Move the carpet molding on the sides out of the way.
5. Use the 7/16” deep socket or wrench to remove the three (3) bolts securing the taillights to the vehicle
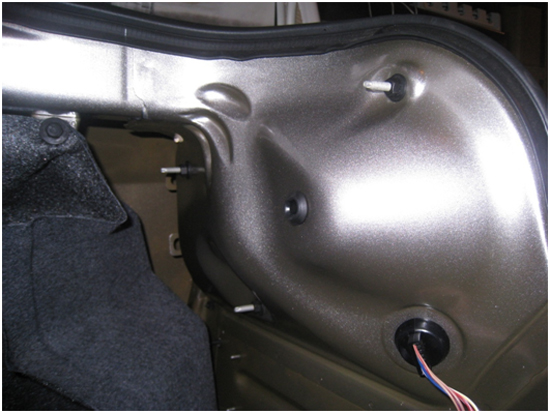
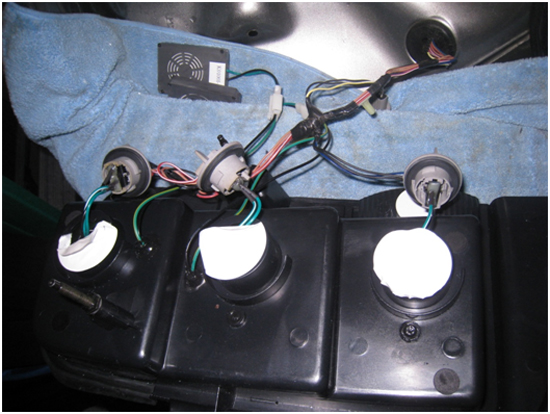
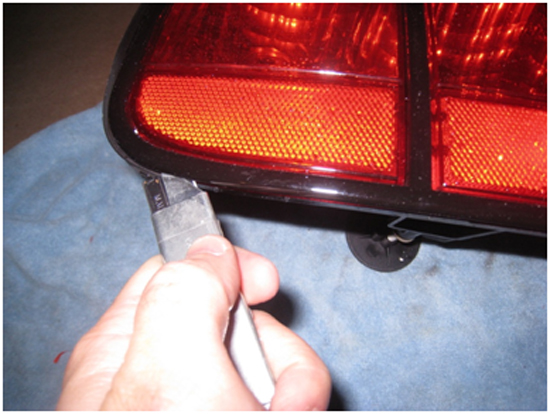
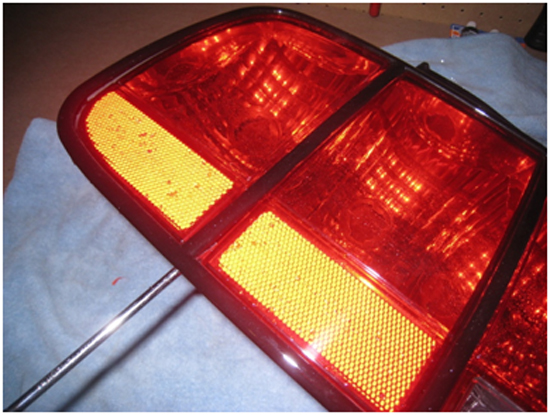
6. Remove the taillights by pulling straight away from the rear of the vehicle while slightly wiggling the taillights and gently place the taillight on the towel. Remove the light sockets from the taillight and set the factory taillight off to the side.
7. Remove the light bulbs from the sockets. Leave the reverse bulb in the socket because you will be reusing this socket and bulb in the new taillights.
Installation of the LED Taillights:
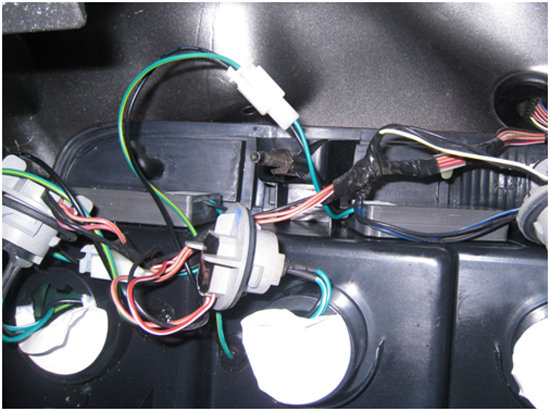
1. Push the plugs on the back of the new taillights into the factory sockets. They are a tight fight and it may take a few tries to get them in.
2. Turn on the running lights to make sure that all light are working. If one or more of the light banks are not working, remove the plug from the socket, turn it around and plug it back in
3. Install the reverse light into the taillight in the same manner that it was removed from the factory taillight
4. Secure the fans in a location that is acceptable to you. They will fit on the bottom of the light and it is recommended that you place them there so that should you need to remove the taillight for any reason it will come out in one piece.
5. Push the taillight assembly screws through the holes of the vehicle and hold it in place while you place the nuts back on the screws. Use the 7/16” deep socket or wrench to tighten the bolts.
Warning:Do not over-tighten the bolts or you will break the taillights.
6. Push the carpet molding back in place and put the plastic center piece back in place. Lower the trunk carpet.
7. Replace the plastic clips removed in step three (3) of the "Removal of Factory Taillights" section of the installation instructions, by pushing them straight on. Make sure that they catch on the screw so that they will hold the plastic center piece in position.
8. Replace all four (4) quick fasteners removed in step two (2) of the "Removal of Factory Taillights" section of the installation instructions.
Removal and Re-Installation of the Taillight Trim:
1. If you have the Black or Chrome Taillight Trim (05-09) it WILL fit on the LED Taillights. You can remove the old trim once the taillights have been removed from the car by using a razorblade and sliding it around the taillights between the trim and the light.
2. Slide a screwdriver under the trim to remove the part of the trim that is between the lights going slow and making sure that you are careful not to break the trim.
3. Remove the old tape from the trim and clean it with rubbing alcohol.
4. Once the trim is dry you can apply new molding tape to the trim. You can then install the trim in the same manner that you did when you first purchased it.

Installation instructions provided by AmericanMuscle customer Paul DeSanto 5.6.09
Related Guides
-
Installation
-
Installation
-
Installation
