FREE 1 to 3-Day Delivery on Orders $149+ Details
How To Install A Ford Racing Boss 302 Front Splitter On Your 2010-2012 GT/CS, Boss Mustang
Installation Time
30 minutes
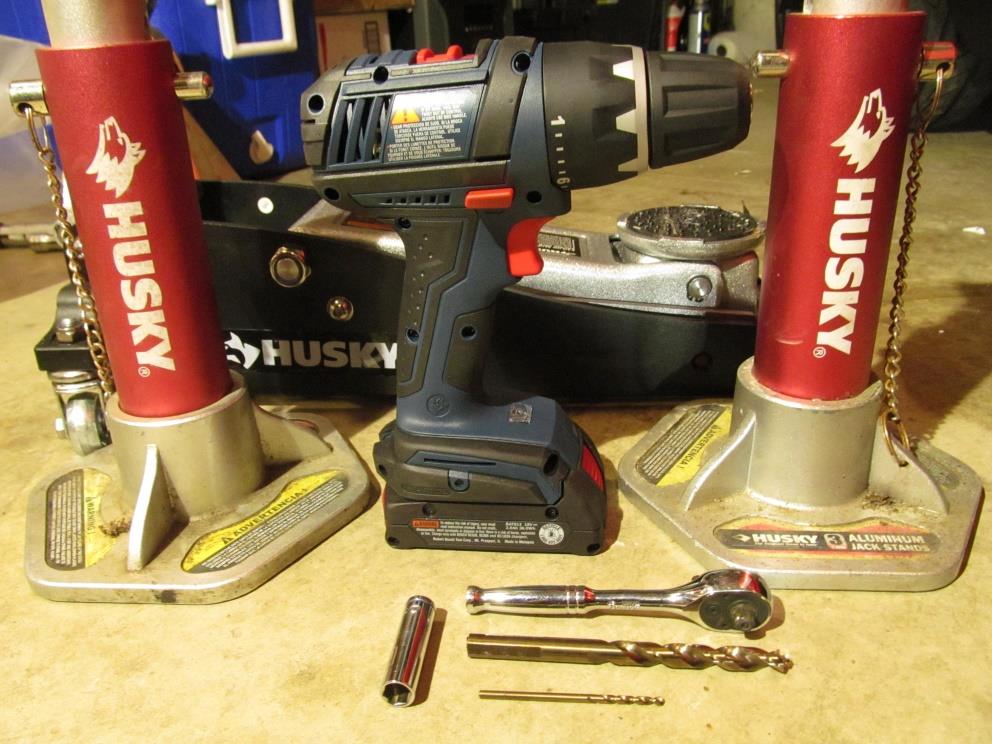
Tools Required
- 1 Jack
- 2 Jack Stands
- 1 Ratchet (1/4” Drive)
- 1/4” Drive 10mm socket
- Drill
- 1/8” Drill Bit
- 3/8” Drill Bit
- Paint Marker

Shop Parts in this Guide
Item #52999
MPN#CR3Z-17626-AC
Note:
This Installation guide is for the Ford Racing Boss 302 Front Splitter (10- 12 GT/CS, Boss) but will fit any mustang with a GT/CS front bumper and fascia.
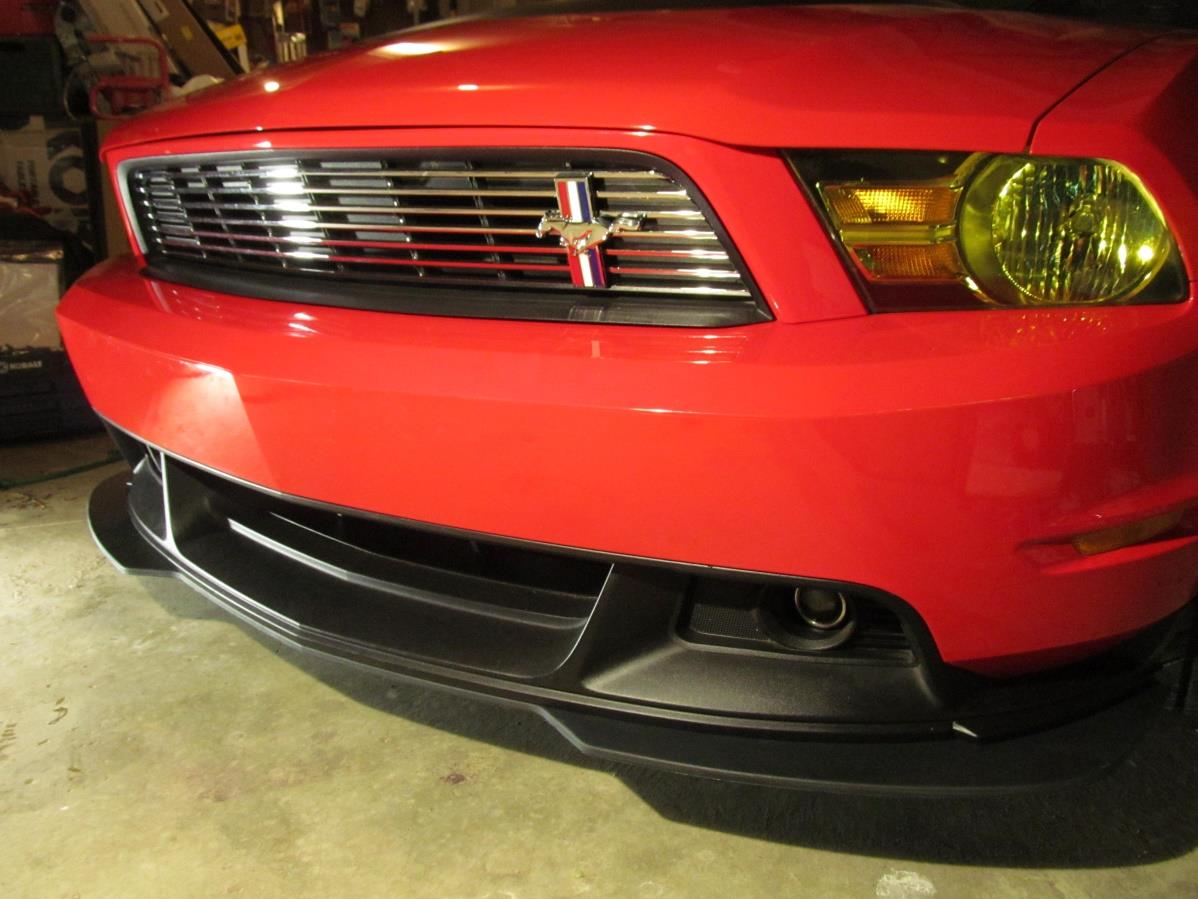
Before Image:
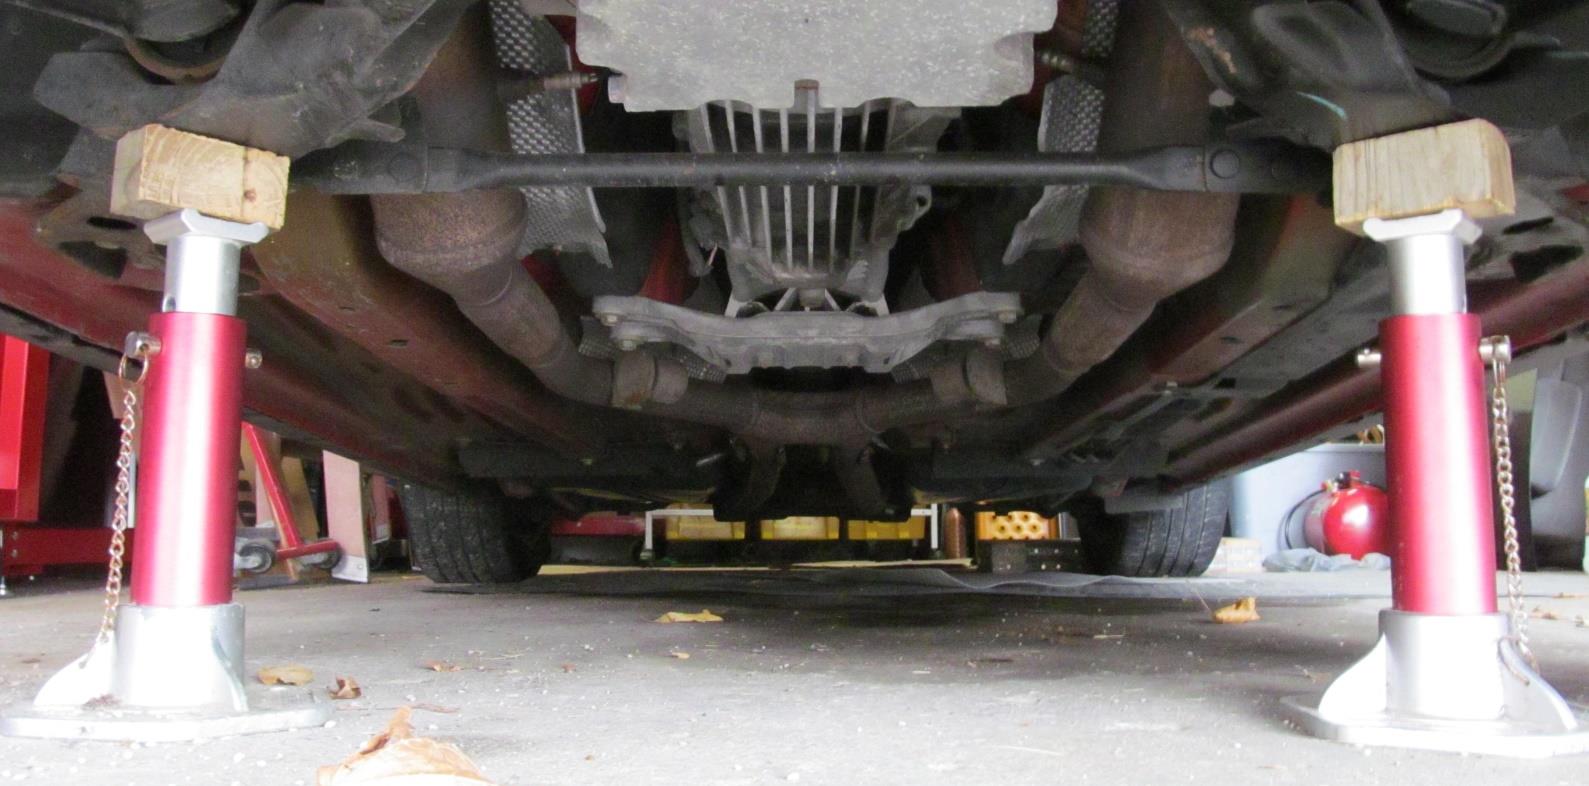
Lifting Procedure:
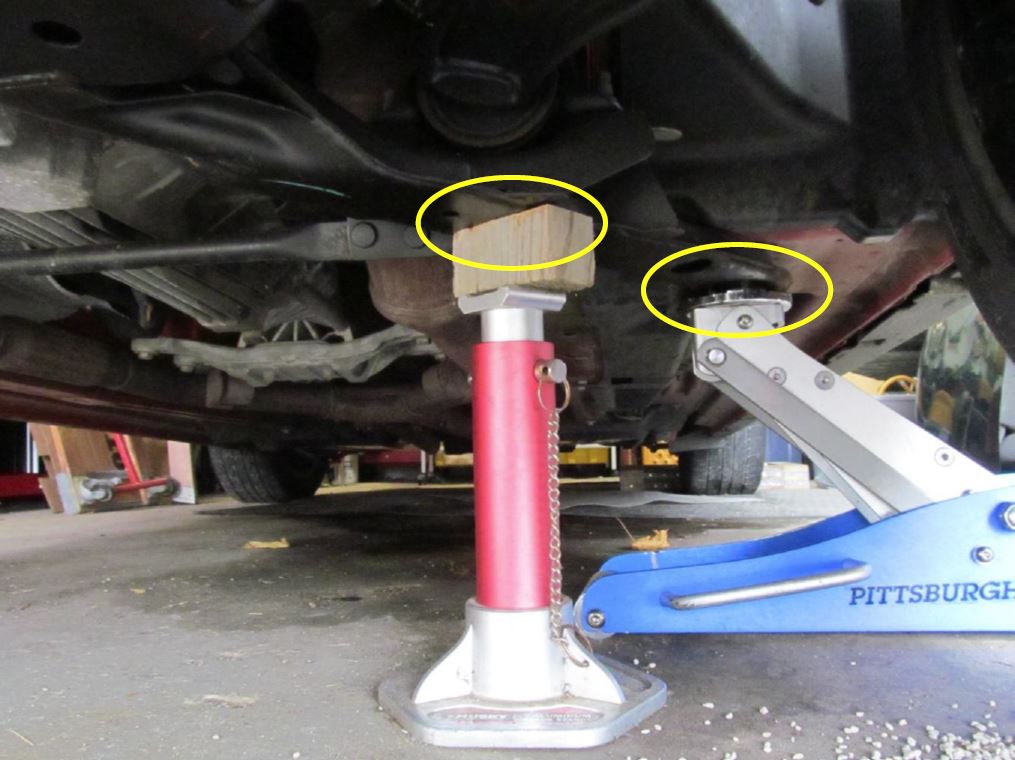
First make sure the emergency brake is engaged and the car is in gear.
Place stops behind the rear wheels for added safety. Scrap 4x4 wood works great.
Next jack up the car one side at a time in the proper locations and place jack stands to suspend the front of the car. The front of the car is being lifted to access the connector bolts on the stock manifold.
Ford Racing BOSS 302 Front Splitter Installation Procedure:
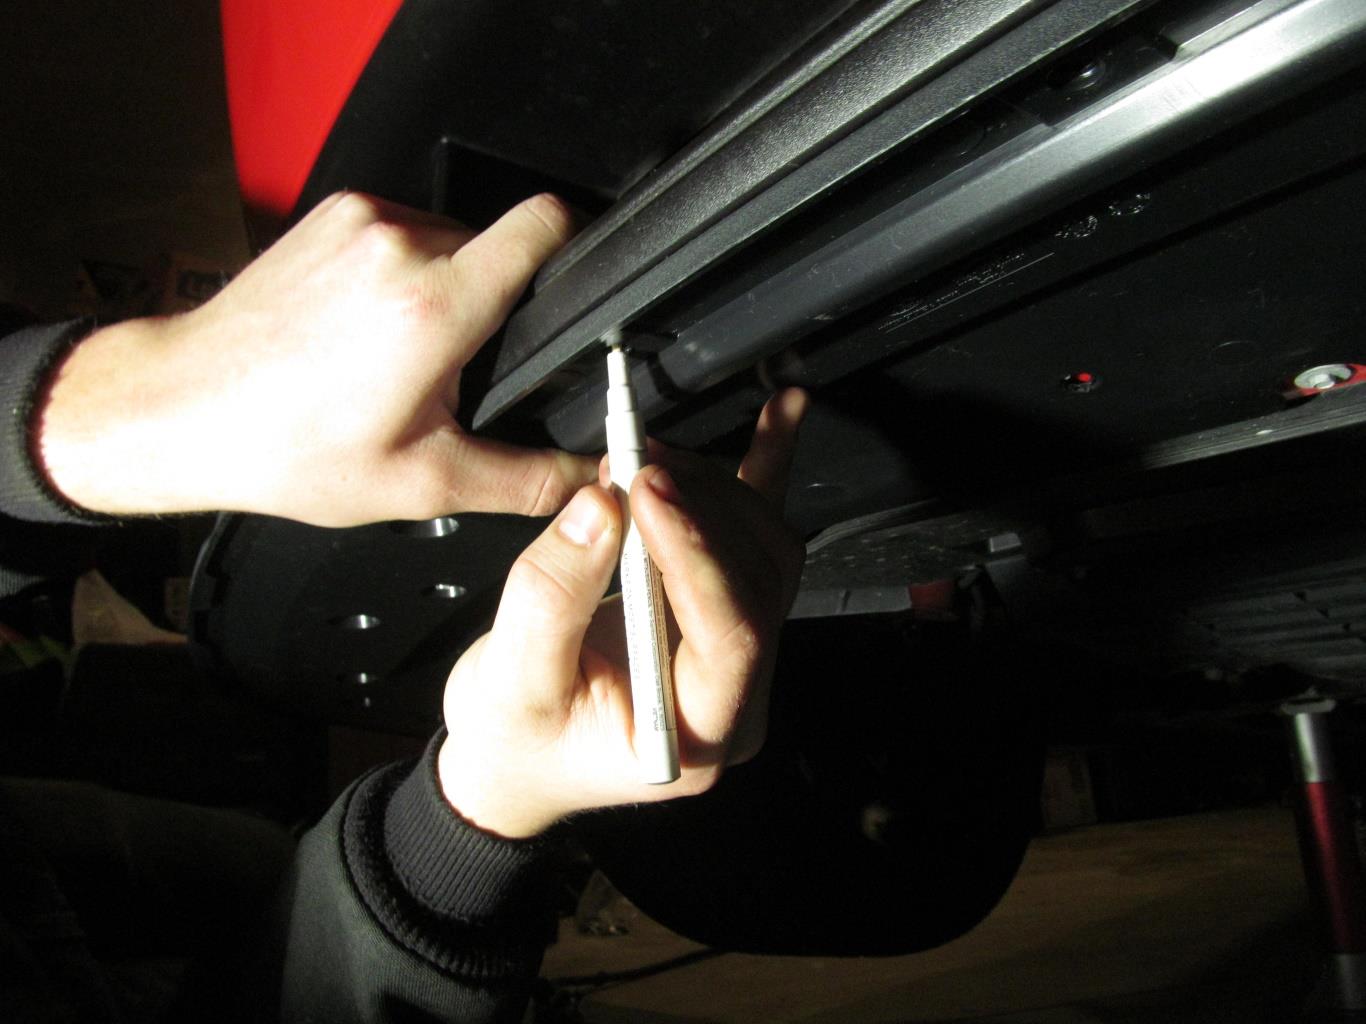
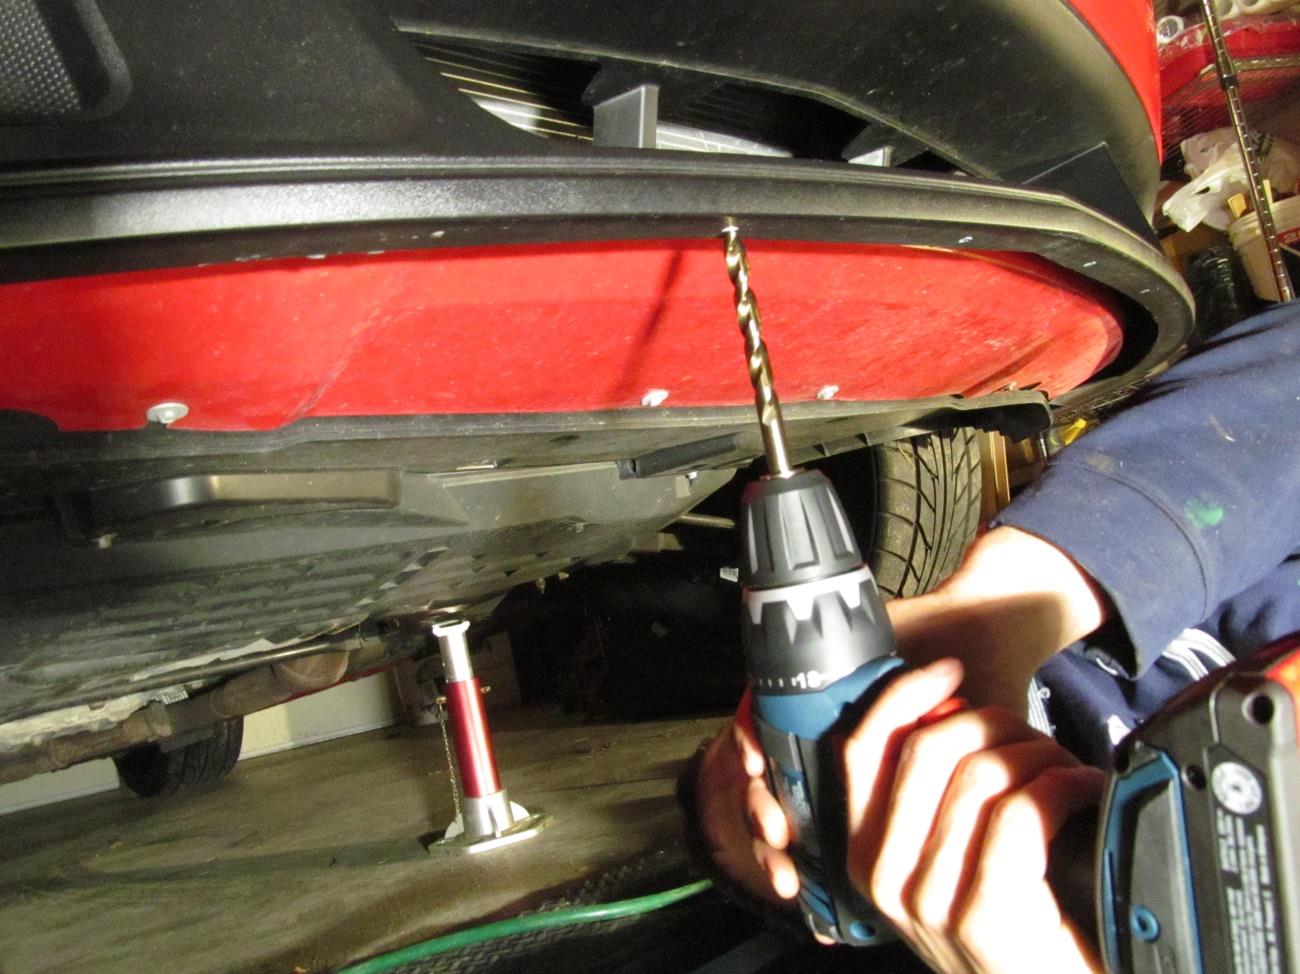
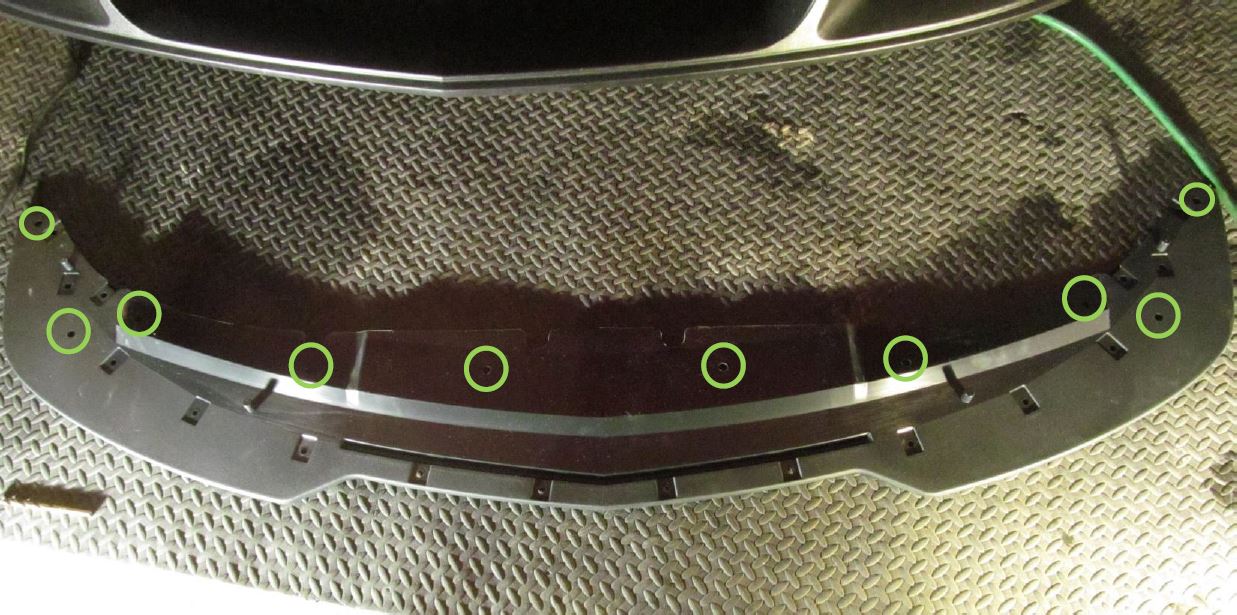
1. Unwrap the Boss 302 Front Splitter and place it in front of the car. Lift up the splitter into the installed position and using the paint marker, mark the four center holes to drill.
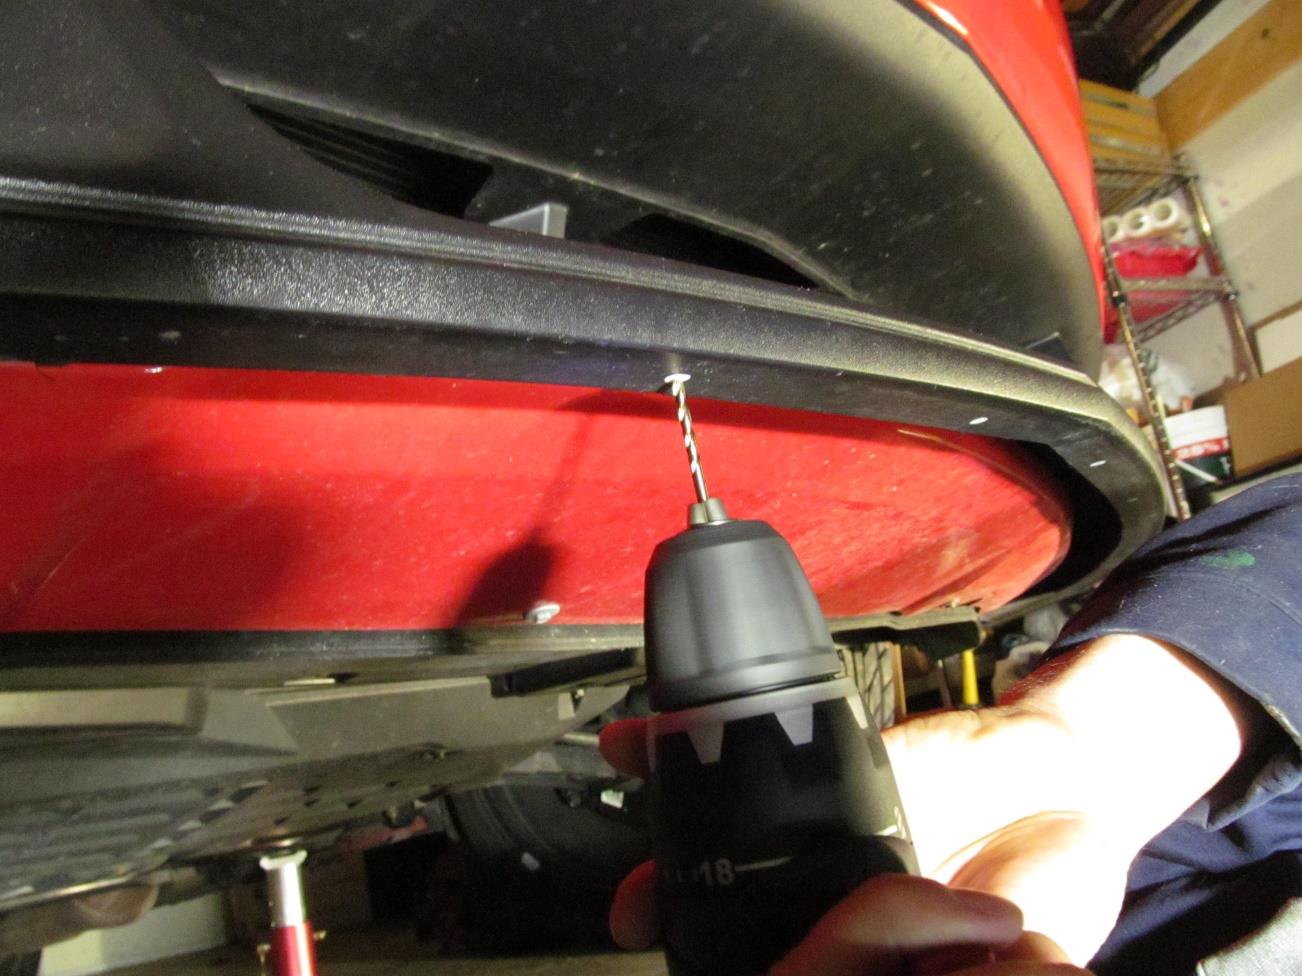
2. With the four holes marked it is time to drill them out. Start with a pilot hole using the 1/8” drill bit. Once the pilot holes are drilled go back and drill those holes out with the 3/8” drill bit.
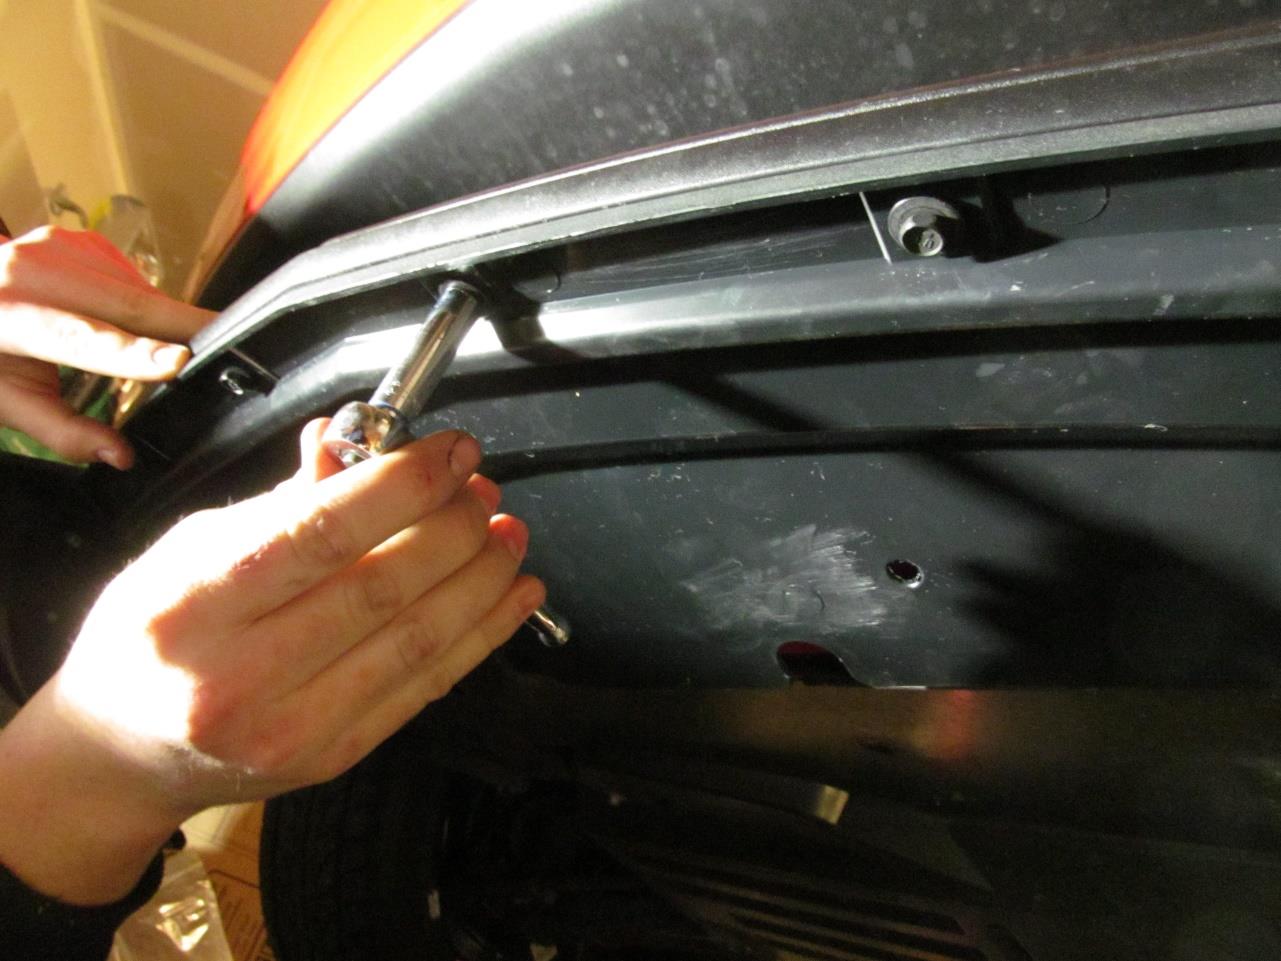
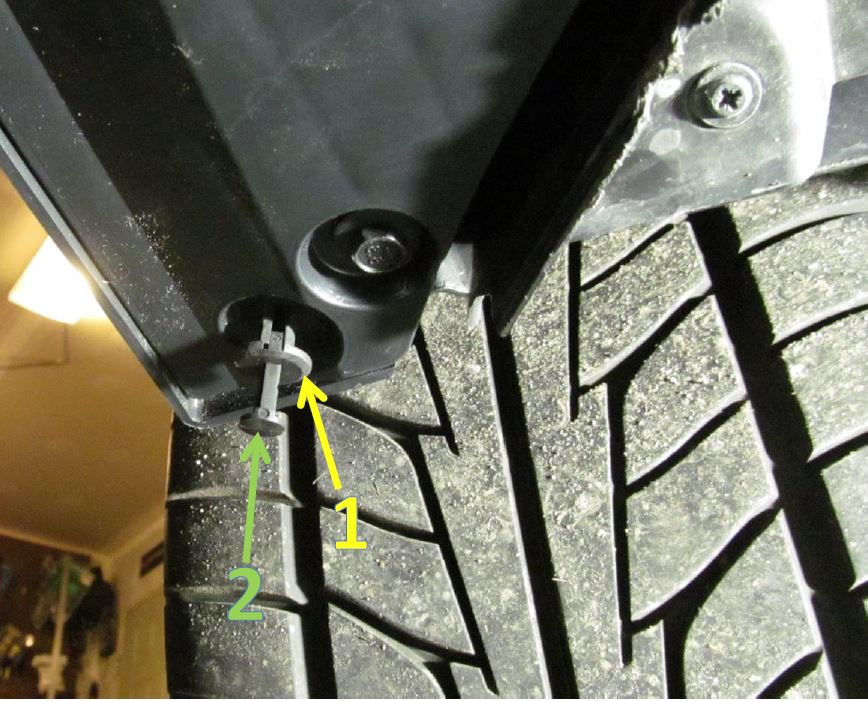
With the four front holes drilled place a clip in each hole and tighten on the Ford Racing Boss 302 Front splitter with the 1/4” drive ratchet and 10mm socket.
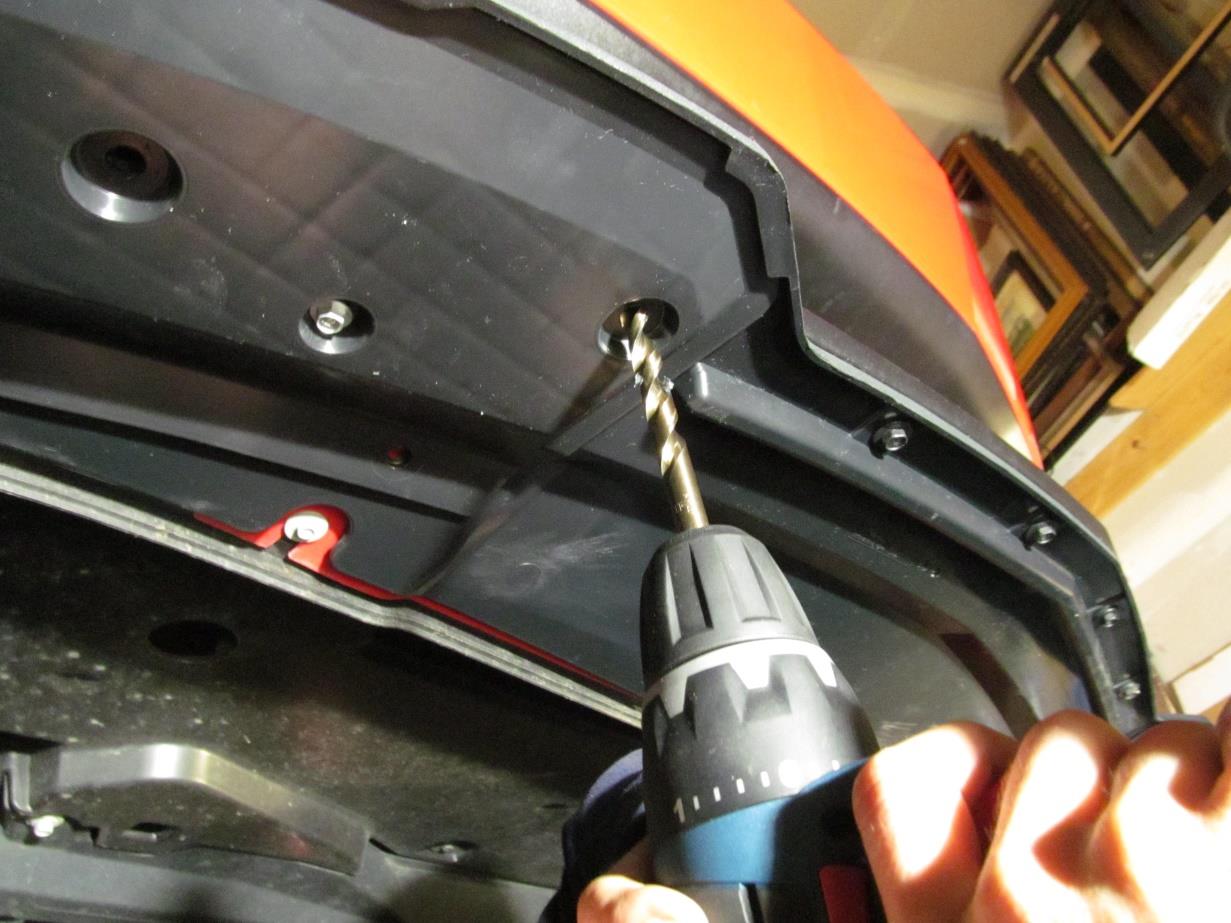
4. With the four front bolts installed the splitter is now in place. The rest of the holes can now be drilled out with the 3/8” drill bit right though each remaining hole of the Boss 302 Splitter.
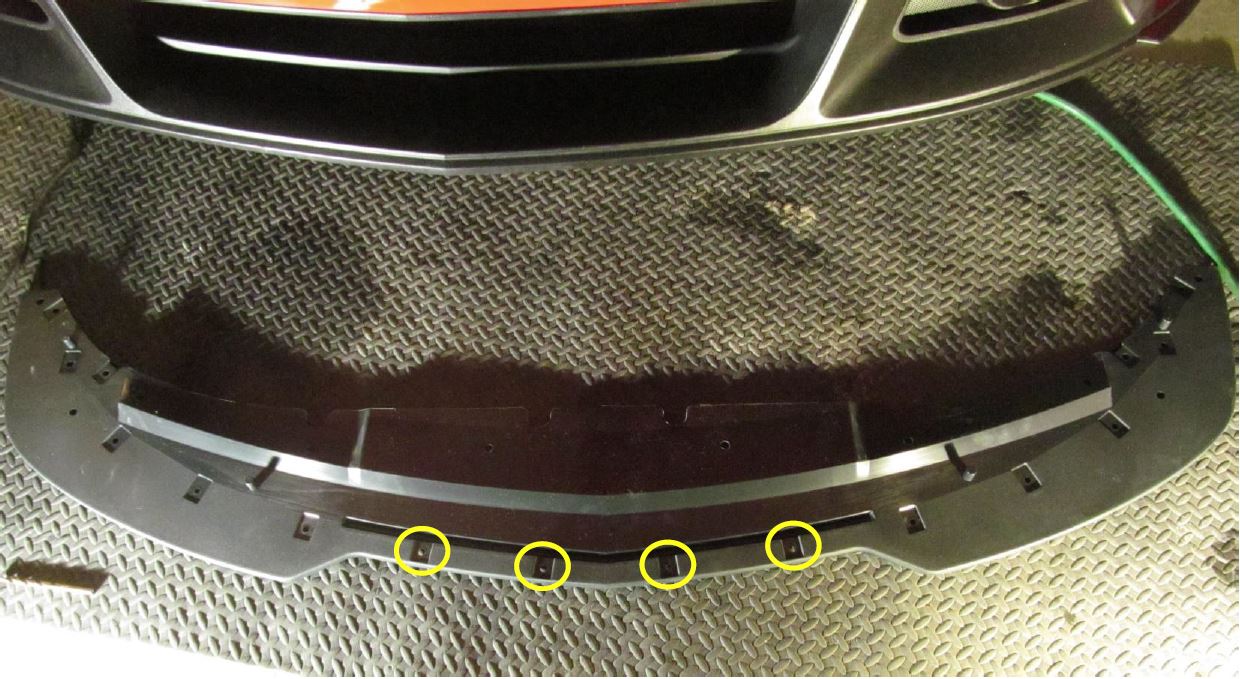
5. Now that all of the holes are drilled, remove the four bolts from the front of the Splitter installed earlier and lower the Splitter to install the rest of the clips on the bumper for the holes highlighted.
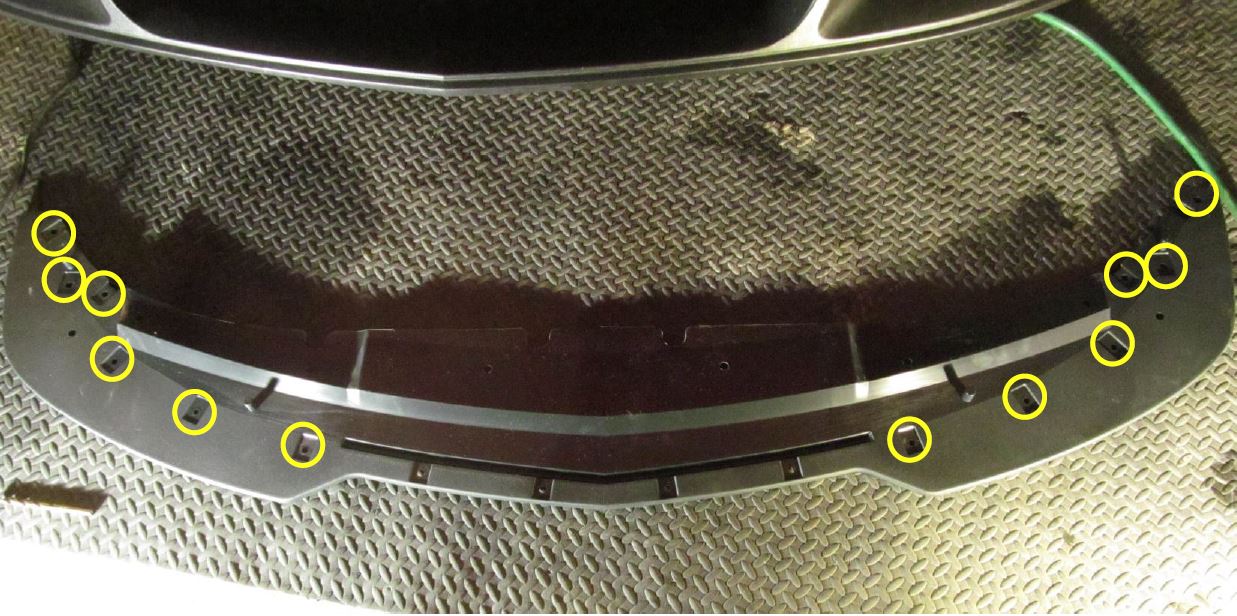
Re-install the front four bolts attaching the front splitter to the bumper and put in the 12 bolts that go in the holes highlighted in step 5. Torque all bolts to manufactured specified 28.3 lbs. in. *NOT ft lbs!!!
In the remaining holes highlighted in green, these take the plastic push pins installed. To install these push pins push the base into the hole and then push the center pin all the way in.
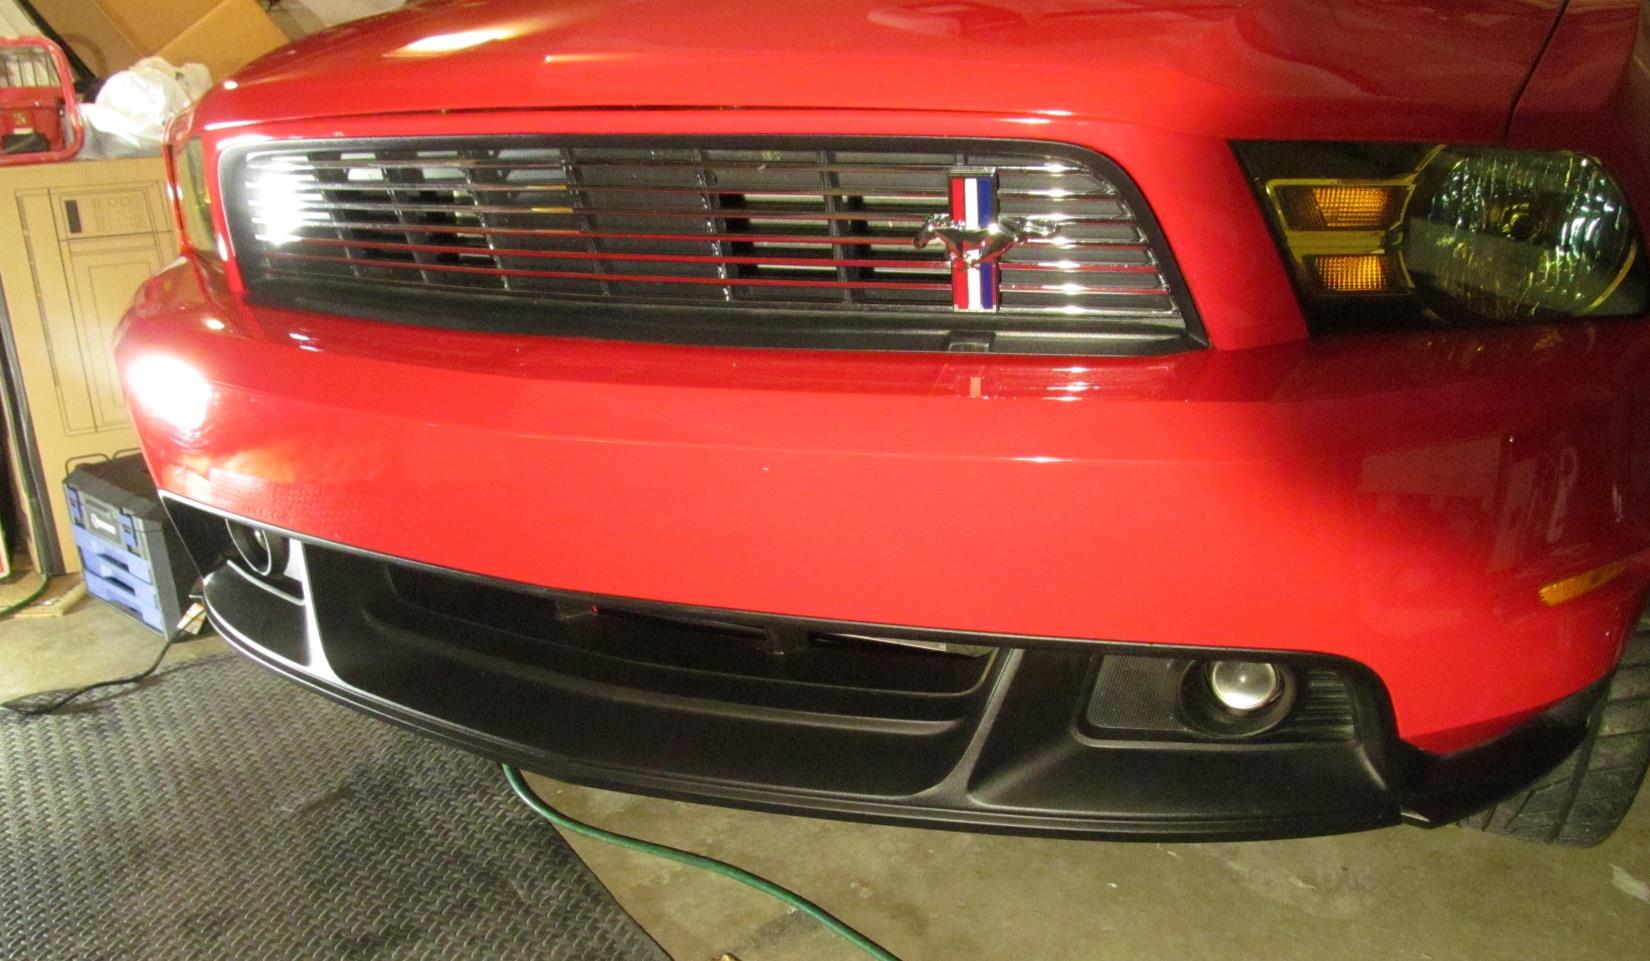
8. Your Ford Racing Boss 302 Front Splitter is now installed! Go test it out!