 FREE 1 to 3-Day Delivery on Orders $149+ Details
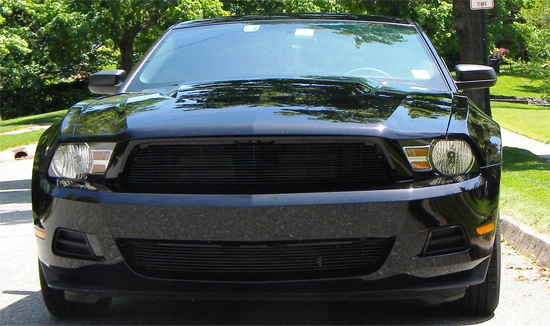
Mustang Pony Delete Billet Grille (2010-2011 V6) - Installation Instructions
Installation Time
30 minutes
Tools Required
- Flat head screw driver
- Hand drill
- Phillips head bit attachment
- Pre drill bit 3/16 bit attachment
- 5 mm socket wrench
- Jack and (2) Jack stands
- Painters tape (optional but recommended)
- Wood spacer (optional but recommended)

Shop Parts in this Guide
Installation
Upper Grille Installation:
1. Optional but recommended.Lay down blue painter’s tape around the bumper and slide some under the gap between the stock grille and the bumper. This is done because removing the grill can scratch your baby’s pretty paint.
2. Pop open the hood and prop it up. Here you will find 8 flush mount plastic rivets, holding the plastic guard to the top of the bumper. These pins are removed by sliding the flat head screw driver under the flush mount head. Remove the 8 pins and the plastic shield and save them for later.
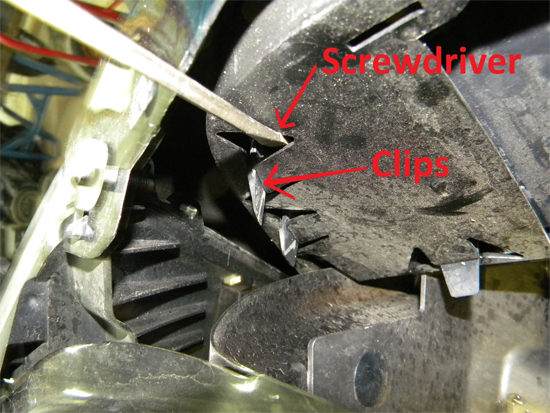
3. Spread open the plastic clips around the grille by sliding your flathead screwdriver under the flap of the clip and pulling back. As you do this push the head of the clip past the flap. This will need to be done all around the grille.
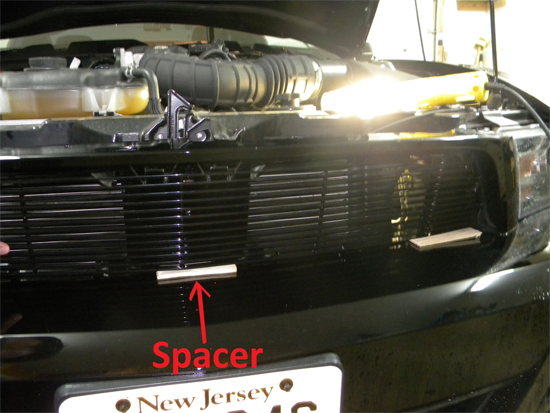
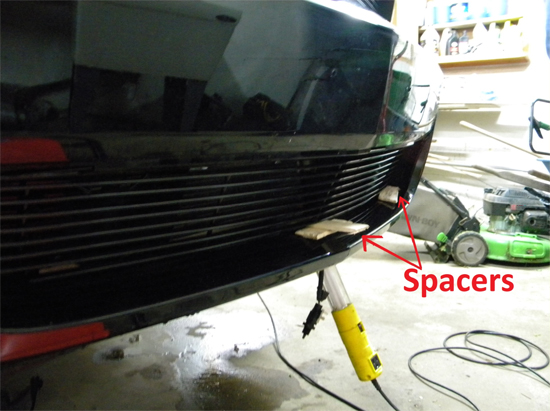
4. Set your new grille up against the open grille enclosure and prop it up with the wood spacer. Make sure the grille is centered with the nose of the bumper, so the centerline of the grille matched up with the point of the bumper.
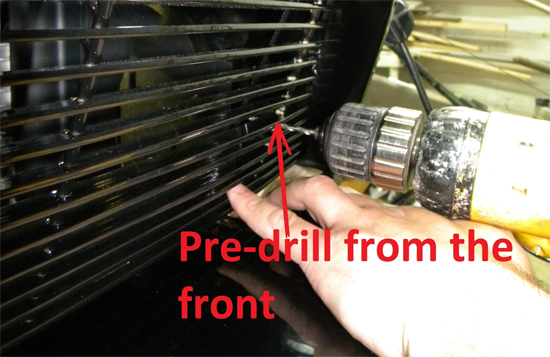
5. Locate the mounting tabs on your new grill and pre drill the hole. After your hole is predrilled begin to set the screw in but don’t let it go too far. The locking clips should be set on the screw, as its peeking through the other side of the plastic and then the screw should be drilled in the rest of the way. This will allow for the locking clip to bind onto the plastic and hold the grille in place. Do this for all three mounting tabs.
6. Reinstall the plastic shield from the top of the bumper.
Lower Grille Installation:
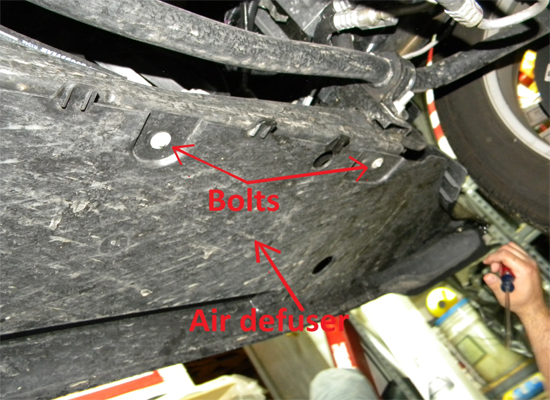
1. Jack the car up at the appropriate jack points Step 2: Under the car there is an air diffuser held in by (8) 5 mm bolts.
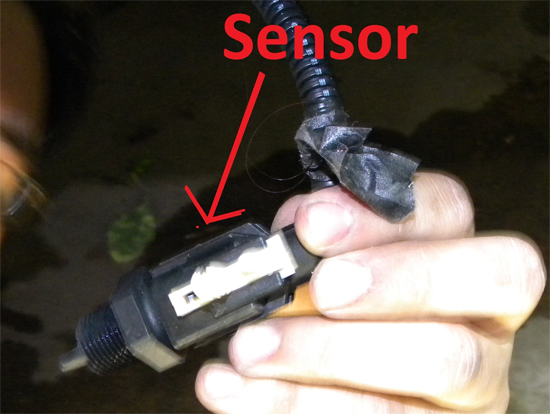
2. Unhook the sensor mounted near the driver side of the car.
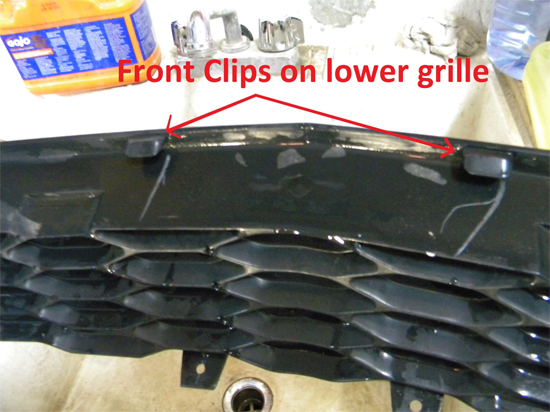
3. Pull up the flaps of the clips and from the front slide your flat head between the grill and the bumper to release the clips.
4. Set your new grille up against the open grille enclosure and prop it up with the wood spacer. Make sure the grille is centered with the nose of the bumper, so the centerline of the grille matched up with the point of the bumper.
5. Locate the mounting tabs on your new grill and pre drill the hole. After your hole is predrilled begin to set the screw in but don’t let it go too far. The locking clips should be set on the screw, as its peeking through the other side of the plastic and then the screw should be drilled in the rest of the way.
6. Reinstall the sensor with zip ties.
7. Reinstall the shield and let the car down.
8. Celebrate good looking ponies.

Installation instructions provided by AmericanMuscle customer Tiffany Jachera 5.17.10
Related Guides
-
Installation
-
Installation
-
Installation
