 FREE 1 to 3-Day Delivery on Orders $149+ Details
How to Install a Pypes Cut and Clamp X-Pipe on your 2005-2010 V6 Mustang
Installation Time
2 hours
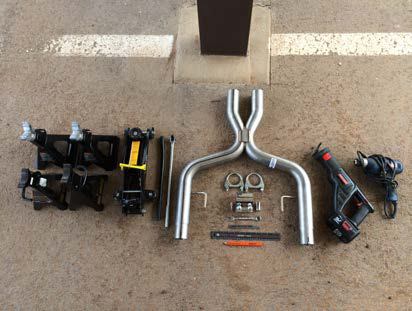
Tools Required
- Pypes X-pipe
- Supplied hardware
- Jack
- Jack stands
- Breaker bar
- Drill
- Deburring tool
- Reciprocating saw
- Ratchet
- 15mm deep well socket
- Ruler
- Marker
- 2.5 in. band clamps
- Eye protection

Shop Parts in this Guide
Installation Instructions:
1. Gather items needed for installation
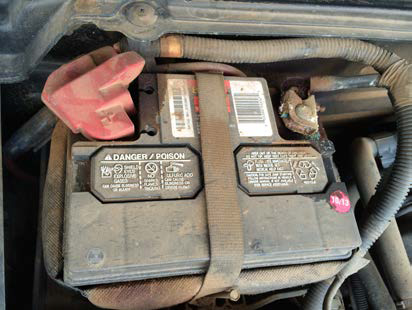
2. Disconnect the negative battery terminal
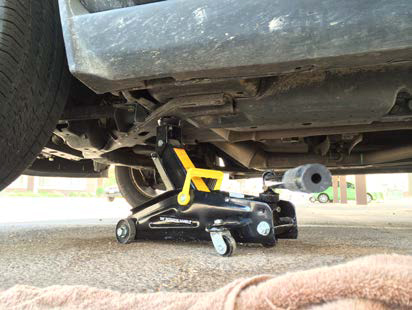
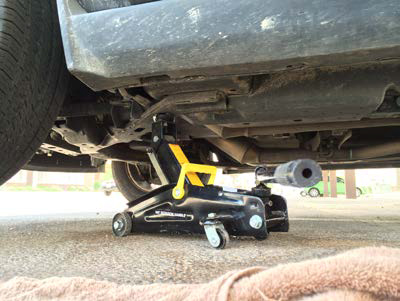
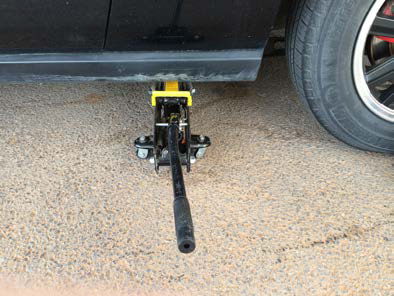
3. Jack the rear of your vehicle high enough off the ground for proper clearance

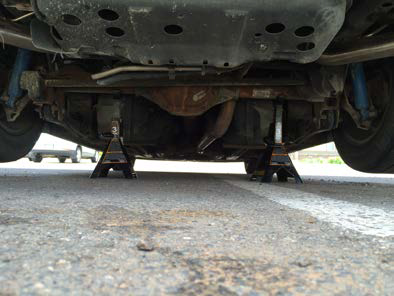
4. Place jack stands under the rear of you vehicle

5. Jack the front of your car high enough for proper clearance and place jack stands under the front of your vehicle
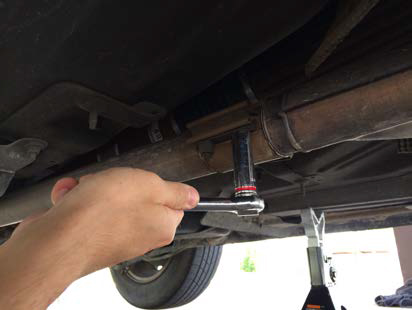
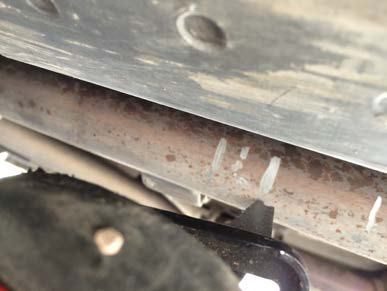
6. Mark spot of oem band clamp for reference during re-installment
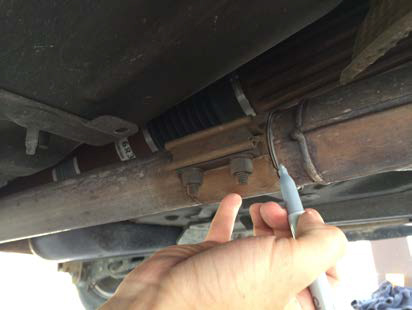
7. Remove the two 15mm bolts on the band clamp using a breaker bar and a 15mm deep well socket
8. Following the provided instructions, measure and mark 9 in. – 8 in. back from the catalytic convertor
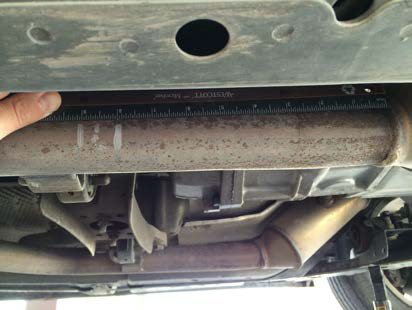
9. Once measured, line of the new x-pipe with the marked spots on the band clamp, and behind the catalytic convertor
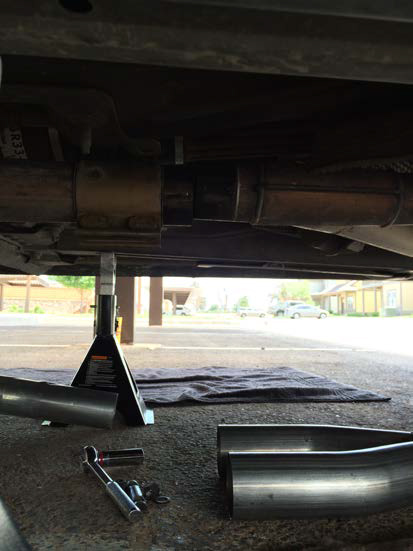
10. Using the reciprocating saw, cut the factory mid pipe off at the indicated markings
11. Using a drill and a deburring tool, deburr the cut portion of the factory mid pipe to promote a good seal
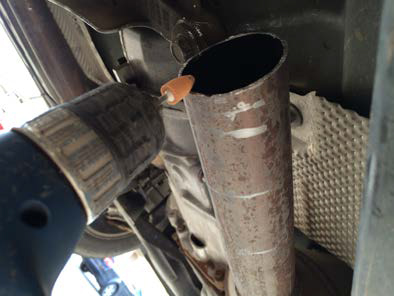
12. Thoroughly inspect the newly deburred factory mid pipe for loose burrs
NOTE: When I cut the factory mid pipe according to instructions, I could not fit the expanded end of the new x-pipe over the old mid pipe. Therefore, I cut the factory mid pipe closer to the catalytic convertor for new fitment. If you just work at fitting it correctly, you should able to avoid this problem.
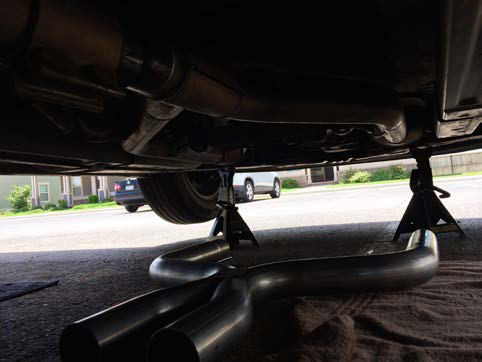
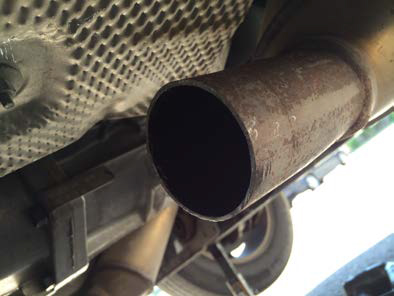
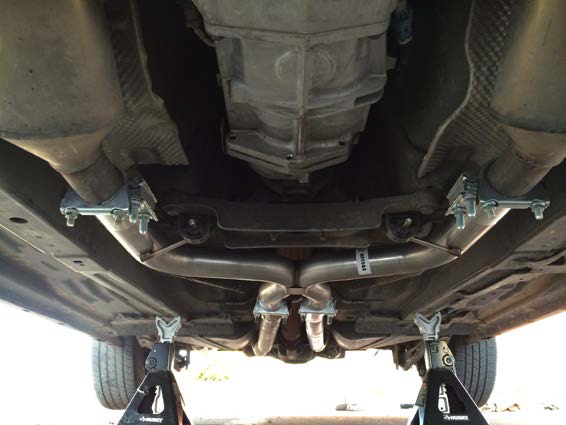
13. Using 2.5 in. band clamps and provided hardware, attach and clamp the new x-pipe to the factor mid pipe
14. Due to my mishap previously stated, I had to get some pipe adapters to fit the space between the new x-pipe and the over axle pipe.
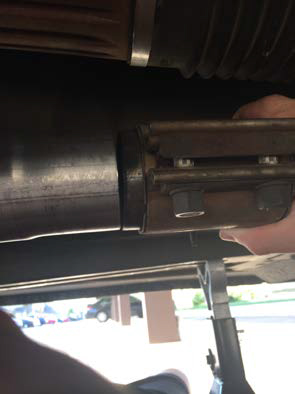
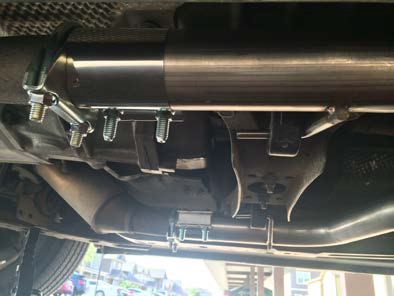
15. Clamp the band clamps to the new x-pipe using ratchet and 15mm deep well socket
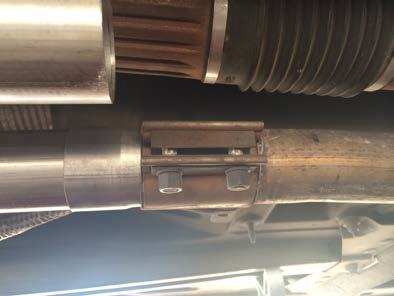
16. Inspect connections and tighten all bolts accordingly
17. Once all connections are secured, jack the front of the vehicle and remove the front jack stands
18. Once the front is lowered, jack the rear of the vehicle
19. Remove the jack stand under the rear of the vehicle
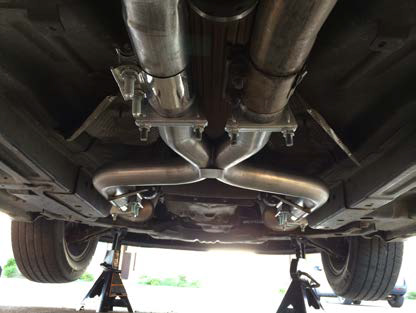
20. Once the vehicle is lowered take it out for a test drive, check for any leaks and fix accordingly. Enjoy your new Pypes Cut and Clamp X-Pipe
Installation Instructions written by AmericanMuscle customer Laurence Arroyo 7.25.2014

