 FREE 1 to 3-Day Delivery on Orders $149+ Details
How To Install an SR Performance Stainless Steel Exhaust Hanger Kit for your 2005-2010 Mustang
Installation Time
2 hours
Tools Required
- Floor jack
- (2) Jack stands
- 3/8 Ratchet
- 1/4 Ratchet
- 1/4 six inch extension
- 1/2 deep socket
- 1/2 shallow socket
- 5/8 deep socket
- Loctite Threadlocker Blue 242

Shop Parts in this Guide
Tools Required for V6 Mustangs Only:
* 8MM x 1.25MM Tap. * Tap T-Handle Wrench. * Cutting oil or WD-40 |
Installation Instructions:
1. Prior to lifting vehicle ensure vehicle is locked in gear and emergency parking brake is fully engaged with wheel chock placed behind rear wheels.
2. Proceed to raise vehicle with floor jack and place jack stands under vehicle recommended jacking points securely and lower.
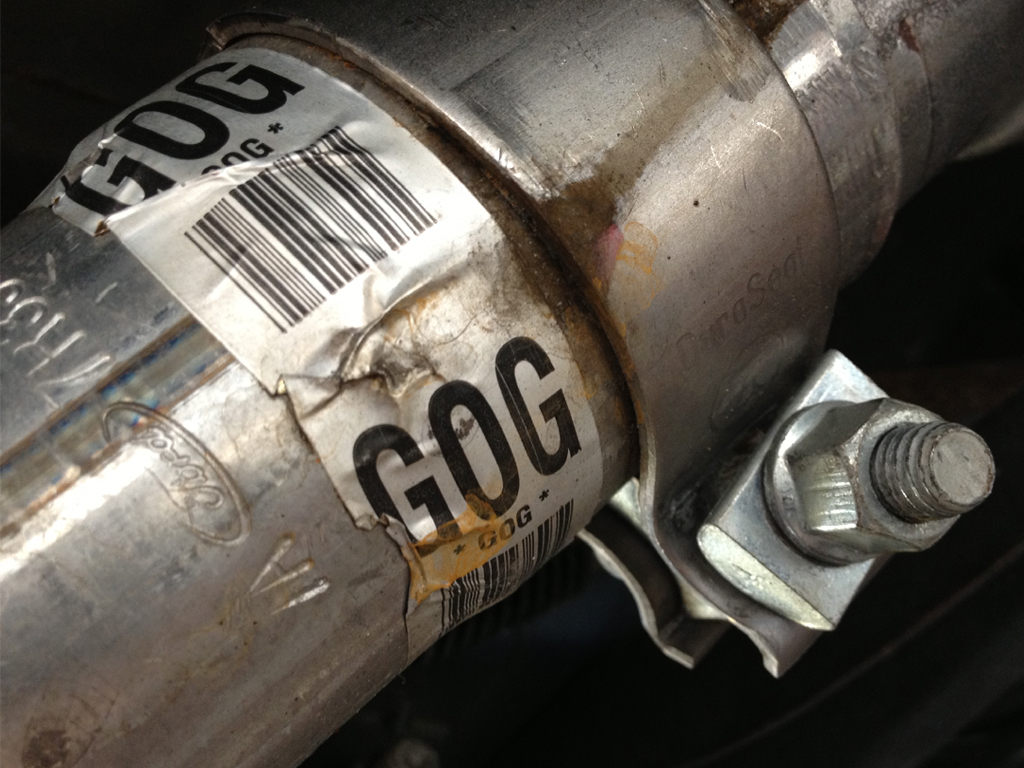
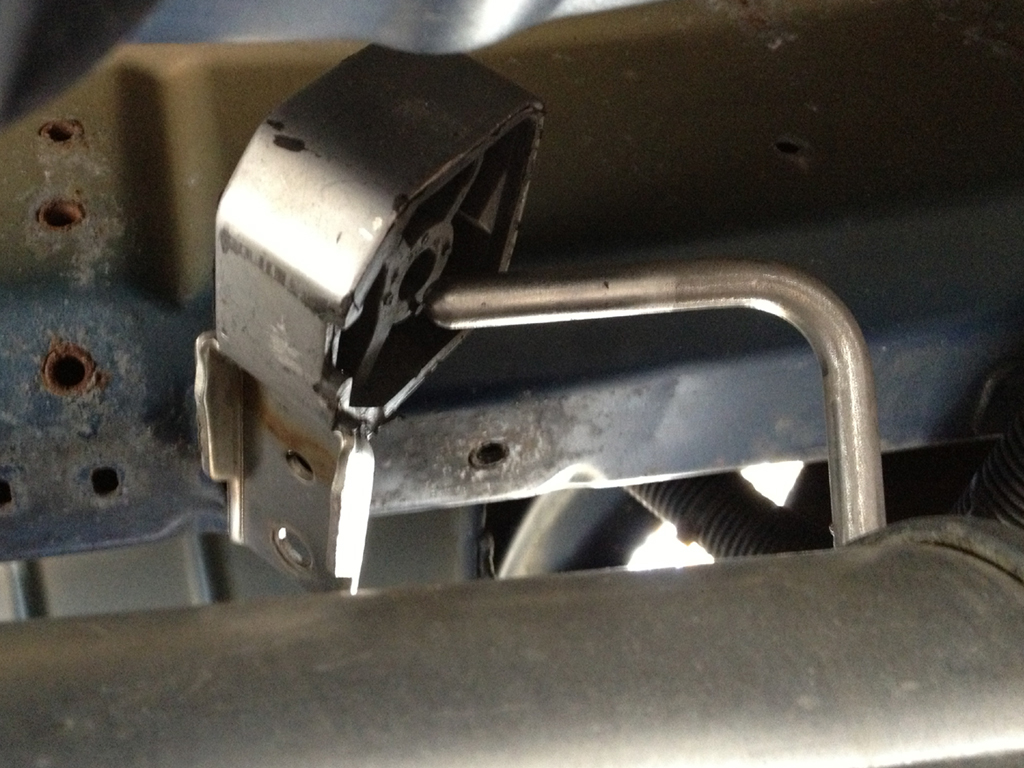
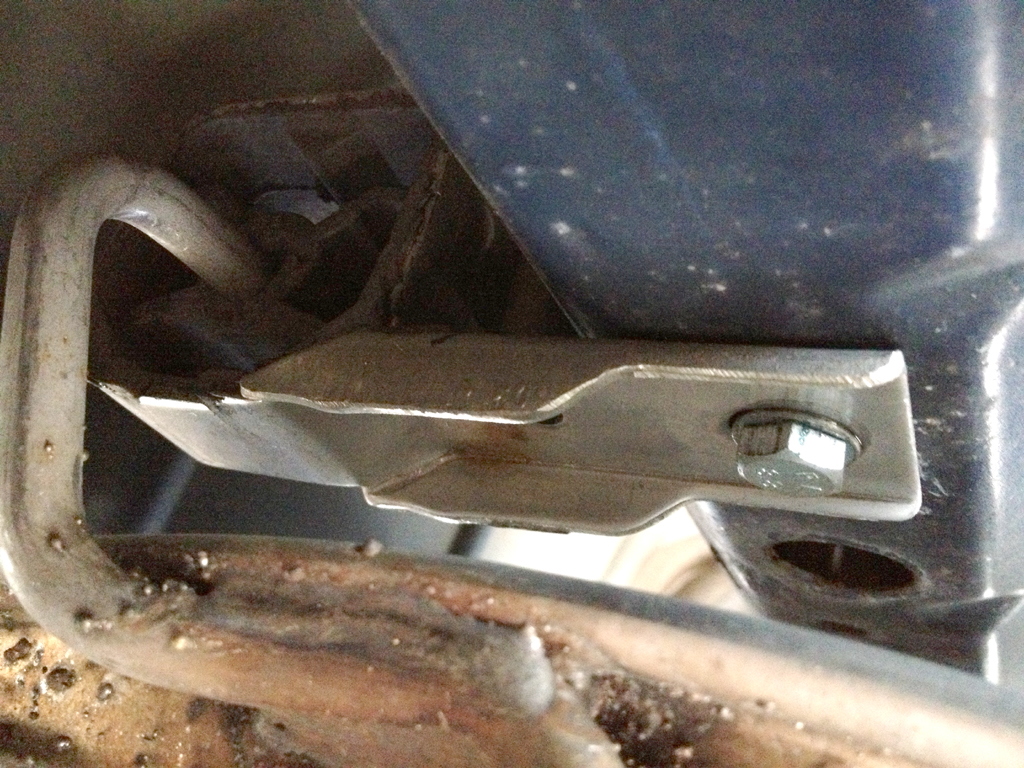
3. Locate exhaust bracket bungs on frame rail.
4. Using a 8MM x 1.25 tap proceed to apply small amount of cutting oil to the cutting threads and align T-handle 90 degree’s with bottom frame rail bungs. Slowly turn until tap is half way through and carefully back out tap and remove any metal shaving. (Only required on V6 Mustang models driver side only.)

5. After tapping both front and back bottom frame rail bungs proceed to tap inner side rails using 8MM x 1.25 tap. Your T-handle will not fit on side frame rail located next to the spare tire wheel well. I found best to use ¼ wrench to turn tap or you may use an adjustable wrench.
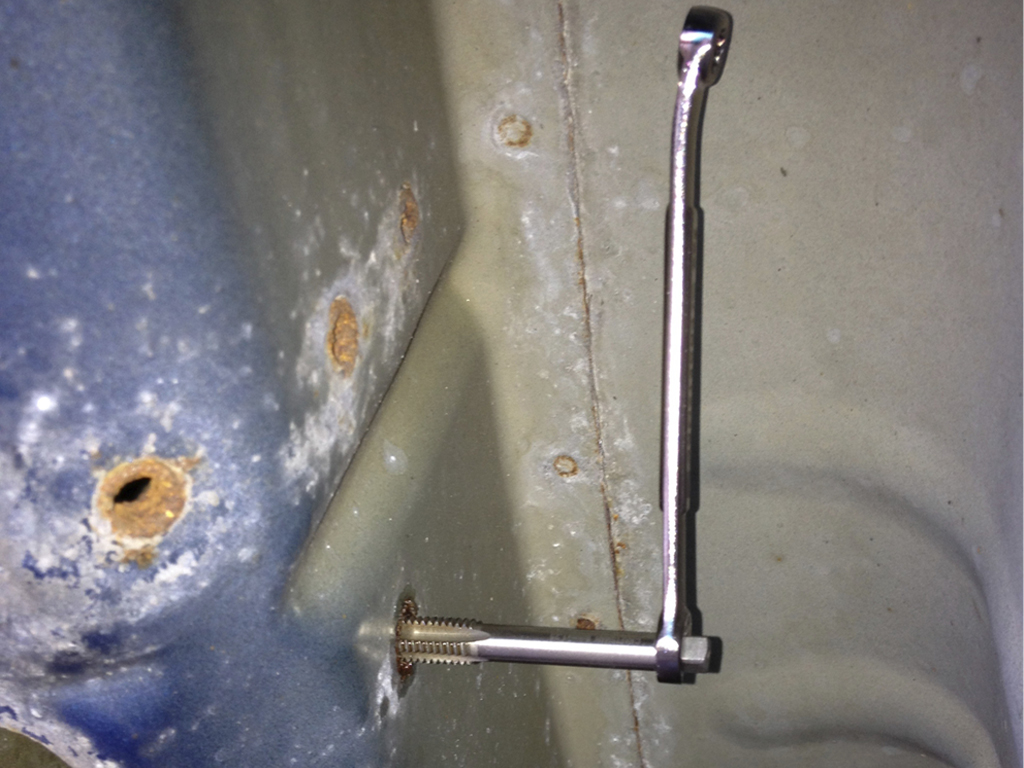
6. Once all four bungs have been tapped proceed to install each bolt and test fit threads.
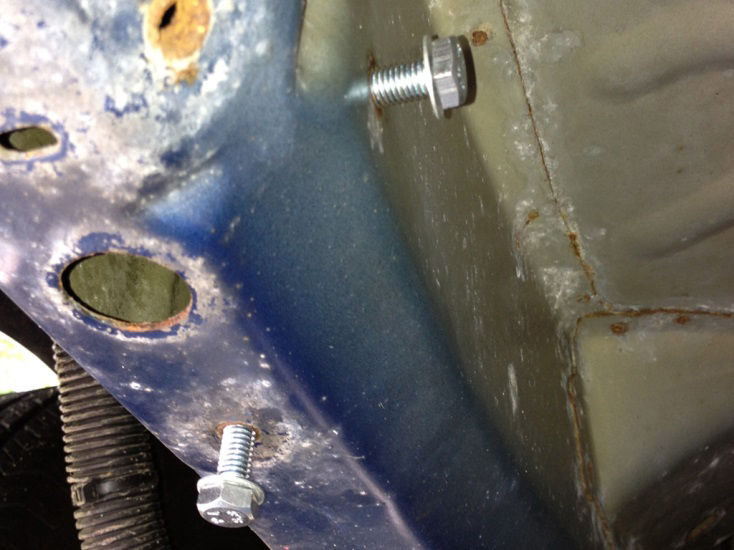
7. To install muffler first install front bracket with frame side rail bolt hand tighten only using a ½ socket then proceed to push bracket on 45 degree angle to allow for clearance.
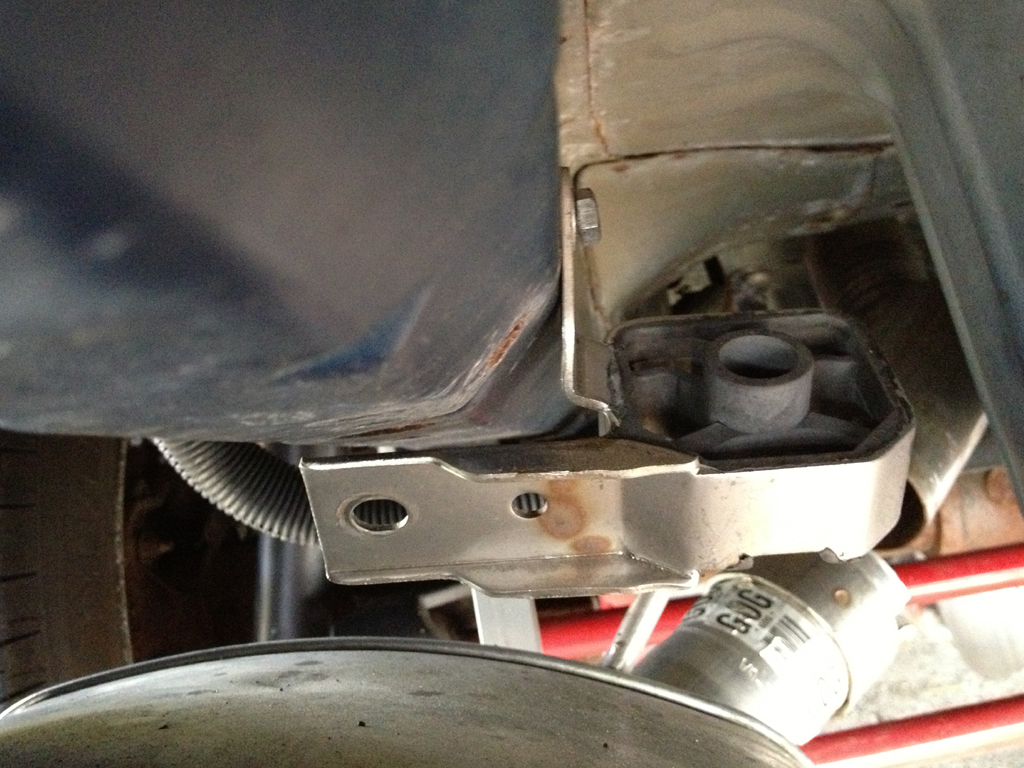
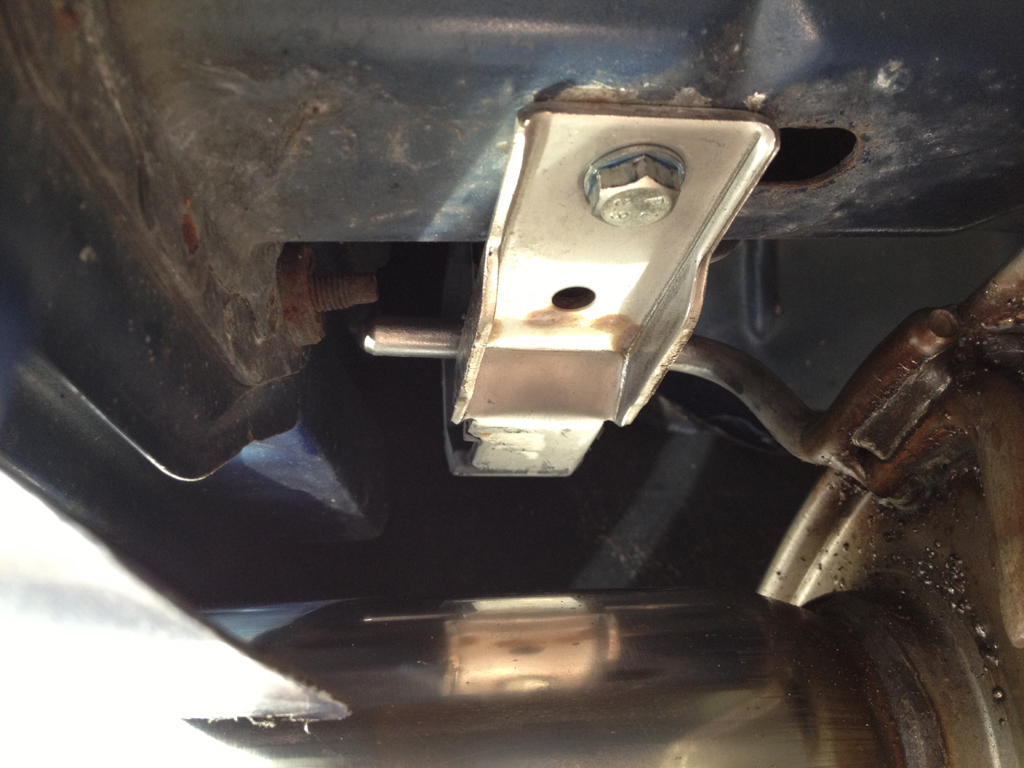
8. Install second rear bracket on muffler hanging rod above muffler tip.
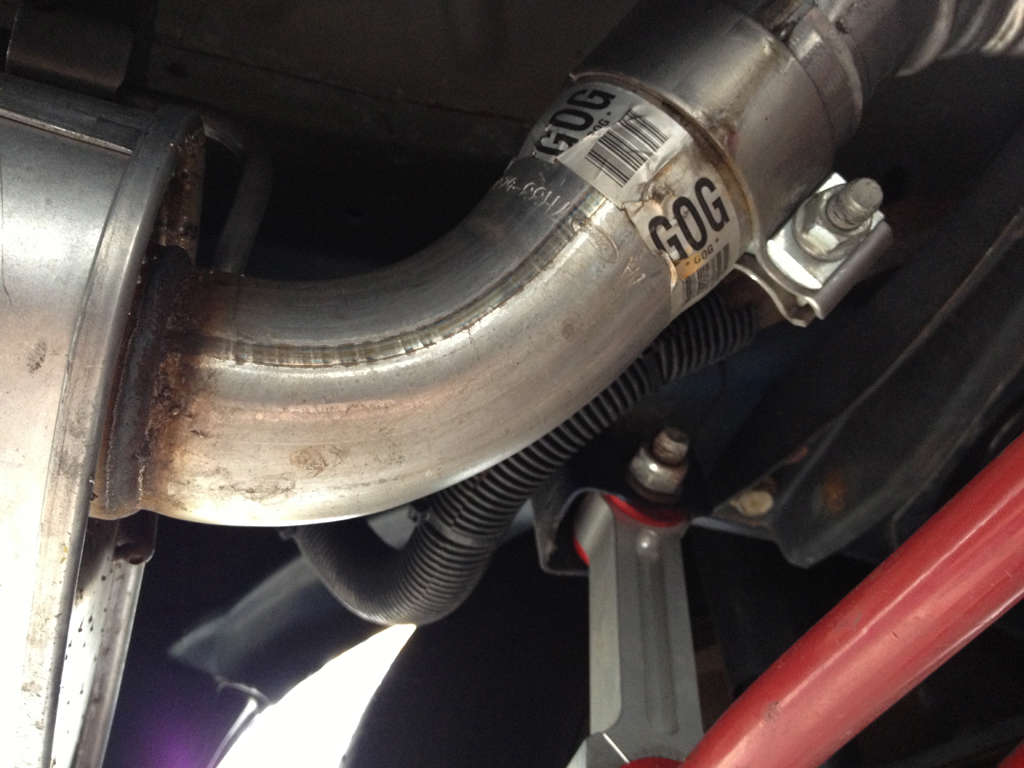
9. Proceed to install exhaust muffler pipe to intermediate pipe. It may require some wiggling and pushing until fully seated. Do not tighten 5/8 nut just yet leave loose for adjustments.
10. Push the muffler up and swing your front bracket down to slip over hanging rod. Install bottom nut in bracket and leave loose.
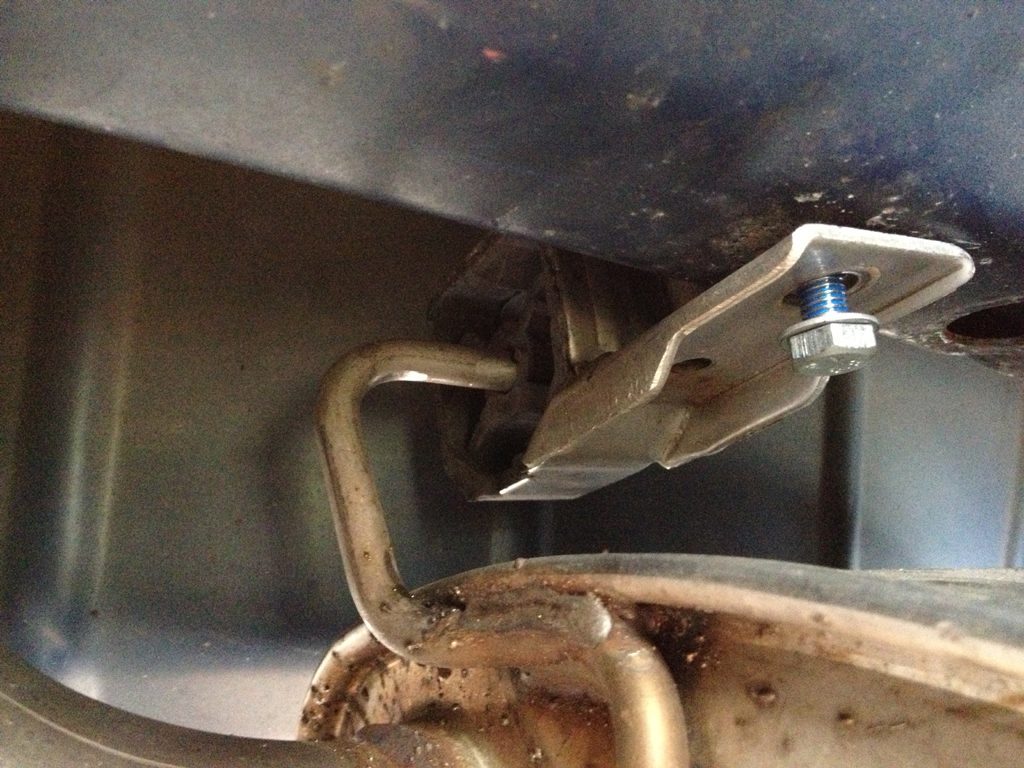
11. Proceed to second rear bracket, pushing up on the muffler tip; loosely attach both 8MM bolts by hand.
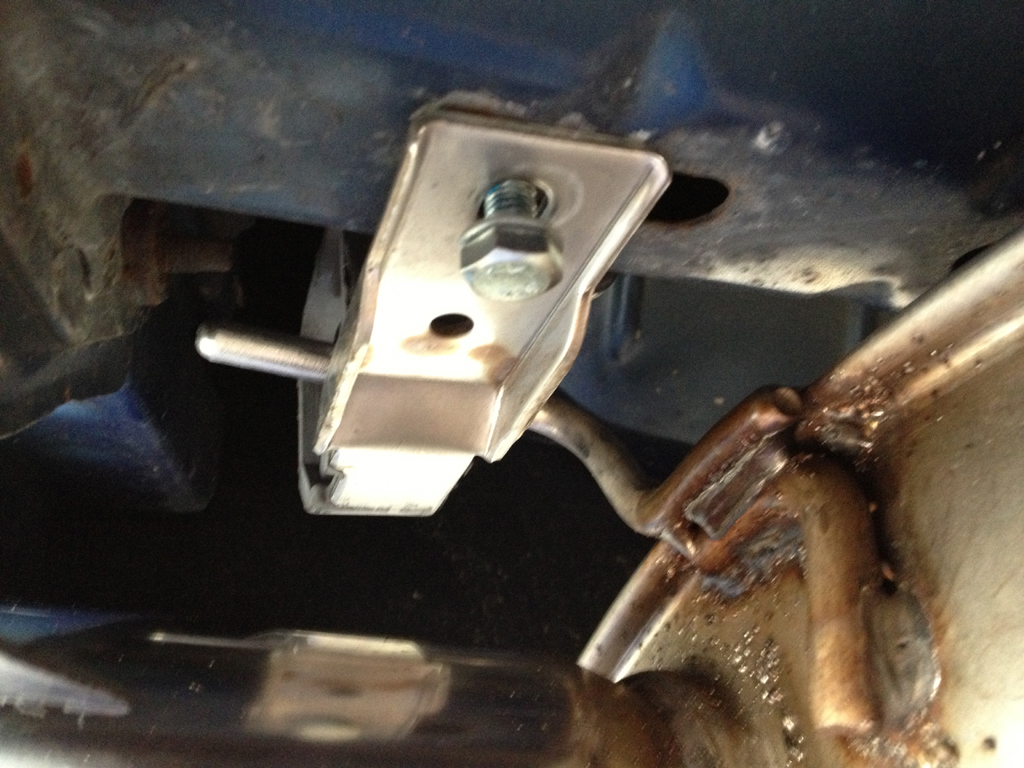
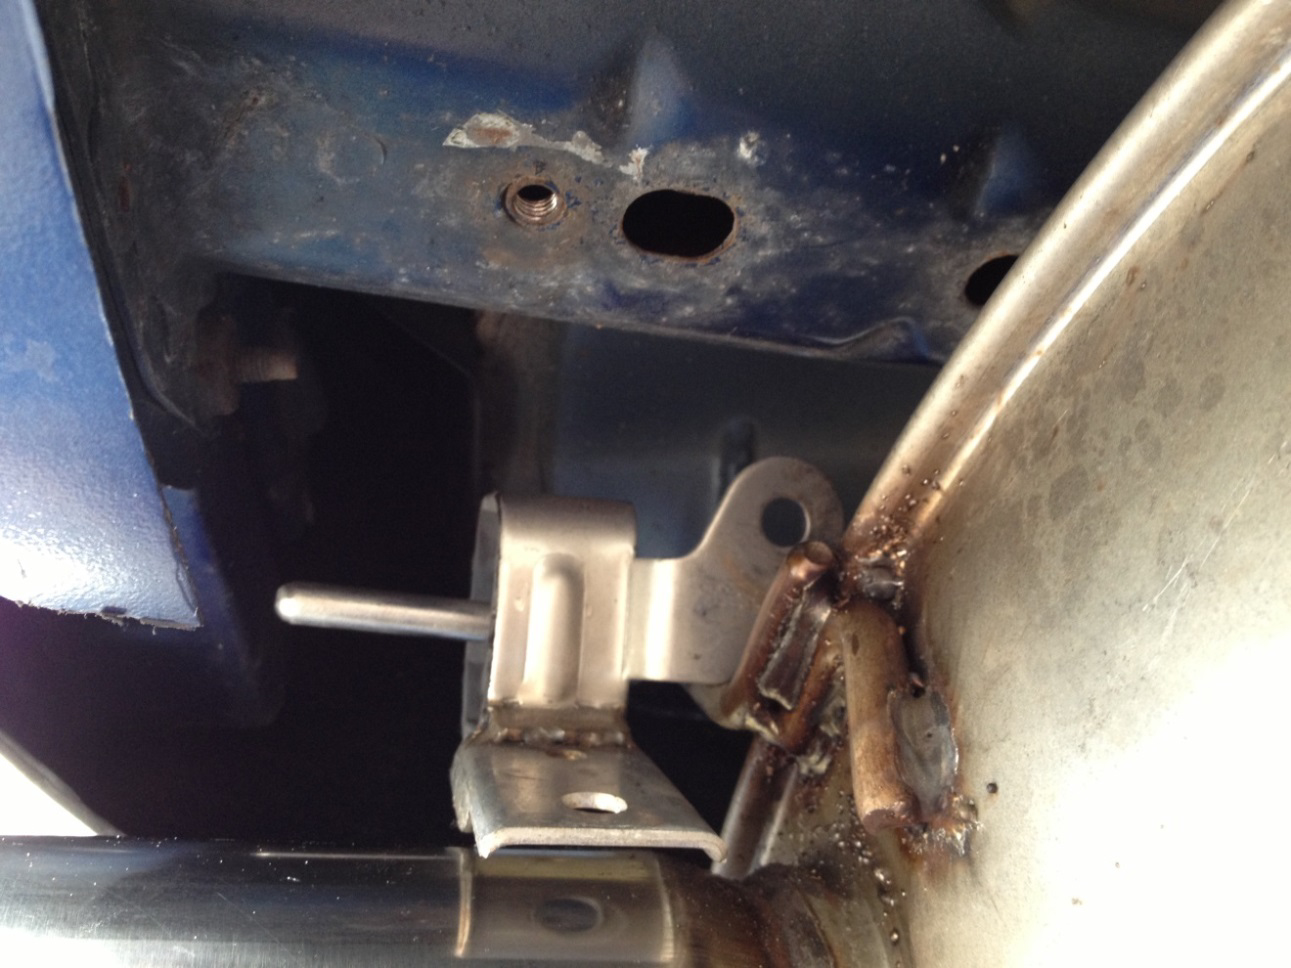
12. Start by tightening the front bracket bottom bolt using a ½ wrench to 18 ft. lbs. Then tighten side frame rail bolt securely.
13. Tighten rear bracket bolts using a ½ socket with extension if needed.
14. After tightening down all four bracket bolts you may adjust muffler alignment left or right. Twisting muffler body left or right until pipe coming rear is 90 degree and straight.
15. Once alignment is complete tighten clamp to intermediate pipe connection with a 5/8 deep socket torqued 40 ft. lbs.
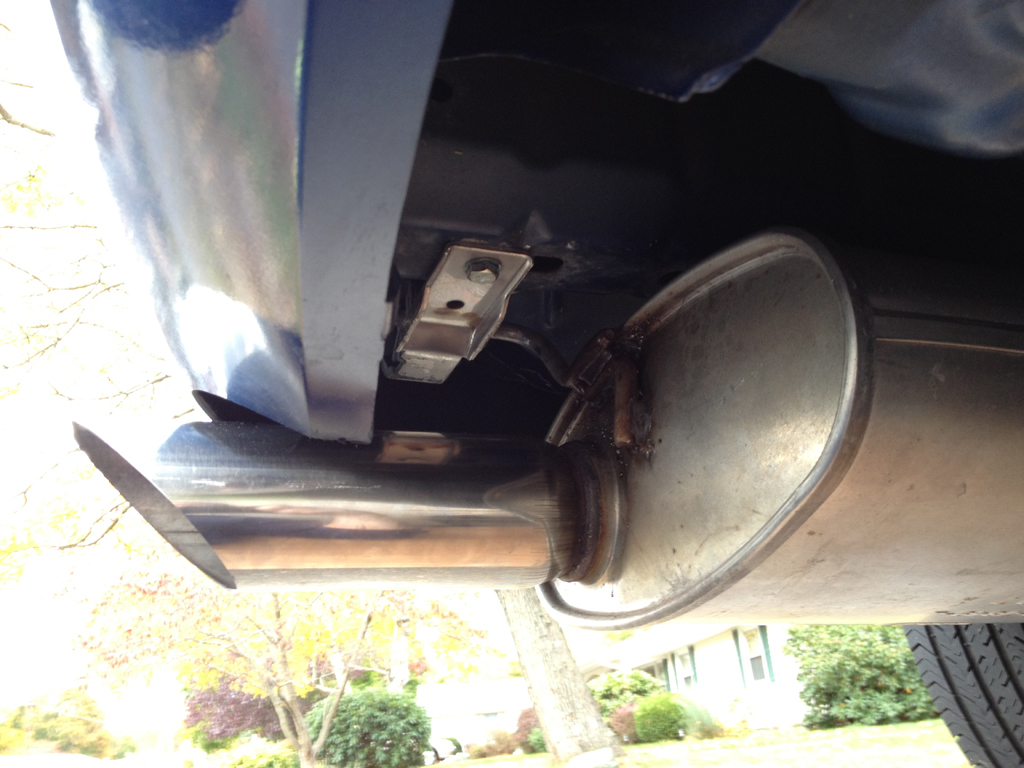
NOTE: To adjust for height your muffler has to be removed from vehicle. You should allow for . gap for spacing to prevent damage to plastic bumper cover due to movement while driving.
Low hanging: If your muffler is hanging lower than one quarter of inch. Proceed to bend rear hanging rod downward with a pipe adding a slightly down bend will help lift closer to bumper cover.
Muffler touching bumper cover: Adding a slight upward bend to the rear rod will allow for clearance and give a gap between the muffler and body cover and avoid mufflers tips melting cover and damage from movement while driving.
Installation Instructions Written By AmericanMuscle Customer Ryan Maguire 11/05/2013
