 FREE 1 to 3-Day Delivery on Orders $149+ Details
How to Install Pypes Polished Shorty Headers on Your 2005-2010 Mustang V6
Installation Time
1 days
Tools Required
- Lift or jack stands
- Gloves
- Safety glasses
- Penetrating oil such as PB Blaster, Brake Free, etc.
- Brake Kleen or similar product for cleaning brake parts
- 8mm, 10mm & 15mm sockets
- 13mm socket (deep)
- 3/8" socket extensions
- 3/8" universal joint (optional)
- 3/8" Torque wrench
- 13mm & 15mm Open-end wrench
- An extra set of hands (friend) will be helpful

Shop Parts in this Guide
Installation
Introduction:
The kit comes complete with replacement hardware and gaskets and can be easily done in your driveway. The hardware supplied for install includes new header-to engine bolts. These bolts would be used if you choose to replace the factory studs/nuts or if you break one off.
NOTE: Since the stock header studs and nuts on my Mustang were in excellent shape, I decided to re-use them. Your choice of using the replacement hardware or stock should be made after the stock manifolds are removed and you can evaluate the condition of the original hardware. Several of the bolts will need to be replaced with those supplied due to a difference in length. I’ll cover those later in the guide. *AM recommends use of all supplied bolts for the install.*
Before Beginning:
Disconnect the car battery. Wear eye protection. Make sure you are working on a car that has had a chance to cool down if it was recently driven.
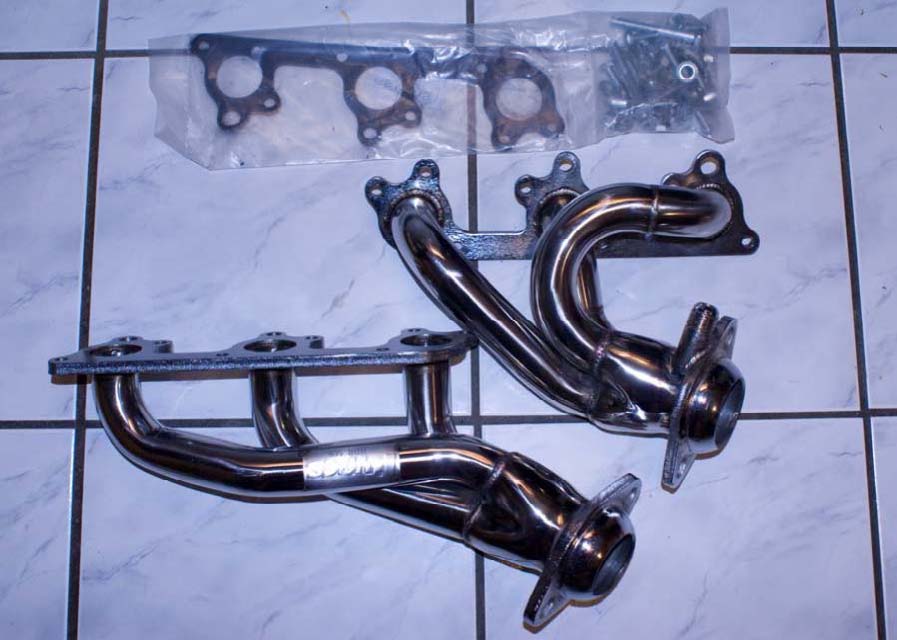
Package contents:
- Right and Left Polished Headers
- Hardware
- (2) Gaskets
Lubricate all nuts / bolts:
Begin by using your penetrating oil and spraying all exhaust manifold flange bolts (6 each side), exhaust manifold to catalytic converter flange bolts (2 each side – best accessed from under car) and the EGR pipe flange nuts (one on exhaust manifold, one located near throttle body). I would suggest doing this the night before and letting the nuts/bolts soak overnight.
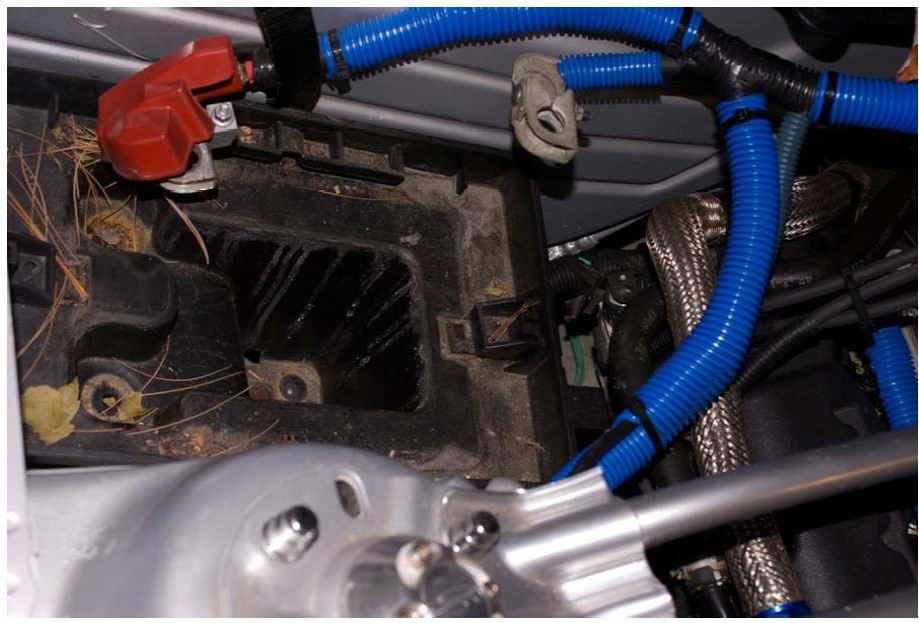
Remove Battery and Battery Tray:
Remove the battery from the car. Using an 8mm socket, remove the (3) bolts holding the battery tray and remove. This would be a good time to clean the tray and debris that has accumulated. Wash with baking soda to neutralize the acid, rinse with water and set aside to dry.
Remove CAI or Air Box and Intake:
On my car, I had to remove the CAI and air intake lines. Remove your air filter / intake if it is going to interfere with access to the exhaust manifold.
Jack / Lift the Car:
Using all safety precautions, place the car on a lift or jack stands so that you can access the exhaust flange bolts from under the car.
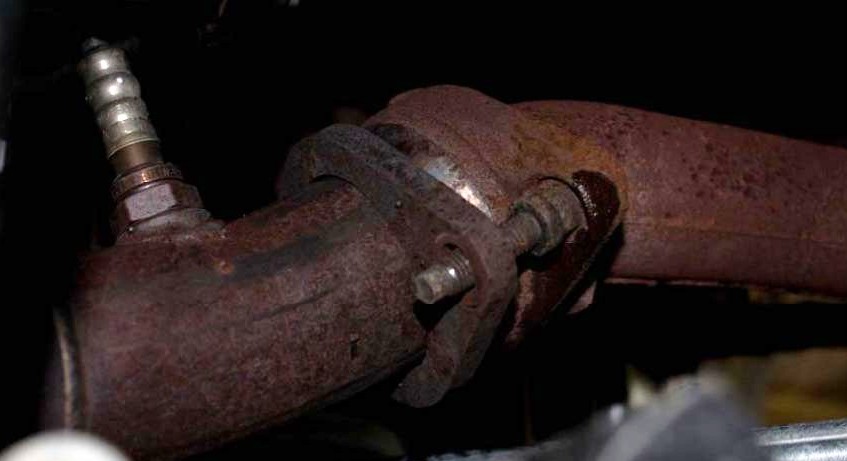
Remove Flange Nuts:
-From underneath the car, remove the (2) bolts that hold the catalytic converter to the exhaust flange. This requires a 15mm socket and some dexterity. I used a universal joint and an extension to get to the driver’s side top bolt, which is the most difficult. Repeat this for the passenger side. Be careful not to damage the oxygen sensors.
-After all (4) nuts are removed, lower the car for safety and ease of access to the engine bay.
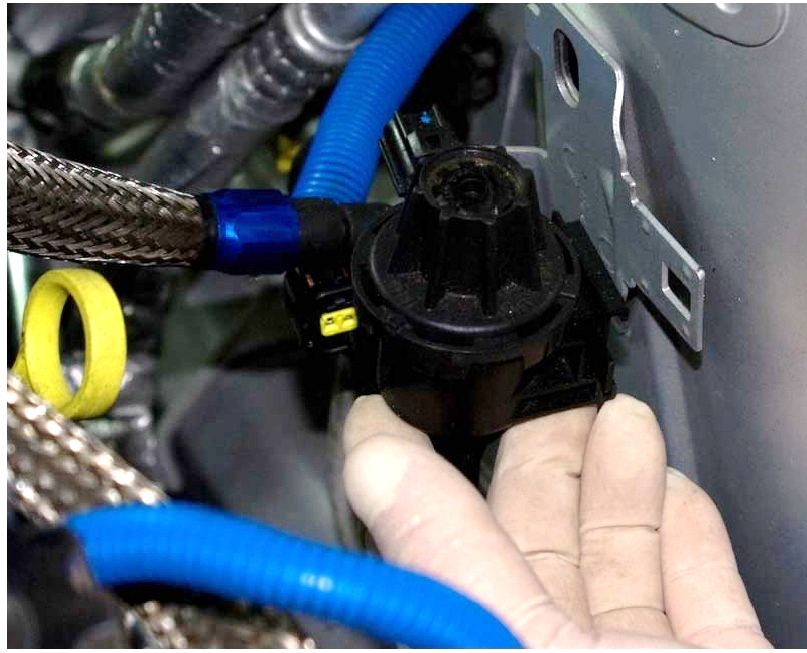
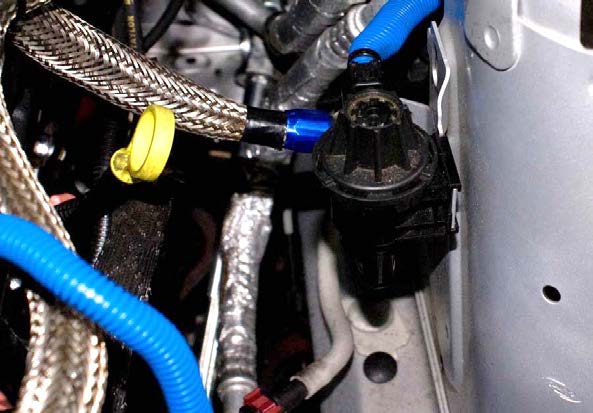
Begin on the Driver's side (most difficult) -- Move Fuel Vent Solenoid:
The fuel vent solenoid is mounted to the driver side shock tower. Disconnect the electrical connector on the solenoid. Slide the solenoid toward the front of the car to remove from bracket and move it out of the way. It's not necessary to remove the solenoid, but you may.
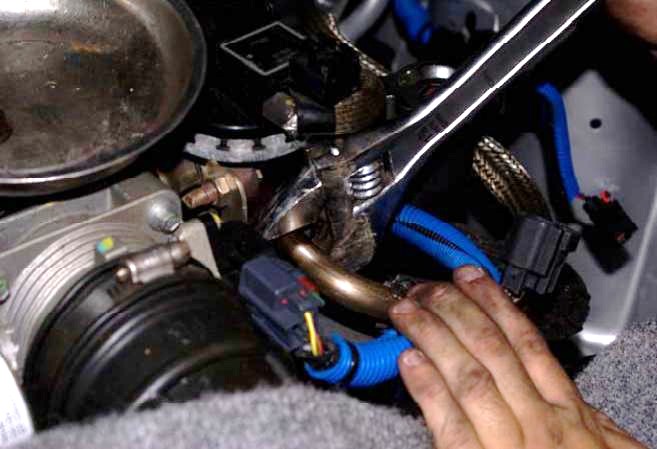
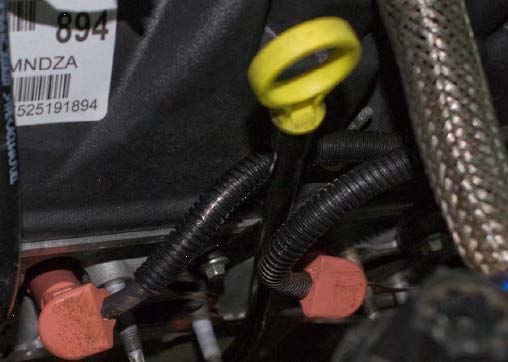
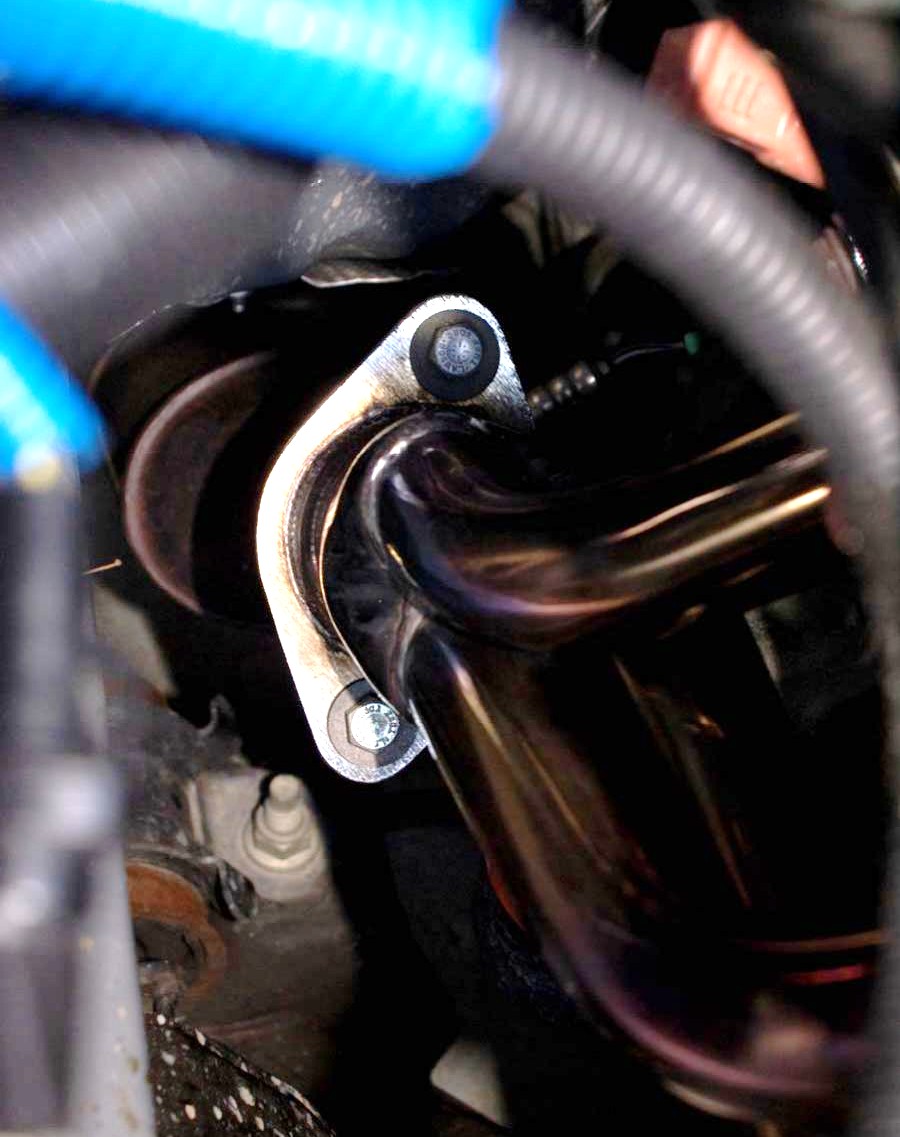
Remove Stock Exhaust Manifold Bolts:
-Using a 13mm socket, remove the (6) nuts securing the exhaust manifold (two are shown in photo).
-Using an adjustable wrench, loosen and remove the large EGR bolt at the throttle body. The other end of the pipe, mounted on the exhaust manifold will be removed once the manifold is out of the car.
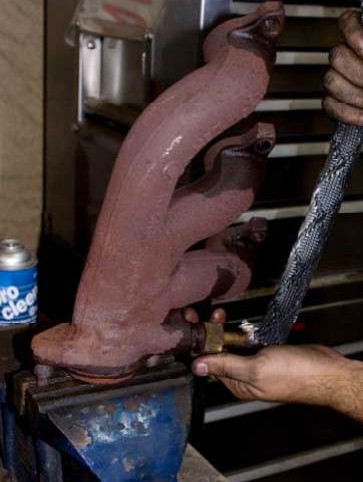
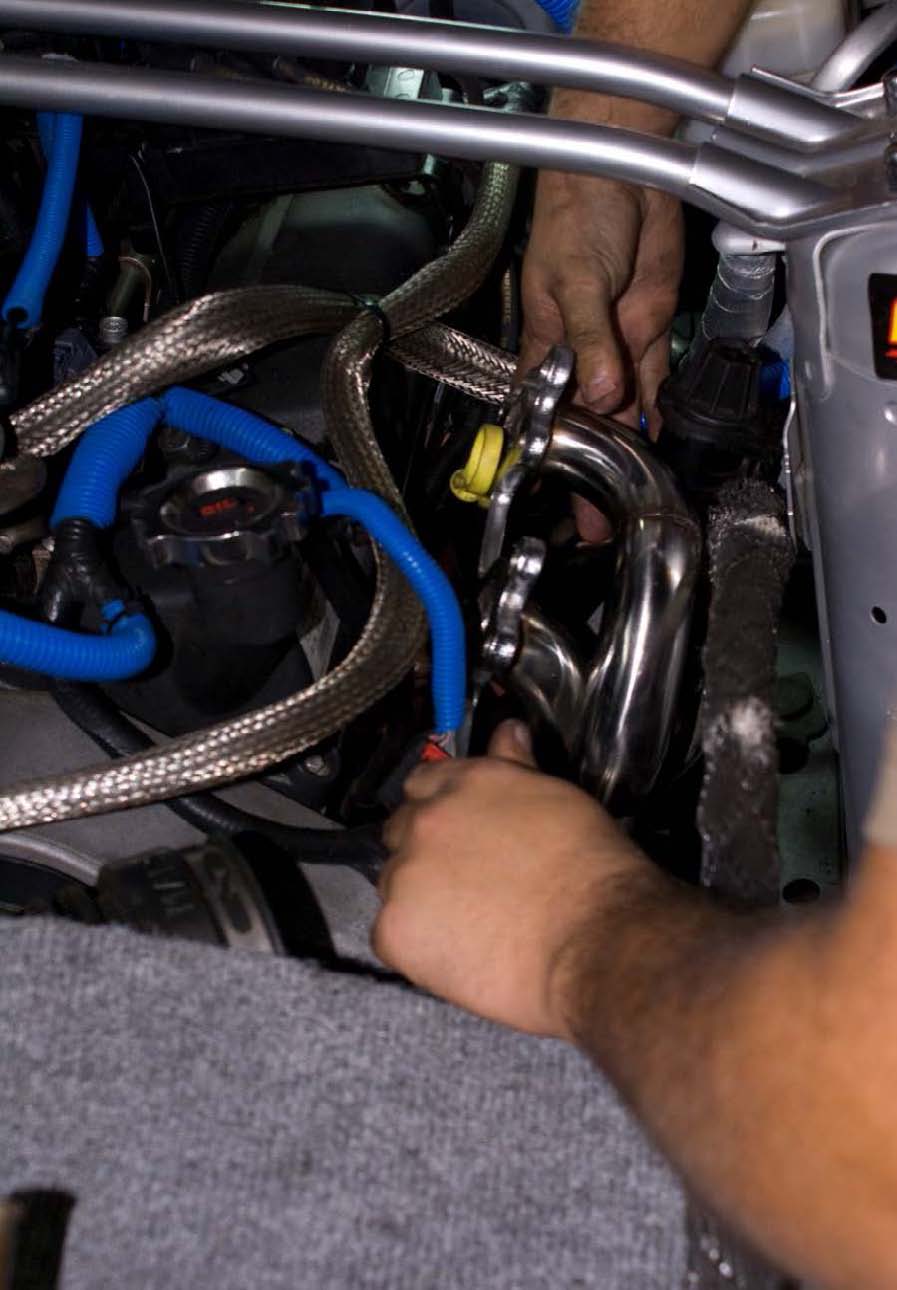
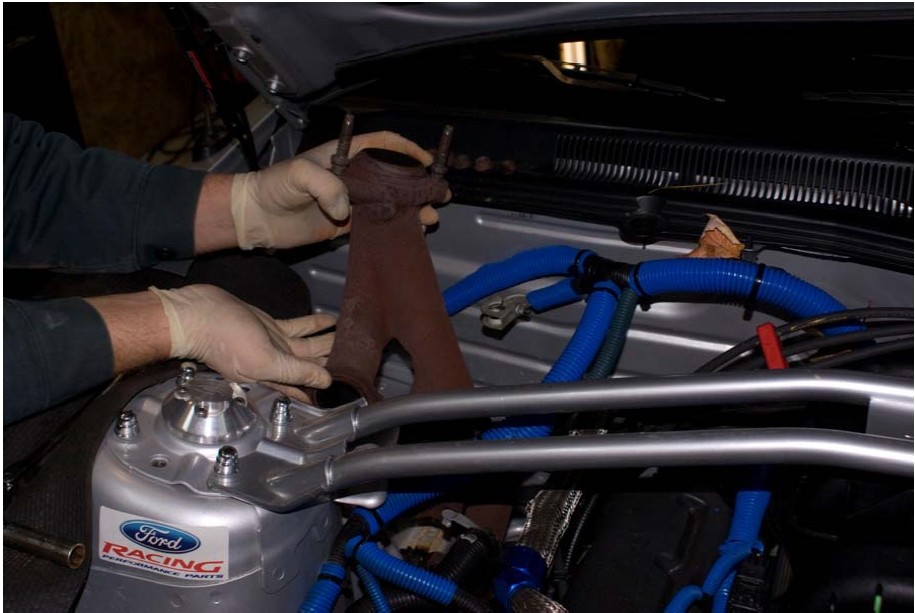
Remove Stock Exhaust Manifold:
-Carefully maneuver the manifold away from the engine block and out of the engine bay. Be careful not to damage the fuel vent solenoid or the EGR tube.
-Carefully remove the thin metal gasket that fits between the engine block and the manifold. Make sure the surfaces of the engine block are smooth and clean.

-Once the manifold is out of the car, use an adjustable wrench to remove the EGR pipe from the manifold. Take note as to which end mounts to the manifold.
Remove Oil Dipstick:
Remove the 10mm bolt holding the oil dipstick bracket to the engine block. Using a gentle twisting and pulling motion on the dipstick bracket, remove the dipstick tube from the engine block. The dipstick tube is pushed in to the engine block and simply held in place by an O-ring. Set the dipstick aside with the bolt. You will need to replace the 10mm bolt with a longer bolt that is supplied.
Remove Coil pack/bracket:
-Using a 10mm socket, remove the (2) bolts securing the coil pack bracket to the intake manifold. Be gentle, the manifold is plastic!
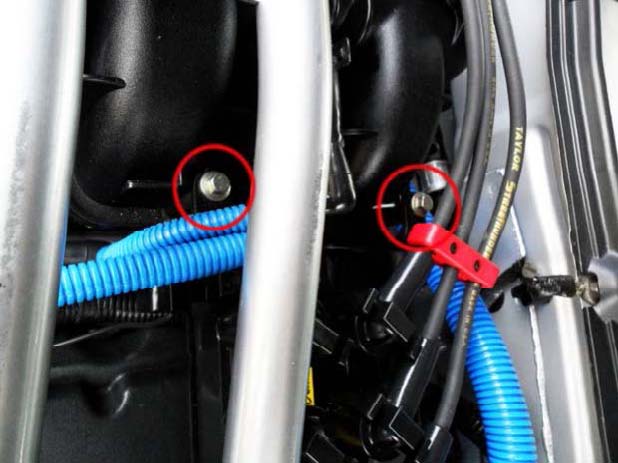
-Using a 15mm socket, remove the large bolt securing the coil pack bracket to the manifold (closest to firewall). Remove the smaller bolt with a 13mm socket. NOTE: Photo taken after header install. Also note in this photo how the bracket will be mounted during assembly – it goes on the OUTSIDE of the header flange.
Prepare the Driver-side Header:
-The driver-side header is identified by the mounting for the EGR pipe. Inspect the header for any damage. Ensure the surface that fits against the engine block is clean and free of any nicks and damage.
-Mount the EGR tube to header. Finger-tight for now.

Installation of new Driver Side Header:
-Carefully place one of the supplied exhaust gaskets on the engine block exhaust manifold studs.
-Carefully maneuver the header in place on the engine block and catalytic converter flange. You may need to put some downward pressure on the header once it sits on the catalytic converter flange to get it to slide on the engine block bolts.
-Once the header is in place, install the (6) 13mm nuts and bolts that hold the header to the block (finger tight only).
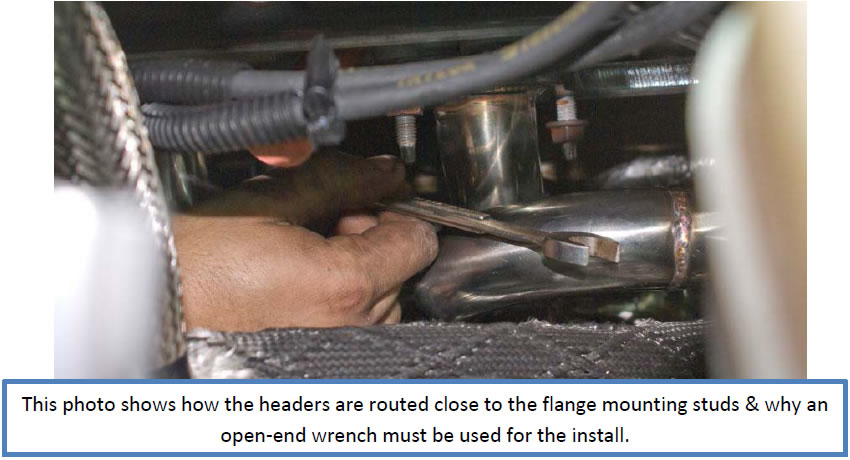
-Because of the way the header pipes are routed, you will need an open-end wrench to tighten the 13mm nuts and should be torqued to 17 ft-lbs (you may have to approximate). Work from the rear to the front of the engine, alternating top and bottom nuts and torque in three equal steps.
- Look at the bolt that held the oil dipstick bracket (10mm) and the small bolt of the coil pack bracket (13mm). In the supplied hardware, find the bolts that match but are slightly longer. You need to use the new bolts due to the thickness of the new header flange.
-Make sure the coil pack bracket is on the OUTSIDE of the header flange and replace the new and longer 13mm bolt and the original 15mm bolt (finger tight only).
-On the top of the engine, replace the (2) 10mm coil pack to intake manifold bolts. You may have to carefully bend the bracket a little to align the holes in order to compensate for the thickness of the header flange. Remember – the intake manifold is plastic! Torque these bolts to 5 ft-lbs.
-Now, torque the 13mm and 15mm coil pack bracket to manifold bolts to 12 ft-lbs.
-Replace the dipstick. Put a small amount of oil on the O-ring before placing the dipstick tube in the engine block. Replace the new and longer 10mm dipstick bolt. This bolt can be torqued to 12 ft-lbs.
-Mount the EGR tube on the throttle body and torque the nut to approximately 10 ft-lbs. Using an adjustable wrench, torque the nut on the header end of the EGR to approximately 10 ft-lbs.
-Reinstall the fuel vent solenoid in the bracket and reconnect the electrical connection.
-Replace your air intake / CAI / air box if it had been removed.
You’re done with the driver’s side! We’ll address the flange bolts after the passenger side is done.
Remove Passenger Exhaust Manifold:
-Using a 13mm socket, remove the (6) mounting nuts on the exhaust manifold.
-Carefully maneuver the manifold out of the engine bay. Remove the metal exhaust gasket and make sure the engine surface is clean and smooth.
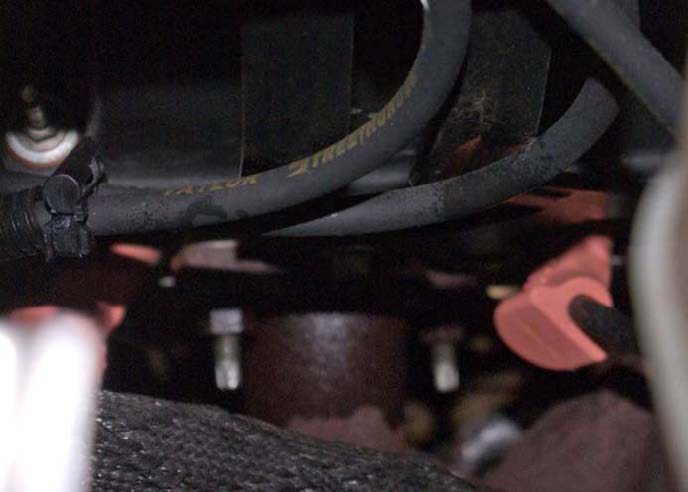
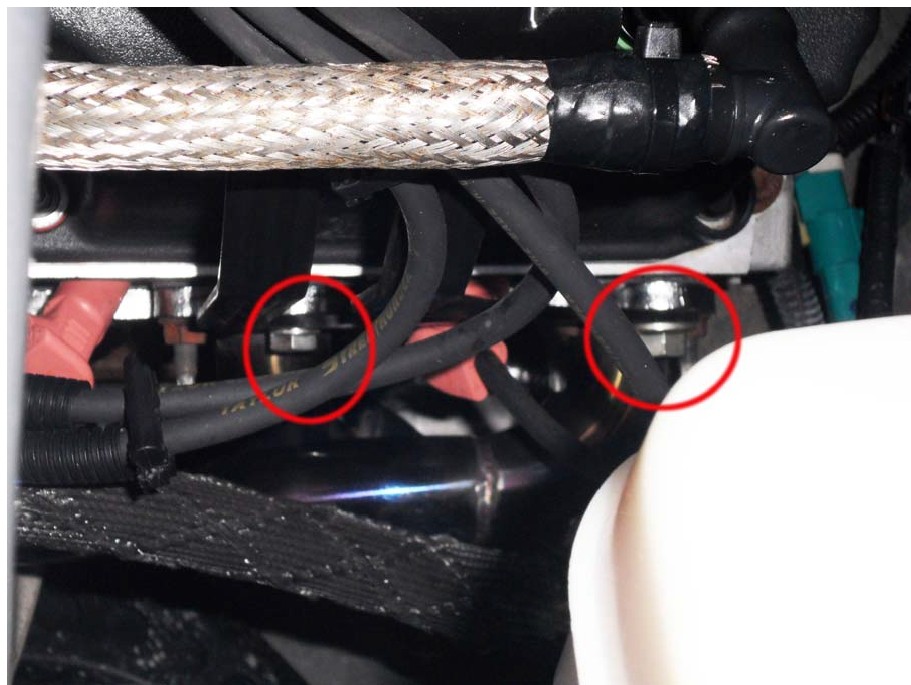
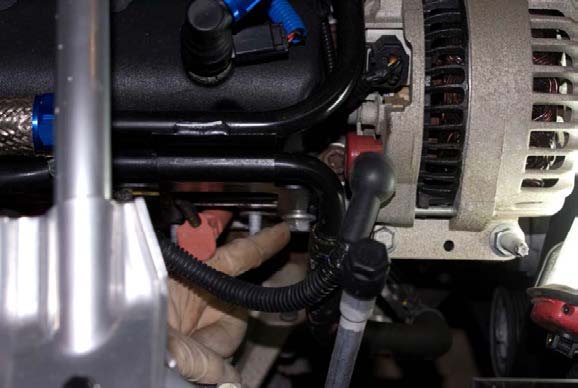
Remove Heater Line Bracket:
Remove the 15mm bolt near the alternator and 13mm bolt that secures the heater line bracket. Set the 13mm bolt aside. It will have to be replaced with a longer one (supplied). The 15mm bolt does not need to be replaced.
NOTE: Photo was taken after assembly. Left Image shows a close up of both bolts. Right image gives an idea of location by showing the alternator with bolt.

Installation of new Passenger Side Header:
-Place the new gasket on the engine BEHIND the heater line bracket. Be careful not to damage the gasket.
-Carefully maneuver the headers in place. You may have to push down on the catalytic converter flange to get the header to slip over the engine block bolts.
-Replace all nuts & bolts and finger-tighten. Inspect and make sure the gasket has not been damaged. NOTE: Longer bolt is supplied to mount the heater bracket.
-Using a 13mm open-end wrench, torque the header mounting nuts to 17 ft-lbs. Use the same rear to front, alternating top and bottom sequence to tighten as was done for the driver’s side.
-Torque the 15mm and 13mm bolts for the heater line bracket to 12 ft-lbs.
Bolt Header Flange to Catalytic Converter:
Find the (2) long flange bolts included, place a washer on each bolt and drop them through the header flange to the catalytic converter. Do this for each side -- total of (4) bolts and (4) washers.
-Raise the car on the lift, if available, or place on jack stands observing all safety precautions.
-From the bottom of the car, align the catalytic converter flange with the header flange and ensure the bolt drops through from the header flange. Place a flat washer, lock washer and nut on each bolt and finger-tighten. I had to use a friend to push up on the catalytic converter flange to get them to align.
-Using a 15mm open-end wrench on the bolt head, use a 15mm socket on the nut and torque to 30 ft-lbs. You may need an extension and/or a universal joint to access the nuts.
-Lower the car.
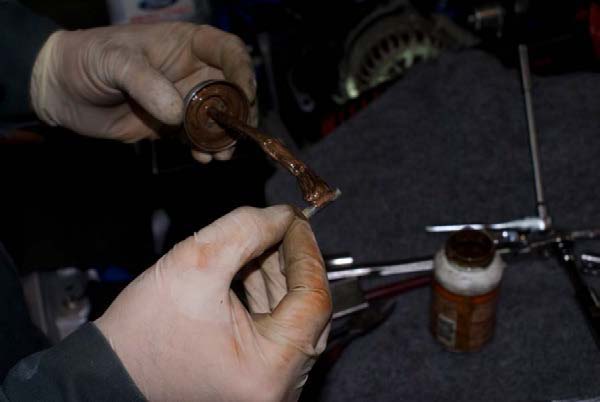
Re-install the battery:
Re-install the battery tray. Coat all the bolts with anti-seize. Since these bolts are under the battery and are exposed to acid and moisture, they will corrode! The anti-seize will make future replacement easier. Re-install and connect the battery.
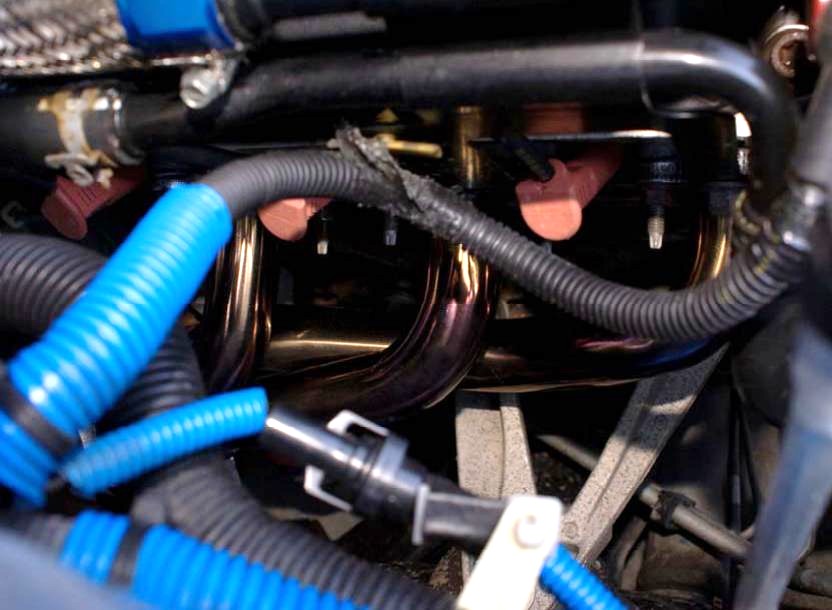
Clean the Headers:
Prior to firing up the car for the first time, carefully spray some Brake Kleen or similar cleaner on a rag and wipe down the new headers. This removes all finger prints and oil. If you do not do this, when you start the car and the pipes heat for the first time (season), you risk permanently staining the pipes with lots of finger prints! If the pipes are clean, they will color to a nice, even, purple hue. If you don’t want to look like a dork, don’t leave finger prints!
Leak Test:
Start the car and let it idle. Listen for hissing or other strange noises around the headers. If there is a leak, immediately shut the car down, find the source (possibly a damaged gasket) and fix it.
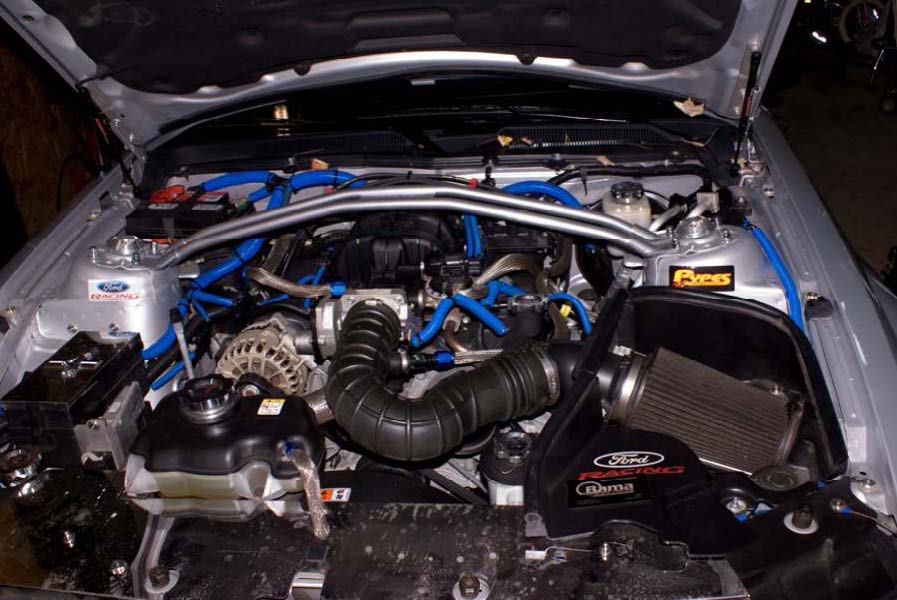
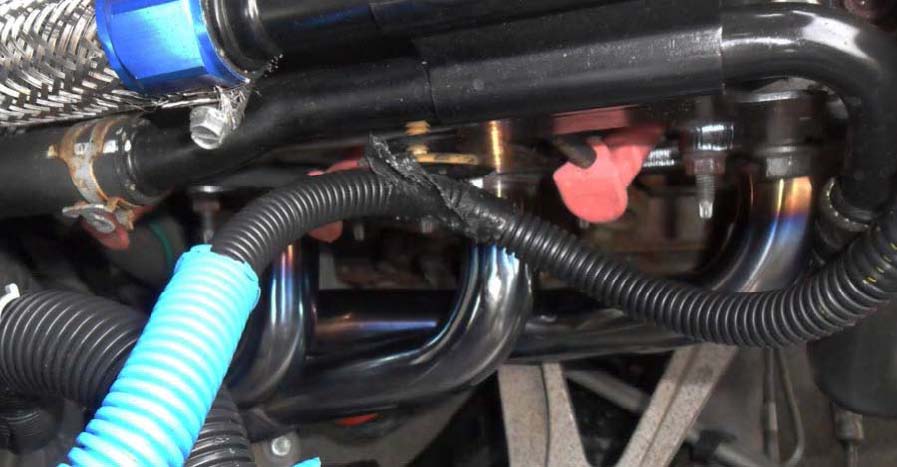
If the headers are cleaned properly and after they are “seasoned,” they will take on a nice color like this:
Installation Instructions written by AmericanMuscle customer Scott Robinson 11.3.11
Related Guides
-
Installation
-
Installation
-
Installation


