 FREE 1 to 3-Day Delivery on Orders $149+ Details
Pypes Violator Catback Exhaust ('98-'04 GT / Mach 1 / Bullitt) - Installation Instructions
Installation Time
2 hours
Tools Required
- 14mm Deep Socket Ratchet
- Hacksaw or Reciprocating Saw
- 1 Can of WD-40
- Jack and (2) Jack Stands
- Safety Goggles and Gloves (For Use When Cutting)
- Allen Wrenches
- Optional Parts
- Impact Wrench
- "PB-Blaster"-brand Lubricant
- Metal File

Shop Parts in this Guide
Installation
Pre-Work
- 24 to 48 Hrs before you attempt removal, spray the 4 bolts down with PB-Blaster. Be sure to place rags or scrap wood under the car to catch any drips. Doing so will eliminate the need for an impact wrench to remove the hardware.
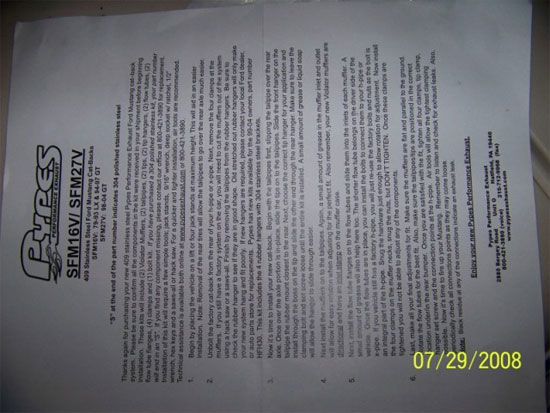
1. Remove all parts from box and identify the parts in your kit before beginning the installation. The instructions that come with the Pypes exhaust definitely could use some work.
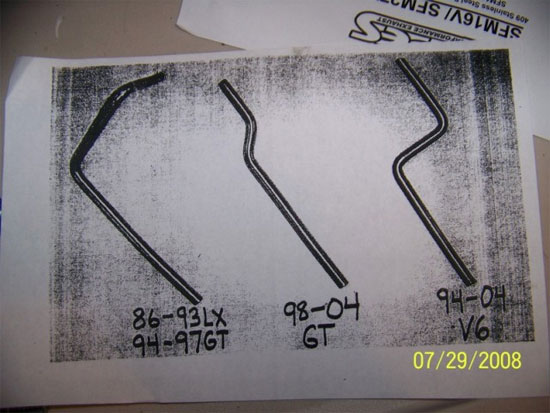
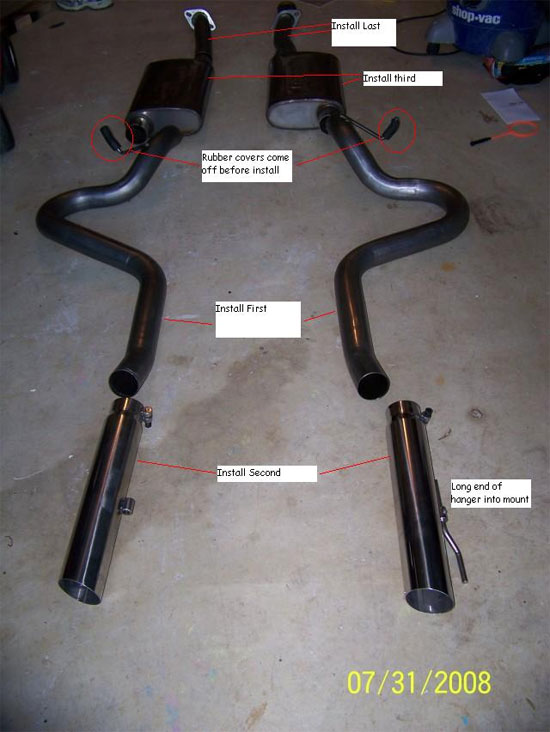
2. Two additional pages of instructions are included with the kit. The page below identifies which hanger to use on the stainless tips.
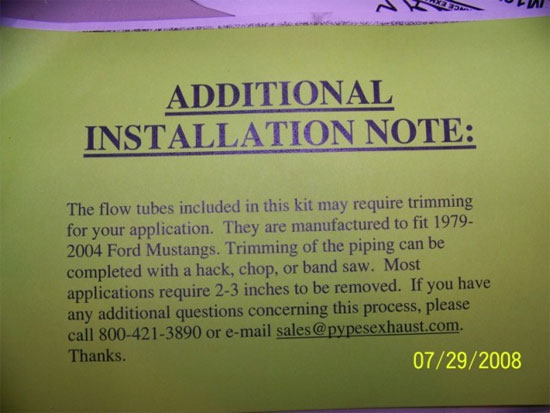
3. The last page introduces a bit of concern, as it hints towards the possibility of having to trim the flow tubes in order to make them fit properly. NOTE: No cutting was required on the Pypes kit during installation on my 2002 GT.
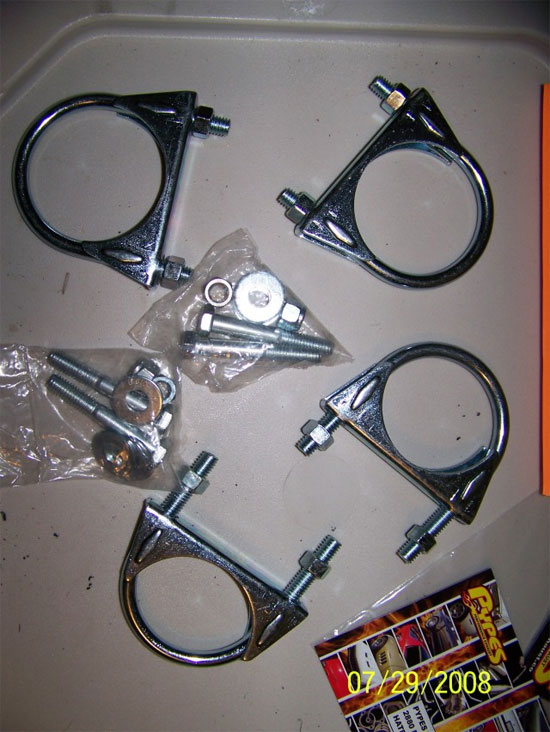
4. REMINDER: Identify and lay out the parts BEFORE attempting to mount anything. The kit comes with 4 sets of clamps and 2 sets of mounting hardware (not required if you are bolting up to the factory H-Pipe).
5. When laying out the new exhaust be sure to adhere to the following:
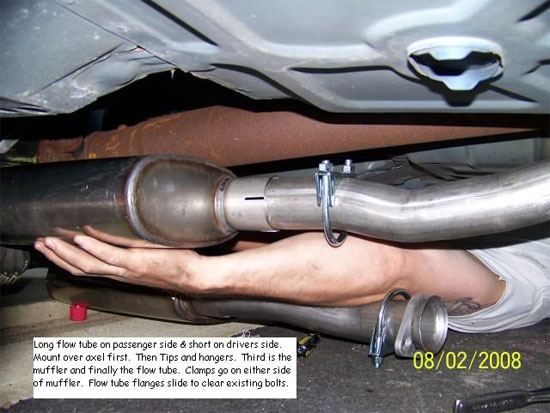
a. Short flow tube (items with flanges) goes on the driver side.
b. Each muffler has an INLET and OUTLET side. The INLET of each muffler is labeled on one side.
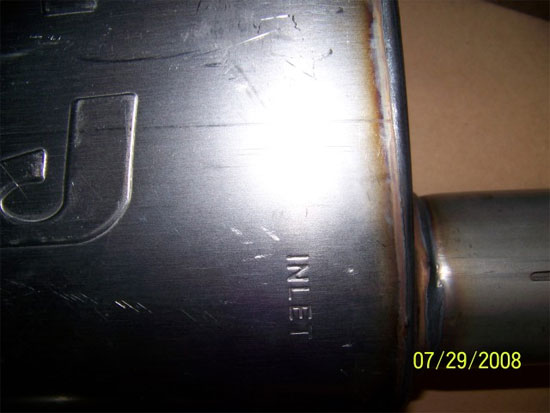
c. The INLET side faces the stock H-pipe/front of the car.
d. The main exhaust pipes have one hanger on each. The hanger side faces the mufflers while the LONG section of pipe faces the rear of the car. If you lay the hardware on the floor with the hangers facing UP and the “humps” facing OUT, then you have them in the correct orientation.
e. Finally the tips can be placed into the equation.
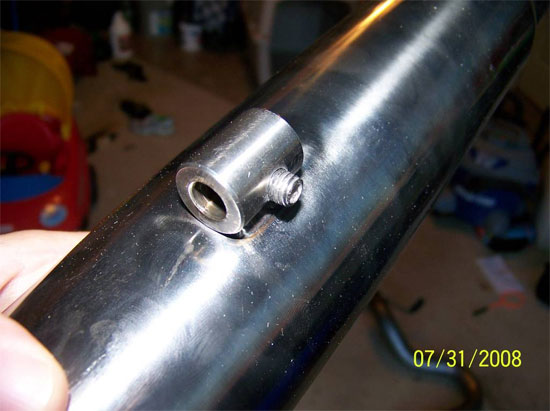
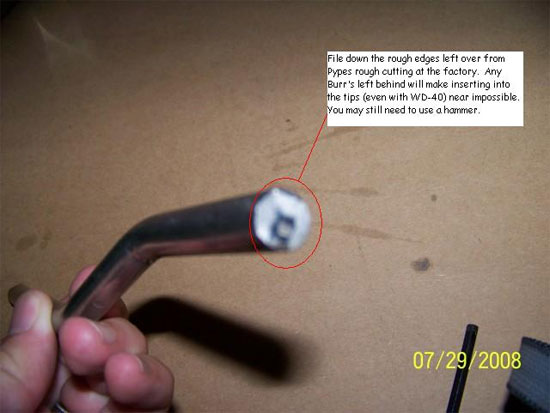
6. It may be necessary to file any rough edges off the tip of the hangers to ensure they fit properly (it was required during my installation). The machined Allen-Key clamps that hold these hangers do not allow for any deformities. The LONG side of the hanger slides into the mount.
7. The factory exhaust is a single piece and requires cutting to remove it from the car. Before proceeding with cutting, perform the following:
a. Chock the front wheels.
b. Jack up the rear of the car, placing it on jack stands. The higher the better.
c. Remove BOTH rear wheels. You will NOT be able to get the Pypes over axle exhaust pipes installed without doing so.
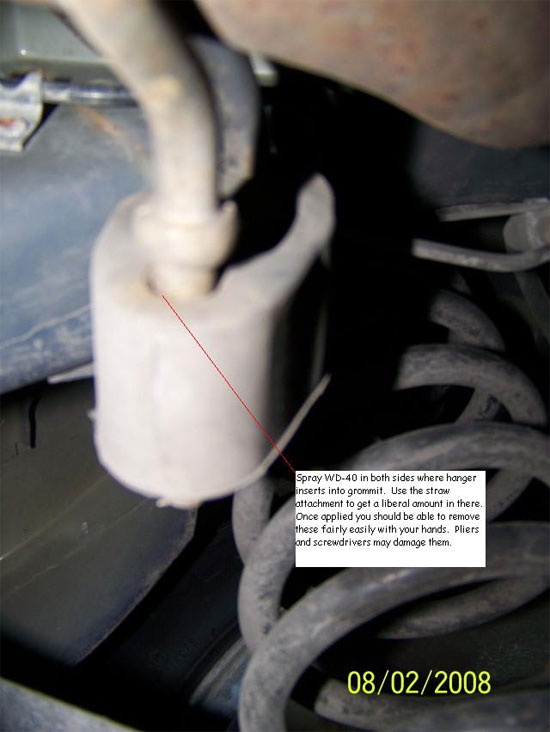
8. Lubricate all hangers with the WD-40. Spray the rod that protrudes through the hanger. The hanger grommets STAY ON THE CAR. You will be removing the rod closest to the ground. Do not attempt to remove the hangers until after you cut the exhaust, which you will do later in the procedure. Doing so will only frustrate you, as there is little play in the exhaust until this is done.
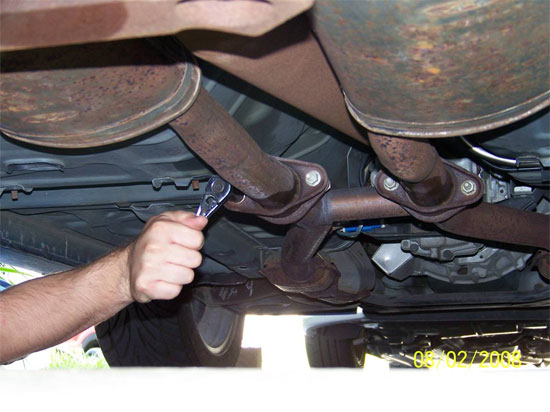
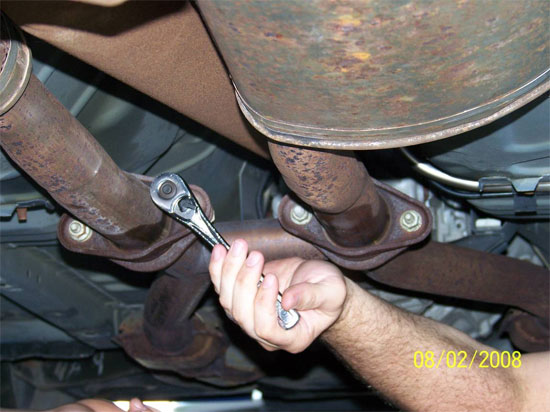
9. Break the 14mm nuts free, which hold the factory exhaust on. Since we used the "PB-Blaster" beforehand, we were able to easily break free the nuts with hand tools. The studs are firmly attached to the H-pipe flange and do not require a second ratchet or wrench to hold.
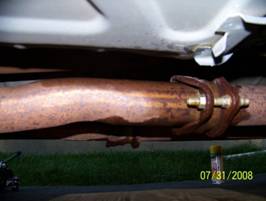
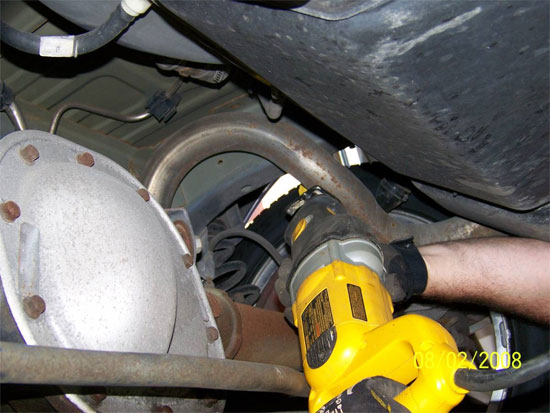
10. Put on your safety goggles and gloves if you have not already done so. Cut the factory exhaust as close to the center of the “hoop” that goes over the axle as you can. STEER CLEAR OF BRAKE LINES, FUEL LINES, etc…. In some cases, it may be easier to cut the exhaust in 2 or more places. The reciprocating saw will cut through the pipe in less than 30 seconds. Slide the exhaust from the hangers.
11. With the factory exhaust removed now you can work the new, over-axle portions into place. This part can be a bit tricky. Be patient and do not attempt to do this without first taking BOTH rear wheels off. The long section faces the rear while the hanger faces the cats. Remove the black packing material from the Pypes hangers and slide them into the factory grommets (additional WD-40 may help).
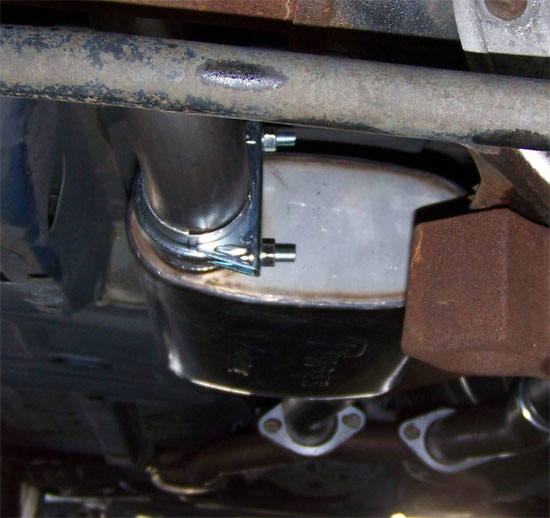
12. Slide a clamp on the rear section, then the stainless tip with the hanger loosely holding it up.
13. Slide another clamp onto the flow tube and slide it into the muffler. The flanges are floating and allow for proper fitting to the H-pipe. If you go in any other order you will be frustrated by parts not having clearance to fit.
14. Do NOT tighten anything until you have it all in place. Tighten the nuts with your fingers, but not with any tools, as this will hold everything firmly in place until you're sure you've gotten everything right.
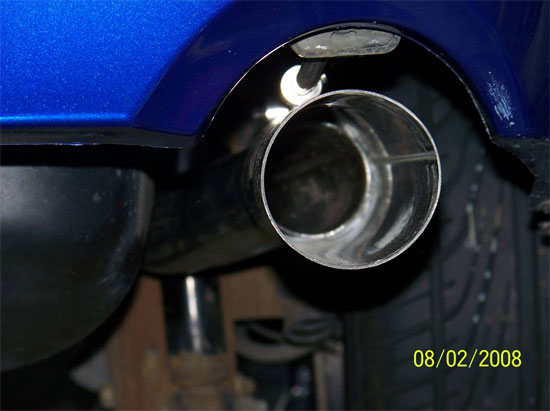
15. When mounting the mufflers, be sure the outlets are closest to the sides of the car.
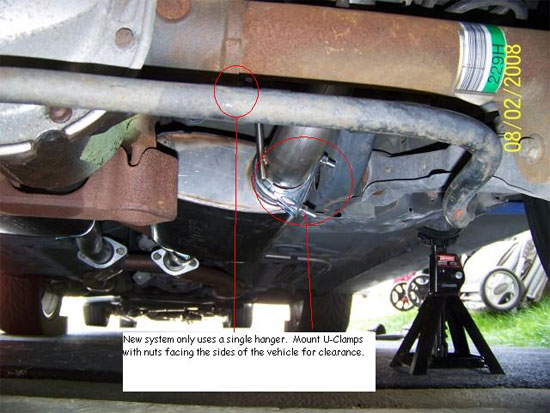
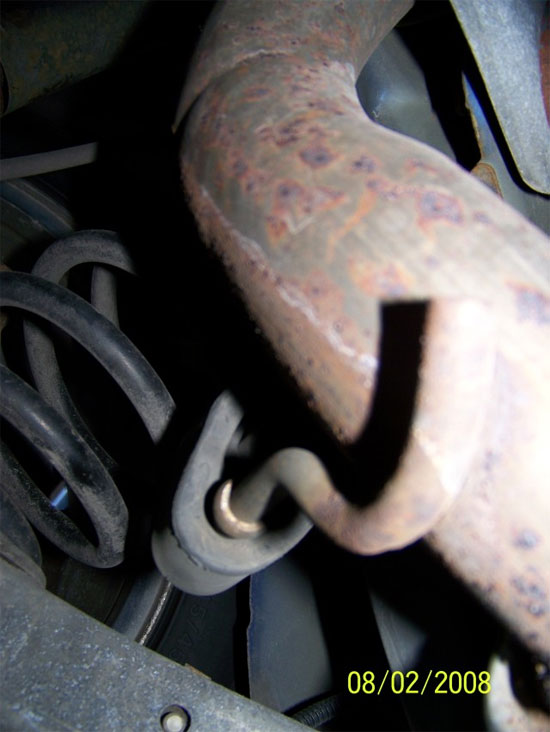
16. The new exhaust only has a single hanger, on the over-axle portion that uses the mount closest to the front of the vehicle/closer to floor boards.
17. When tightening the supplied clamps, try to keep the nuts pointing to the sides for clearance.
18. Once everything is loosely in place go ahead and tighten all connections. Have a friend hold the exhaust system up while you tighten it down. Make it TIGHT. Work on each nut a few turns at a time then switch to the other. Attempt to leave equal threads visible on each side of the U-Clamp.
19. Do not forget to tighten the hangers on the tips with an Allen Wrench.
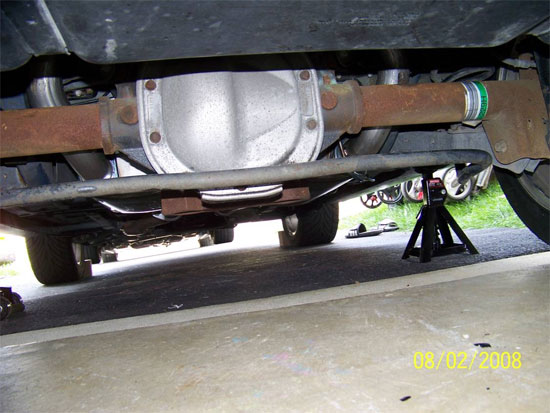
20. The installed system should hang no lower than the factory system did. If it does hang lower, then try rotating the flow tubes, mufflers or over-axle portions to make sure they all fit properly..
21. No part of the new exhaust system should touch any other surface on the car. The system gets EXTREMELY hot and will cause serious damage if it makes contact with any of these surfaces. You should be able to slide a finger between the exhaust and all surfaces of the car.
22. Put the wheels back on the car and lower it from the jack stands.
23. Clear all tools from around the car and start it up. *Drool*. It is normal for a nasty burning smell to emit from the system for 15-20 minutes or more. These are the oils used during the manufacturing process burning off.
24. Check for leaks using a spray bottle that contains water and liquid soap. Spray the joints and look for bubbles. I typically wait to do this after driving the car for about 20 minutes or so to allow the metal to expand and contract.
Installation instructions provided by AmericanMuscle customer Mike Ames 8.2.08

