 FREE 1 to 3-Day Delivery on Orders $149+ Details
Raxiom Mustang Halo Projector Headlights (2010-2011) - Installation Instructions
Installation Time
2 hours
Tools Required
- Flat Head Screw Driver
- Blanket-to lay front fascia/bumper on
- Crimpers
- Zip ties/Electrical tape
- Ratchet with 5.5mm, 7mm,8mm, and 10mm sockets
- Silicone Adhesive (if youre going to reseal the headlights)
Installation
Removal of Factory Headlights :
1. The first thing that must be done is to disconnect the battery since you will be dealing with wires.
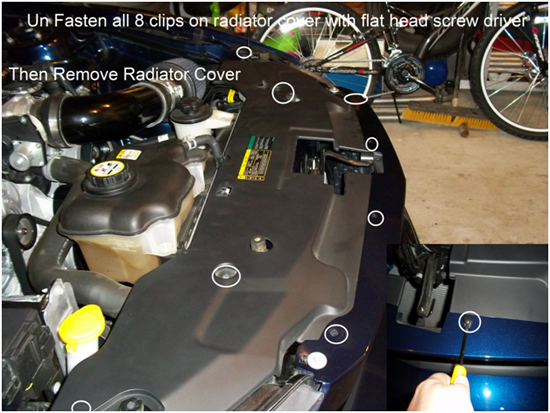
2. Next as shown in the picture below you must remove all push tabs from the radiator cover so you can remove it. After removing the radiator cover set it and the tabs aside so you can put them back on after you install the lights.
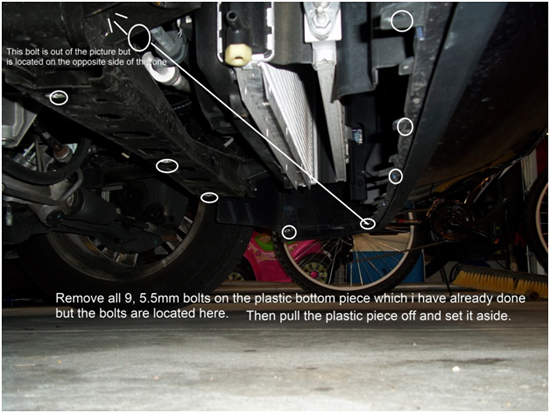
3. Next you must remove all nine 5.5 mm bolts on the bottom scrap plate which is also shown in the picture below, after you remove all bolts set them and the scrap plate aside because you will need to put it back on after you install the headlights. Also why you are underneath the car at this time you can go ahead and disconnect the yellow parking lights that are located on the 2 sides of the bumper. To do this just reach up to the back of them and push in the tab and pull back this will disconnect the lights so when you take off the front bumper you can completely remove it. This is not shown in the picture but it is fairly easy. Also disconnect the front air sensor by pulling back on it which is located in the front center of the car all the way at the bottom behind the lower grille.
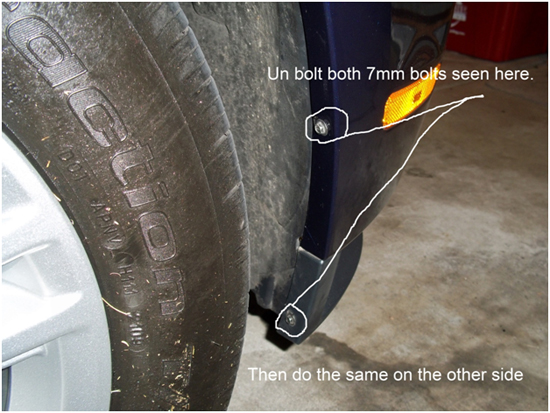
4. Next you will remove both 7mm bolts in each of the wheel wells, as shown in the picture below. After you remove all four bolts, two on each side, set them aside for reuse.
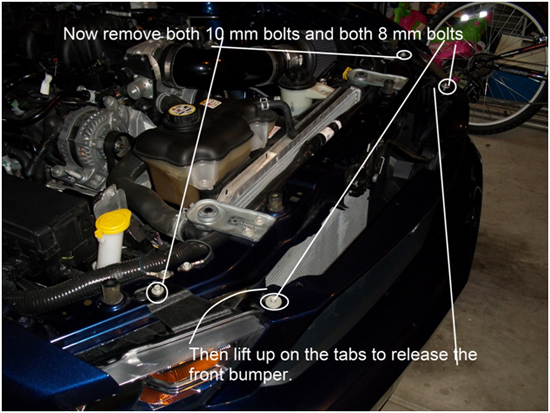
5. Next you will remove two 10mm bolts and two 8 mm bolts as shown in the picture below. After you remove those bolts pull up on the tabs that are located next to the 8mm bolts to release the top part of the front bumper. Once again set these bolts aside until after you have the head lights in so you can reuse them.
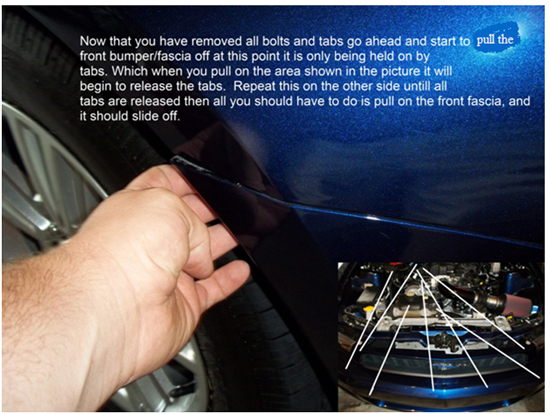
6. Now that you have removed all bolts, tabs, and pins from the front bumper that I have showed you, you can now go ahead and take the front bumper off, which at this point is only being held on by tabs. These tabs will be released when you pull on them like showed in the picture below. It does take some force to pull these tabs off but just take it one tab at a time and work your way around the bumper and you will be fine.
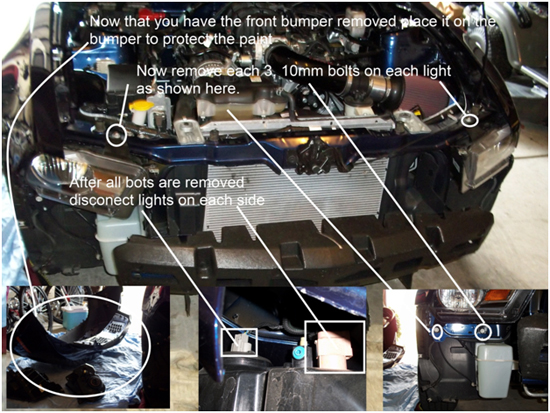
7. Now that you have the front bumper off you can lay that aside on the blanket and go ahead and unbolt and disconnect the lights on both sides at this time. In the picture below you can see the three steps involved in this process and were the bolts and connections to the lights are.
Installation of Raxiom Mustang Halo Projector Headlights
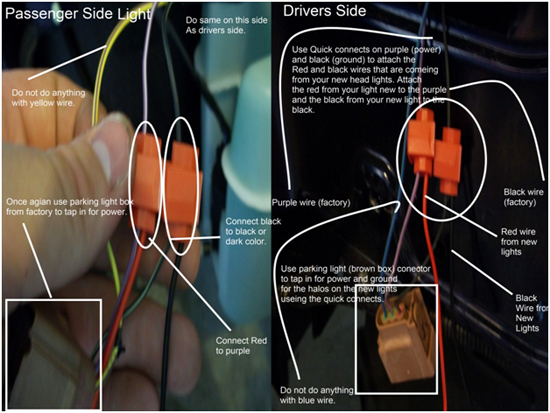
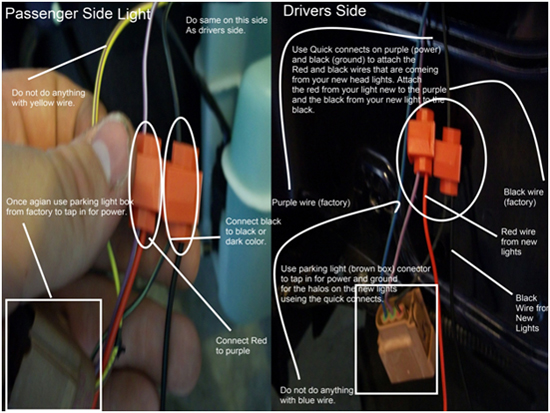
1. Now that you have the old headlights and bumper off you are ready to start with the installation of the new headlights. First remove the old turn signal light bulb holders and insert new yellow bulbs on each side and then put those in the new headlights. Now you are ready to begin connecting wires as shown in the picture below. After all wires are connected on each side, and then connect both wiring harnesses on each side to the new headlights. The grey wiring harness from the factory will connect to the black wiring harness from the new head lights. Then all you have to do is connect the turn signal wiring harnesses together and then you can bolt in the new headlights how the old ones were.
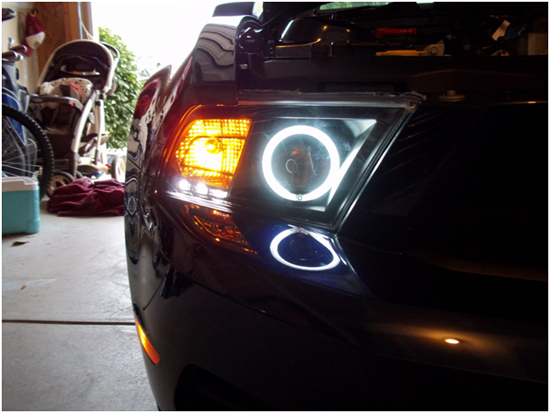
2. After you have both headlights bolted in before you put the bumper back on test the lights to make sure they are working properly, as shown in the picture below. If everything is working how it should (as in the halos, LED’s, and parking light all come on at once then the main lights come on after flipping the switch again, and the halos should not blink when the turn signal does) then you can go ahead and put the bumper back on as shown in the picture below. If lights are not working properly check all connections and try again. Also at this time you can align the lights it they need it buy twisting the 8mm bolt on top of the new head light.
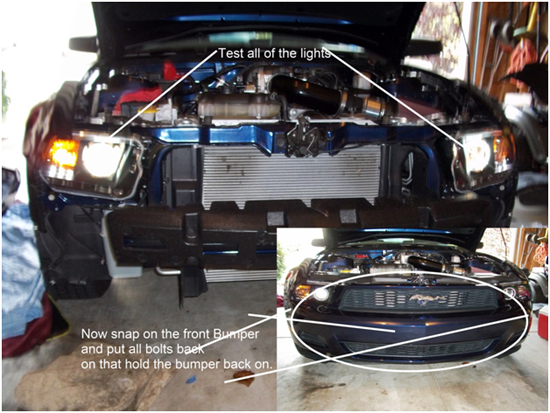
3. Now that you have begun to put the front bumper back on you can follow steps 1-8 in reverse to help you put everything back together and then when you are done it should look like the picture below.
4. From the time that you rip the headlights out of the box to the time that you get them on the car, test them, and then put everything back on your car that you had to take off in order to get to the headlights off it will take about 2 Hrs; if you know your way around your tools in your garage, other than that this is a fairly easy installation.
Installation instructions provided by AmericanMuscle customer Jordan Wagers 9.16.10
Related Guides
-
Installation
-
Installation
-
Installation
