 FREE 1 to 3-Day Delivery on Orders $149+ Details
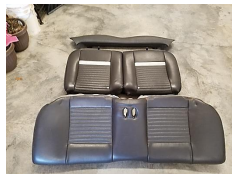
How to Install Alterum Rear Seat Delete - Black (94-04 Coupe) on your Ford Mustang
Installation Time
2 hours
Tools Required
- 3/8" Drive Ratchet
- Extension
- 3/4" Deep socket
- 5/16" Socket
- 10mm Socket
- 1/2" Drive Ratchet
- 15mm Deep Socket
- 18mm Deep Socket
- Flathead Screw Driver
- Interior Body Clip Removal Tool
- Torx T-50 Socket/Bit

Shop Parts in this Guide
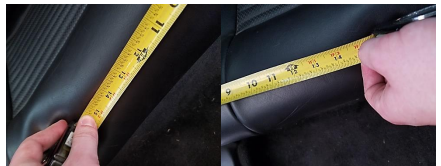
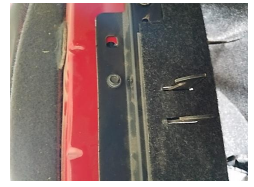
1. 13” from either side, to the seat button, use a flat head screw driver. To push button and release the seat bottom from the car.
2. Use flat head to push and release seat button, do one side, then prop that side up with an extra screw driver and then do the other.
3. Release belt buckles from the seat, then pull bottom of seat out.
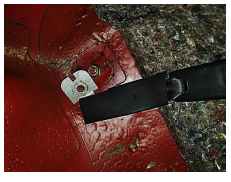
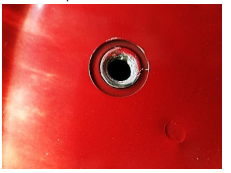
4. Find nuts at bottom corners of each seat back, use 3/8” drive with 3/4” deep socket or 1/2” drive with 1/2"-[3/4” socket] to remove.
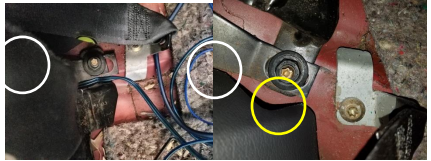
(The dark nuts are the ones needing to be removed (ones with white circle), the goldish bolts are the T-50 torx bit you will use later to remove your seat belts.(ones with yellow circle)
5. Then use 3/8” drive with 5/16” socket to remove 3 bolts. Which are at the bottom of the head rest. Then remove head cushion above seat back.
6. Then use 3/8” drive with 10mm socket to remove 2 bolts under head cushion. These bolts will be last thing holding the seat bracket to the car.
7. Now you can remove the back of the seats. You will now have the bottom of the seats, back of the seats and head cushion removed from the car now.
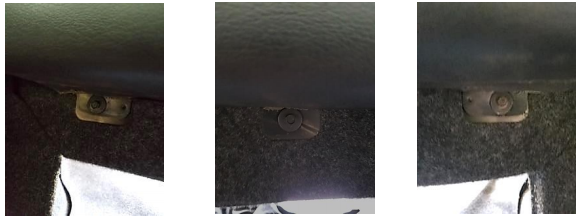
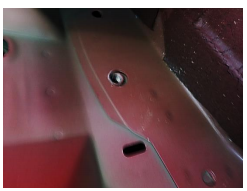
8. Use 3/8” drive and 5/16” socket to remove plastic clips that hold the seat bottom bracket to the car.
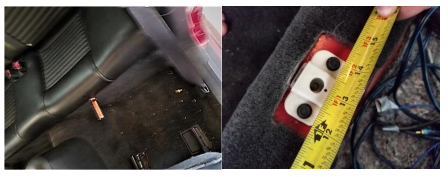
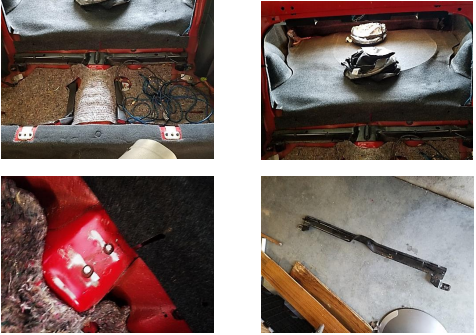
9. You will now need to pop off the plastic cover over the transmission tunnel bolts, which is on top of the child safety bracket. Use 1/2" drive and 15mm deep socket to remove child safety seat attachment. *You will need either a grinder or a hack saw to remove transmission tunnel bolts. If your car does not have these, then you can skip this step.
*(Wires in the floor of the seat are for an aftermarket amp, which has been removed from car.)
*(Now if you do not want to remove your seat belts and seat buckles, just skip ahead to step 15.)
*(Steps 10-14 are about removing seat belts/buckles)
*(When you purchase this rear seat delete it comes with instructions, these will walk you through the removal of your seat belts/buckles. This is where I found I needed the T-50 torx bit.)
10. To remove rear seat buckles, use 1/2" drive and 18mm deep socket to help with ease of removal. Do this on both sides to remove both buckles.
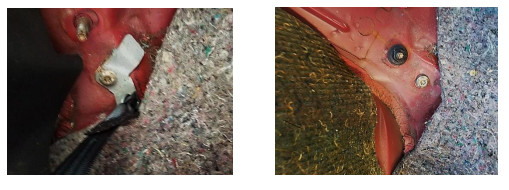
11. Then use a T-50 torx with a 3/8” drive to start the removal process of seat belts. You start by removing bottom of seat belt bolt. But make sure and put the bolt back to keep water out of cabin of car. I put the bolt back as you can see in the second picture.
12. Now you will remove the interior door seal trim and 3 plastic body clips from arm rest panel in rear of car. Then you can remove plastic interior panel. Repeat this on both sides of car to help get deriver/passenger side seat belts in the rear of car. Also need to remove the interior clothes clip above the back window to help remove the above interior piece. Use a screwdriver to remove screw and clothes holder.
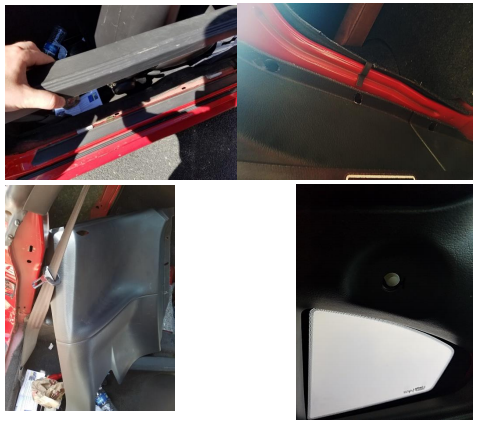
13. Once done, you can now remove the second bolt for the seat belt which is behind the arm rest interior panel.
14. Now you will need to pull back the top interior piece by the back window to get to the last bolt for the seat belt. Once totally removed pull out the seat belt and now put the interior back in reverse. I also went to Lowe’s to get some of the automotive plastic clips for the interior pieces since mine messed up so much. I put these plastic clips where you had to remove the 3 from step 12 and replaced them in the back of the arm rest panel.
*(From here on you will be putting in the rear seat delete.)
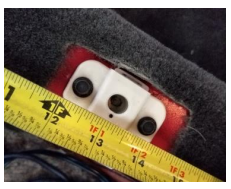
15. Finally you can put the rear seat delete in the car. We are given hardware, 2 bolts with plastic covers for the back of the rear seat delete. *(there are two different locations for the back of the seat delete holes where the hardware goes; this depends on your year model of mustang. The instructions will tell you where to go; also it will tell you to trim the seat delete back part. I did not have to do that, it just went right in place. But if so, then just get some shear scissors and cut it then put back the carpet which is one the seat delete kit.)
16. You can now use the bolts you removed from the plastic seat bottom brackets to hold the bottom of the rear seat delete in. You will be installing the left and right parts of the bottom of seat delete kit. But I went to Lowe’s and bought the 4 bolts and 4 washers to fit. I used the bolts from step 8 to find the correct bolt pattern and size.
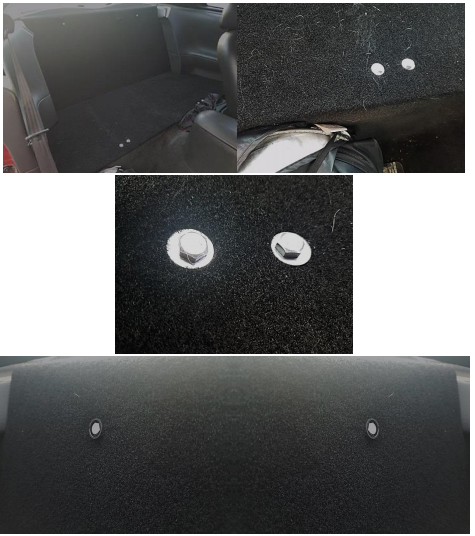
*(These pictures are in order, the final seat delete kit, than the bottom bolts and washers from left to right side, than the back of the seat delete from left to right with given hardware.)
Installation Instructions Written by American Muscle Customer 8/21/2017
