 FREE 1 to 3-Day Delivery on Orders $149+ Details
How to Install Roush Cold Air Intake on your Mustang
Installation Time
1 hours
Tools Required
- 5/32" Allen Wrench
- 3/32" Allen Wrench
- 5/16” & 10mm -1/4” Drive Socket
- 1/4” Drive Ratchet and Short Extension
- Razor Knife or Equivalent

Shop Parts in this Guide
C. A. R. B. EO # D-418-14
See “Important EO Note” below
Included with your ROUSH Intake System Kit is a sticker with a California Air Resources Board (C. A. R. B.) Executive Order (E. O.) number. This sticker must be placed in plain view inside of the engine compartment. Failure to do so may prevent you from passing the California smog test.
Application: 2005 – 2009 Ford Mustang GT w/ 4.6L
Notes: This kit will not fit the Stage 3 ROUSHcharged Mustang.
Installation Instructions
Important EO Note: Mustang GT vehicles built between September 2004 thru April 2005 (inclusive) and all 2007, 2008 and 2009 model year Mustang GT vehicles are not included in this C.A.R.B. exemption due to their use of a hydrocarbon absorber. It will not be legal to operate these vehicles for “on-road” use in the State of California or any other CAA Sec. 177 State.
Before installing your ROUSH Performance Product(s), read through the entire installation procedure and check to make sure all items are present. Contact ROUSH Customer Service at 1-800-59-ROUSH, 9:00 AM to 5:00 PM weekdays, for missing parts, any questions regarding fit or instructions that are unclear to you.

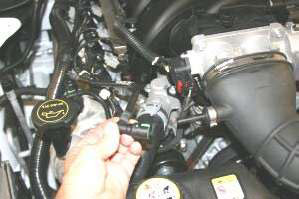
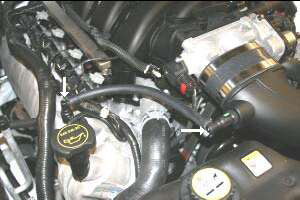
1. Disconnect battery negative cable. Remove the breather hose assembly from the vehicle by pushing in on the green plastic tabs to release each fitting. (Save breather hose for later use.)
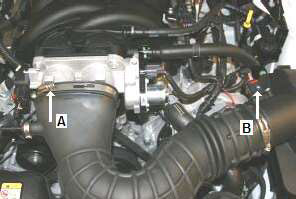
2. A) Loosen the hose clamp on the throttle body.
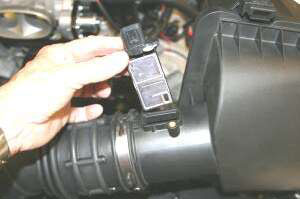
B) Slide the red tab on the electrical connector and disconnect from the mass air flow sensor.
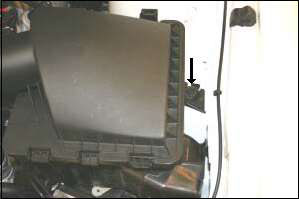
3. With a 10mm socket, remove and save the bolt that holds the factory air box to the fender.
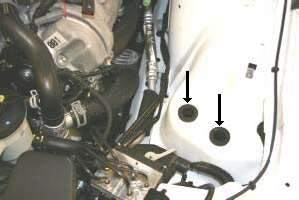
4. Remove the complete factory air inlet assembly. (Note: Make sure the two factory grommets remain in the lower air box support.)
5. Using the provided #20 Torx Bit, remove the mass air flow sensor from the factory inlet air tube. (Save the mass air flow sensor for later use.)
6. With a 10mm socket, remove and save the bolt that holds the factory anti lock brake bracket as shown.
7. Install the Filter Adapter into the Cool Air Dam as shown, using three 1/4”-20 x 1/2” Button Head Bolts and three 1/4” Flat Washers.
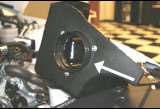
8. Slide the provided Aluminum Spacer, into the hole in the Cool Air Dam Assembly as shown.
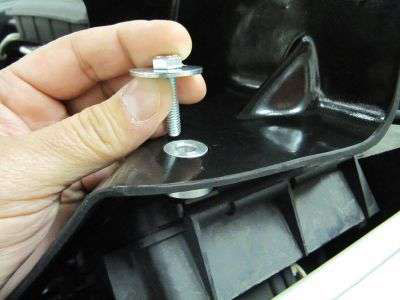
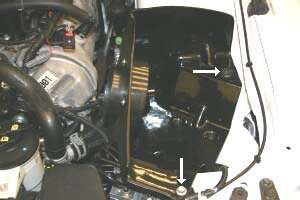
9. Install the Cool Air Dam Assembly pins (on bottom) into the factory grommets from Step #4. Reinstall the bolt from Step #3 using new Fender Washer into the inner fender. Reinstall the bolt from Step #6 into the anti lock brake bracket.
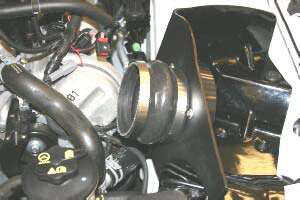
10.Install the Hump Hose onto the Filter Adapter with one #64 Hose Clamp and tighten. Place one #64 Hose Clamp loosely onto the Hump Hose as shown.
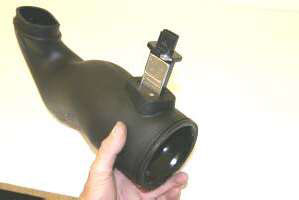
11.Install the Grommet into the ROUSH Intake Tube and then install the Aluminum Fitting into the Grommet, as shown, tapered end first.
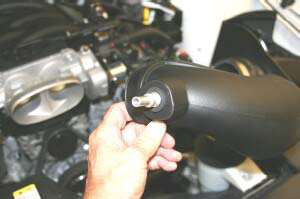
12.Insert the Tube Insert into the ROUSH Intake Tube, aligning the slots as shown.
Important Notice: Removal of the Tube Insert from the ROUSH Intake Tube makes this kit “For Racing or Off-road Use Only”, and NOT LEGAL for “On-road” use in the State of California.
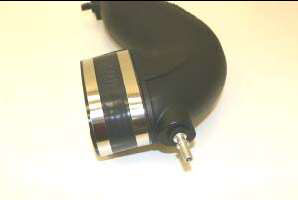
13.Align the slots of the ROUSH Intake Tube and Tube Insert. Install the mass air flow sensor, from Step #5, using two supplied #8-32 x 3/8” Button Head Bolts. Do not use the factory bolts.
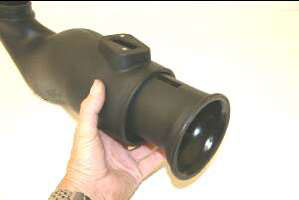
14.Install the Oval Coupler with one #72 Hose Clamp and tighten. Place the second #72 Hose Clamp loosely onto the Oval Coupler as shown.
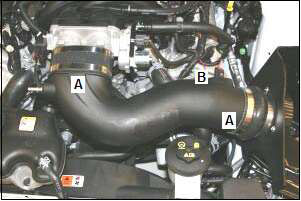
15.A) Install the ROUSH Intake Tube, into the Hump Hose first, then into the Oval Coupler. Tighten the Oval Coupler, Hose Clamp and then the Hump Hose, Hose Clamp.
B) Reconnect the electrical connector onto the mass air flow sensor. Slide the red tab to lock the connector.
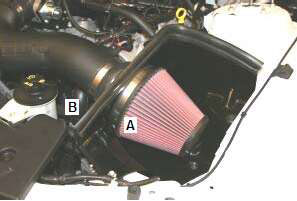
16. A) Install the ROUSH Premium Filter onto the Filter Adapter using the supplied Hose Clamp.
B) Install the supplied Weather Strip on the top edge of the Cool Air Dam Assembly.
(Note: The weather strip is pre-cut to the proper length. Start from one end and work your way to the other end to ensure even placement.)
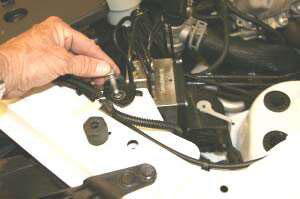
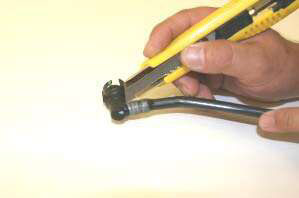
17. VERY CAREFULLY!!! With a razor knife, cut the plastic tube away from the factory ends of the breather tube assembly as shown.
18.Install the factory ends onto the supplied 3/8”x 12” Breather Hose as shown.
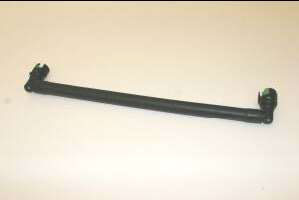
19. Install the new Breather Hose Assembly as shown.
20. Double check your work. Make sure there are no foreign materials in the intake path. Make sure all clamps, hoses, bolts, and screws are tight.
21. Reconnect the negative battery cable.
22. California Customers...Apply the C. A. R. B. Sticker in the engine bay, near the air box, in clear view.
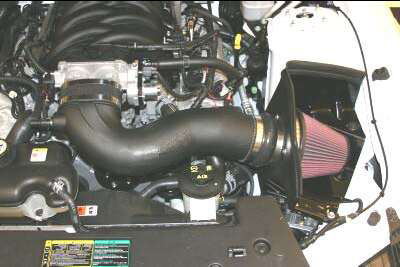
Congratulations!!! You have completed the installation of the ROUSH Performance Products, Air Induction Kit. It is recommended that you save all parts removed from your vehicle during the installation of this kit.

