 FREE 1 to 3-Day Delivery on Orders $149+ Details
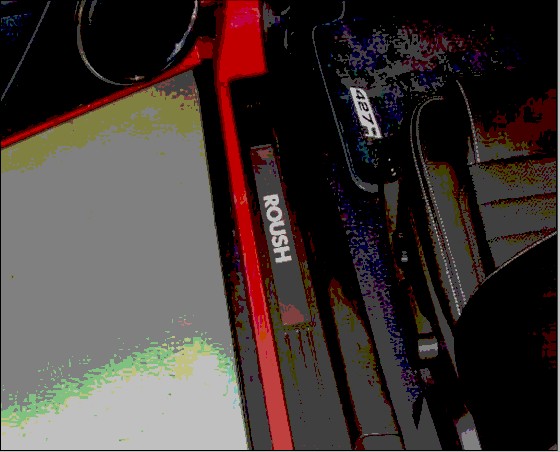
How to Install Roush Illuminated Door Sill Plates (10-14 All) on your Ford Mustang
Installation Time
1 hours
Tools Required
- Isopropyl Alcohol Packets
- Needle nose pliers
Installation Instructions
Before installing your ROUSH Performance Product(s), read through the entire installation procedure and check to make sure all items are present. Contact ROUSH Customer Service at 1-800-59-ROUSH, 9:00 AM to 5:00 PM EST, weekdays, for any questions regarding fit, missing parts or instructions that are unclear to you.
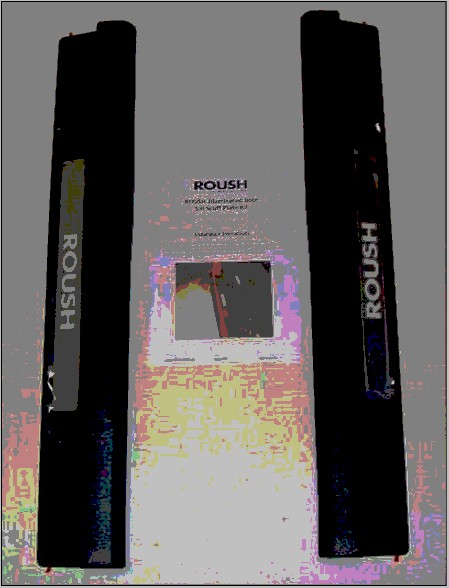
Packaging List for ROUSH Door Sill Scuff Plate Kit

Scuff Plate Removal
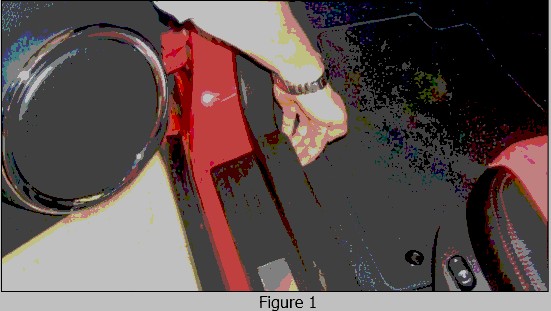
1. Open the driver’s door. Starting at the front of the scuff plate, pull the left scuff plate straight up from the door sill releasing the four (4) spring lock retainers. Refer to Figure 1. The scuff plate is connected to the vehicle wiring harness so only lift 2-3 inches.
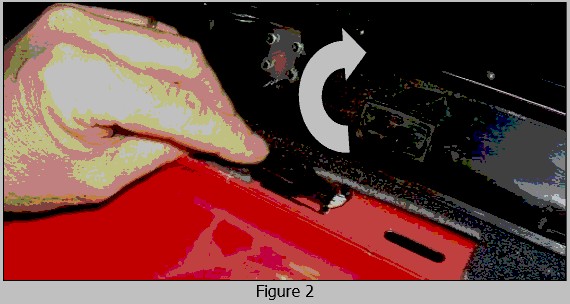
2. Roll the scuff plate toward the driver’s seat. Press the release tab and unplug the wire harness connector. Refer to Figure 2. Remove the left scuff plate from the vehicle.
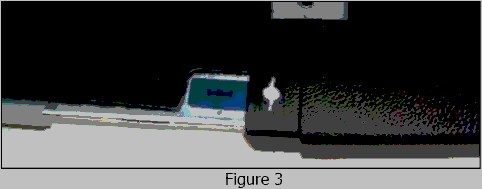
3. If any of the spring lock retainers separate from the scuff plate and remain attached to the door sill sheet metal, use needle nose pliers to remove the spring lock retainer from the slot in the door sill. Refer to Figure 3.
4. Remove any foam tape residue that remains on the door sill sheet metal and clean the area with Isopropyl Alcohol. Allow to Dry.
Scuff Plate Installation
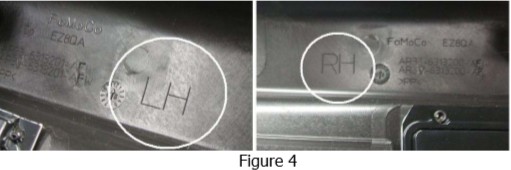
5. Obtain the LH ROUSH Scuff Plate. LH and RH Scuff Plates can be identified by the “LH” or “RH” marking on the back side of the Scuff Plate. Refer to Figure 4.
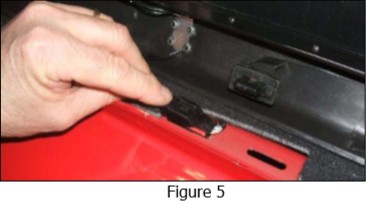
6. Place the ROUSH Scuff Plate next to the driver’s seat and connect the wire harness connector to the vehicle wiring harness connector. Ensure the connector is fully inserted and snaps into place. Refer to Figure 5.
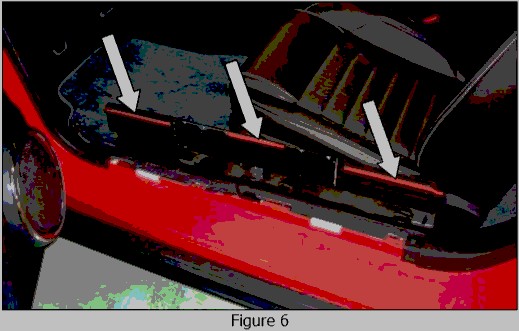
7. Remove the three (3) pieces of red backing tape from the back side of the ROUSH Scuff Plate. Refer to Figure 6.
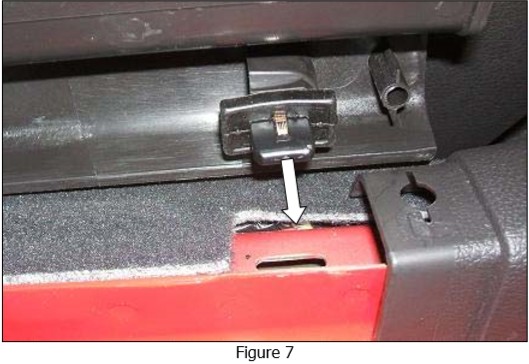
8. Align the four (4) retainer spring clips to the openings in the sill plate sheet metal and press the ROUSH Scuff Plate to the door sill. Refer to Figure 7. Ensure all four (4) fasteners are pressed fully into place. Press the outer edge of the scuff plate (foam tape) to the door sill sheet metal. This will adhere the tape for a tight bond.
9. Repeat steps 1 through 8 and install the right ROUSH Scuff Plate onto the right door sill.
10. Referring to your Owners Manual, cycle through the My Color selections to verify the ROUSH Scuff Plate illumination.
Congratulations!!! You have completed the installation of the ROUSH Performance Products, Door Sill Scuff Plate Kit. It is recommended that you save all parts removed from your vehicle during the installation of this kit.
