 FREE 1 to 3-Day Delivery on Orders $149+ Details
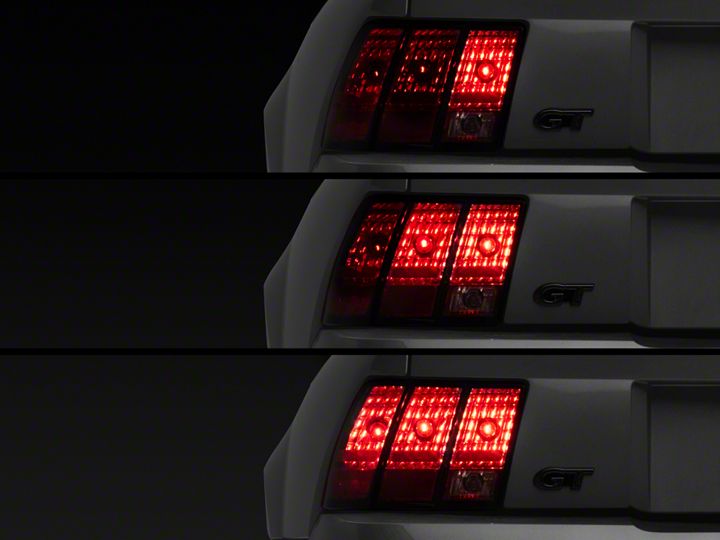
Mustang Sequential Taillights Kit - Plug-in ('96-'04) - Installation Instructions
Installation Time
15 minutes
Tools Required
- 1/4 Drive 11mm Wrench or a Deep Well Socket and Ratchet
- Small Flathead Screwdriver
- T-30 Torx Bit and Driver
Shop Parts in this Guide
Installation
1. This will all take place in the trunk, so empty out the trunk before starting!
2. UNPLUG the BATTERY! Something you should always do when working with the electrical system.
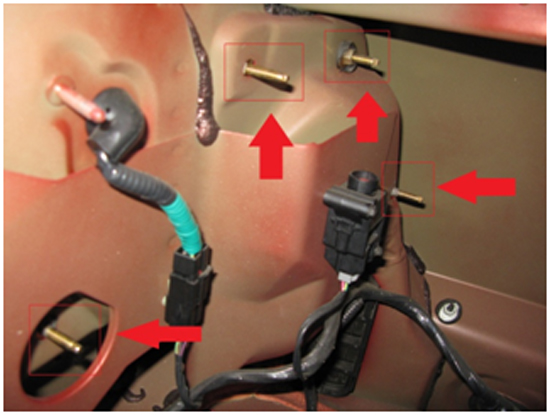
3. With the trunk open, locate trim where the trunk latch is. There will be 4 lock pins. Using the flathead screwdriver, pop these out, and keep them somewhere safe.
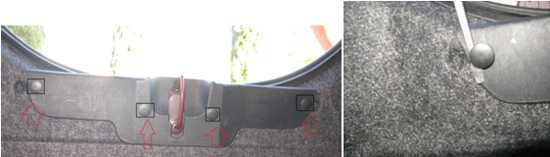
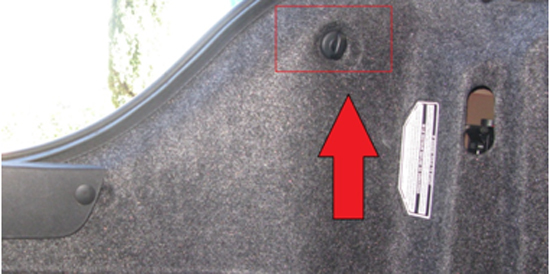
4. There will be 2 trunk net latches, one on each side of the trim. Using the wrench, gently unscrew these. *There may be some difficulty getting them off, but they DO unscrew off.
5. Once the trim piece (step 1) and the 2 cargo net hooks (step 2) have been removed, slide the cargo liner out, and place it somewhere safe during the rest of the installation.
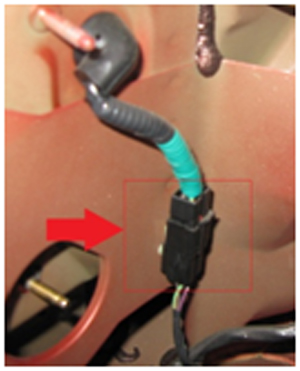
6. Unplug the plug from there connector on each side of the trunk (one on each side, right behind the tail lights)
7. There will be four 11mm nuts (on each side) holding the light in place. Remove all of these on both sides, and keep the nuts somewhere safe.
8. with all the nuts removed, the light should be ready to pop out. Slide the wire grommet through the hole so that it is outside of the vehicle.
9. You should now be able to completely remove the tail light now (along with the wiring)
10. Unplug the light socket housings (there will be four for each tail light), by turning them until they simply pop out.
11. With the old harness out now, you can pop out the old bulbs, and just slide them into the new harness. (Or, you could use new bulbs if you desire)
12. With the bulbs in the new sequential harness, time to put the new kit in the tail light. Simply just twist the new bulbs into the tail lights.Note:*1 is for the innermost socket, 2 is for the middle socket, and 3 is for the outermost socket, and BU is for the back up light*Note:Either new sequential harness can be used for either the left / right. Just make sure the 1, 2, 3, and BU lights are properly placed. *The new sequential harness is labeled 1, 2,3, and BU.*
13. With the new sequential harness in the tail lights, it’s now time to reinstall everything. Slide the new harness back into the trunk grommet, and plug it back into the tail light plug. Now would be a good time to test the kit, so plug back up the battery, and try her out!
Note:Make sure both tail lights are plugged in when testing* If everything is looking good, continue on. If not, make sure all bulbs are in snug / the right socket.*
14. Now to put everything back together. Slide the tail lights back into the housing, and put the 4 nuts for each side back on. The tail light housing should be snug in place again. With the tail light harness plugged into the connector again, the trunk liner can come back in. So in reverse order as you took them out, put back in the trunk liner, the two cargo net hooks, and finally the cargo trim (with the trim in place, just push the pins in).
15. With everything back in order, you are ready to hit the road and show off your new lights!
Installation instructions provided by AmericanMuscle customer Stephen Gilardi 10.6.10
