 FREE 1 to 3-Day Delivery on Orders $149+ Details
Shelby 5-Speed Short Shifter ('05-'09 GT) - Installation Instructions
Installation Time
2 hours
Tools Required
- 3/8" ratchet
- ratchet
- 3/8 torque wrench (needed for 18ft/lbs. spec)
- 6" ratchet extension -3/8"
- swivel head socket head adapter
- Standard Phillips-head screwdriver
- 12" flat-head screwdriver
- 13mm socket -3/8"
- 13mm ratcheting wrench
- 18mm socket -3/8"
- 17mm socket -3/8"
- 7mm socket-1/4"
- 6mm socket -3/8"
- 10mm socket -3/8" and
- 4mm Allen socket -3/8"
- 6mm Allen socket -3/8"
- 12mm x 12pt socket-3/8"
- Feeler Gauge (.030)
- Floor jack
- Transmission jack
- Jack stands
- Safety Glasses
- Gloves
- Blue Loc-tite
- WD-40 (or similar)
Installation
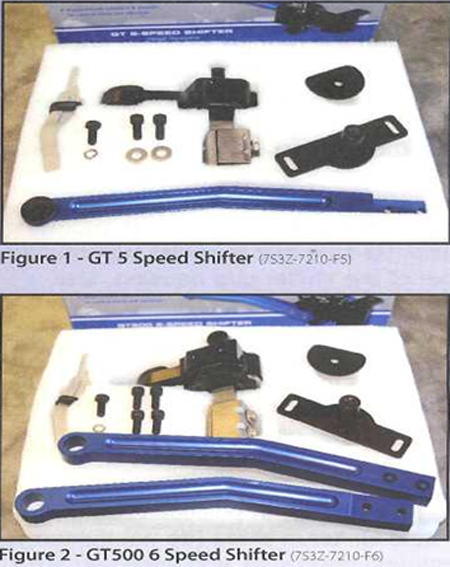
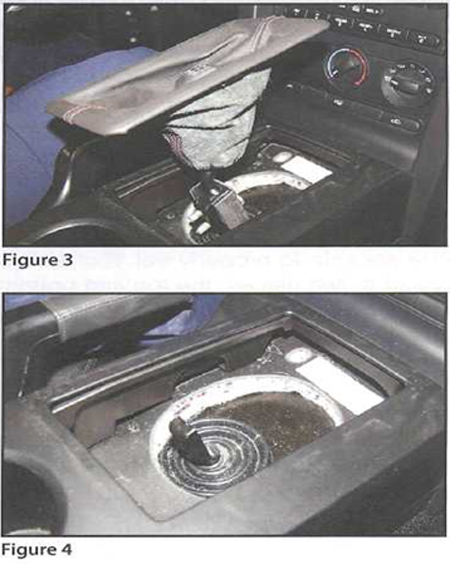
1. Please lay out all parts and ensure that you have everything needed for installation. Review these pictures and installation guide thoroughly so as the installation progresses, you are familiar with the coming steps and procedure. Refer to figures 1& 2 for parts overview. Enjoy!
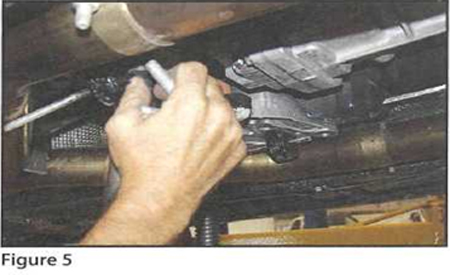
2. Make sure your factory shifter is in neutral. The boot should lift up with a little pressure on the lip, exposing the shifter arm and bolts. Using the 13mm ratcheting wrench, remove the two bolts holding the handle onto the pivot lever (maybe necessary to place shifter in 4th gear for this but be sure to return to neutral when done). The handle, boot and knob should all be removed as one piece. (Figures 3 & 4)
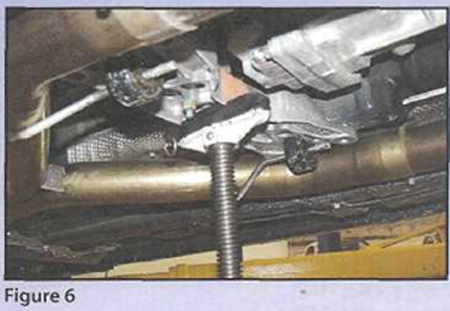
3. With the vehicle properly supported with jack-stands (or preferably a lift), raise the transmission jack under the center of the transmission cross-brace for support. You will then want to remove all 4 outside 18mm bolts from the cross-member and gently lower the transmission approx. 2-3" with the transmission jack. (Figures 5 & 6)
4. Locate and mark with a sharpie the position of the bolts on the driveshaft support brace (where the two shafts meet) and remove the two 13mm bolts holding it in. You will want to replace this brace as close to the factory location as possible when re-installing later in these instructions. You also want to remove the driveshaft from the transmission output shaft balancer by removing the (4) 12mm12-point bolts. This will require the help of a friend, as you will need to place the transmission in and out of gear to rotate the driveshaft and access the bolts needing to be removed. Gently lower driveshaft onto exhaust so that your entire shifter assembly is accessible. (Figures 7 & 8)
Note:Some customers will have custom exhaust components that will need to be lowered or removed for this installation and others may have a one-piece driveshaft that requires no brace removal on this step.

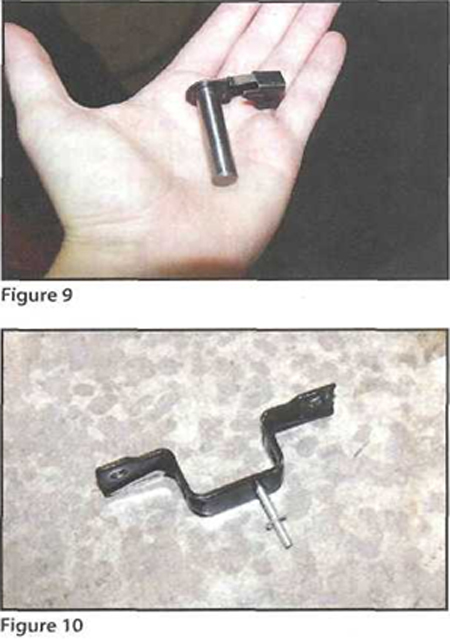
5. Remove the lower pivot arm linkage bolt on your factory shifter with the 17mm socket and 6mm Allen wrench. Next remove the forward support arm clips with the 12" long flat-head screwdriver. (This will be very tricky and will require studying figure 9to get a grasp of how it is shaped for removal; this is possibly the hardest part of this installation. The good news is that they are very easy to re-install with the new shifter in place). Finally, remove the (2) 10mm nuts holding in the rear isolator of the factory shifter. The shifter can now be removed. (Figures 9&10)
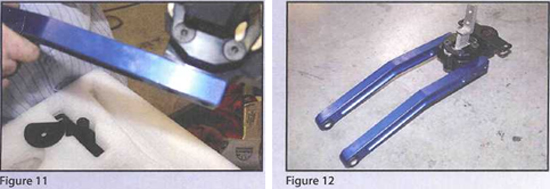
6. Now you want to assemble your new shifter leaving the handle off for now. Be sure that the billet support bars notches face in to match the curve of the shifter cup housing. Use a drop of blue loc-tite on the support arm bolt threads and screw in with the 6mm Allen wrench socket head. You want to torque these to 18ft/lbs with your torque wrench. Next install the isolator and plates with a 13mm socket. You now want to remove the support arm bushings from your factory shifter and transplant them into your new shifter's billet arms. This is accomplished by removing the inner plastic sleeve and then pushing out the rubber with your thumbs. (Figures 11 & 12)
7. Place shifter in position in vehicle and loosely re-install 10mm nuts to hold shifter in place (do not tighten yet). Re-install support arm clips removed previously and once you are sure they are secured, you may tighten the rear isolator nuts. Mount factory linkage to new shifter with original OEM bolt and nut. Use the transmission jack to raise the cross-member and trans back into position and re-install the 4 bolts previously removed from the cross-member.
Note:The fit can be very tight! Please use WD-40 or similar lubricantto ease the linkage bolt through our new Delrin bushing.
Note:You are not yet reconnecting the driveshaft (and exhaust if youhave an aftermarket system).
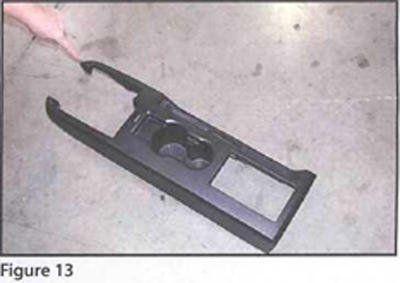
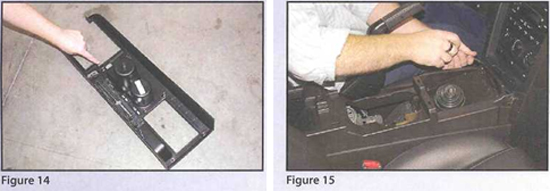
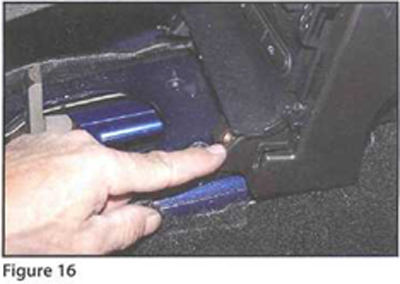
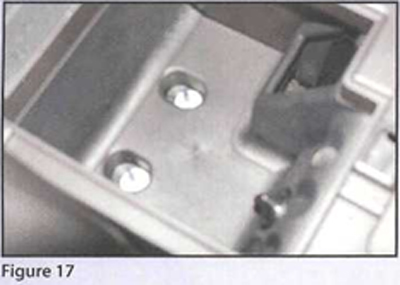
8. Back in the passenger compartment, you will need to remove the center console to properly set your shift stops. The entire console comes apart in two pieces, the top and bottom. Removing the two Phillips-head screws in the rear of the console compartment will allow you to carefully pry up on the snap anchors to remove the top half of the console. Removing the front two 7mm screws and rear two lower console compartment 10mm nuts with your sockets will allow you to remove the lower console, completely exposing the shifter area. Remove the juke padding and then use your %" swivel-head on 10mm socket to remove the 4 nuts on the studs that hold on the steel top plate and rubber boot. (Figures 13,14, 15,16 & 17)
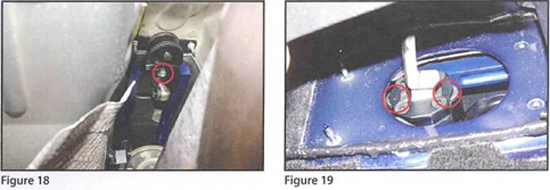
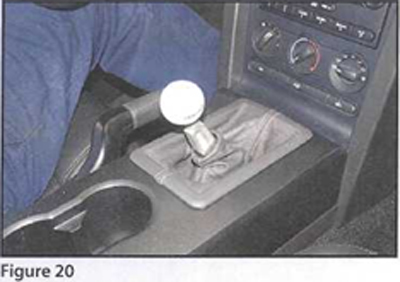
9. Using a friend again, you will need someone below the car accessing the shift stop locks and you will need someone in the passenger compartment properly setting the stop itself. You will want to install the new shifter handle at this point with the two factory 13mm bolts so that you have leverage and your friend below will want to loosen the stop locks for adjustability. Engage the shifter into 3rd gear and hold the shifter there with some force. While doing this, swing over the front round shift stop so that its loosely touching the pivot lever. Using the feeler gauge, place.030" between the shift stop and the pivot lever as a starting point and have your friend below lock the stop in place with a 13 mm wrench a 4 mm Allen socket Repeat this procedure for the rear shift stop but with the shifter engaged in 4th gear. After tightening the stops, re-check your setting by shifting hard and ensuring that the pivot lever touches the shift stop. Upon release, there should only be a small gap. Once this is done, you can re-assemble the center console, being sure to replace the steel plate, rubber boot and juke padding. Replace boot and install compatible Shelby Performance Parts shift knob; being sure to install included boot retainer onto the factory shifter boot. Make sure that all gears engage correctly (without the car running!) and check to be sure there is no binding in the linkage you can feel. (Figures 18, 19 & 20)
Note:You may need to remove the handle again to re-place the factory rubber boot over the lever.
Related Guides
-
Installation
-
Installation
