 FREE 1 to 3-Day Delivery on Orders $149+ Details
How To Install an SHR Lower Grille Diamond Mesh Insert on your 2011-2012 GT/CS; 12 Boss Mustang
Installation Time
2 hours
Tools Required
- Ratchet / Nut Driver & extension
- Body Trim removal tool (available at silverhorseracing.com)
- Jack and jack stands, ramps, or vehicle lift
- Flat and Phillips Screwdrivers
- Felt tip pen ( to mark hole locations)
- 5.5, 7, 10 mm sockets
- 3/8” capacity hand drill (for use with supplied ¼” drill bit)
- Razor blade
- Blanket or body panel stand
- Tape Measure or Ruler

Shop Parts in this Guide
2010-12 Lower Radiator Grill Debris Shield
P/N S297-200-GT & 200-CS
Thank you for your purchase of SilverHorse Racing products. Please read all directions before beginning the installation. A factory shop manual should be available for reference during installation. If, after reading these and any accompanying directions, you feel that you may not be able to complete the installation safely and properly, please seek out professional installation by certified technicians. Please read and understand our product purchase agreement (included on yellow sheet) prior to starting installation. Vehicle should be off and in park with parking brake set prior to beginning installation.
Directions:
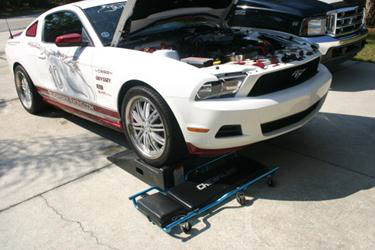
1) Safely lift and support front of vehicle off the ground, using proper jack stands and appropriate safety equipment to support vehicle. (Figure 1)
Figure 1
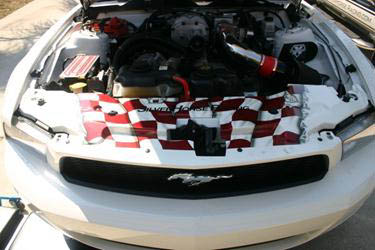
2) Open Hood (Figure 2)
Figure 2
3) At lower radiator inlet opening on driver's side, there is the ambient Air temperature sensor. Remove this form the opening and let hang safely out of the way.
4) Remove front bumper assembly from the vehicle. To do this, follow steps 'a' thru 'e' below:
a) There are two 7mm hex-head screws in each front wheel well that must be removed holding the back edge of the bumper.
b) Across the bottom of the bumper are a number of 5.5mm hex-head screws and plastic rivets retaining the bumper to the lower air diverter that extends back from the bumper. Remove these fasteners as needed to separate the two pieces from one another.
c) Across the top of the bumper there are 4 plastic rivet clips holding the radiator cover to the bumper, remove these as well by pulling up on the center first using a trim removal tool or screwdriver, and then removing the outer porton from the vehicle.
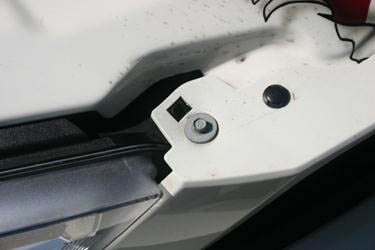
d) Finally there are two 10mm bolts holding the bumper to hard supports at the top which must be removed (Figure 3)
Figure 3
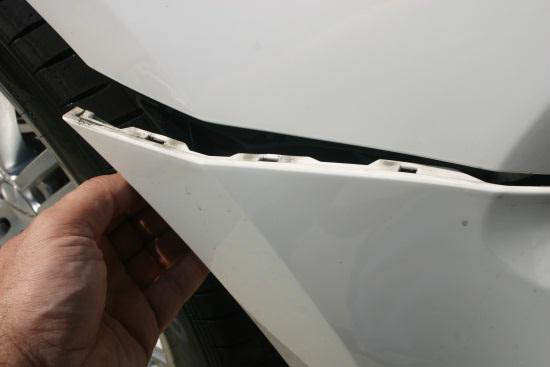
e. At this point the only things left holding the bumper will be a series of snap-clips near the headlights (Figure 4) and the wiring to the parking lights which must be unplugged.
Figure 4
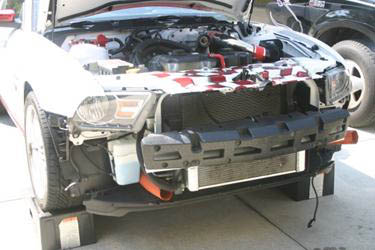
If your car has foglights or functional brake ducting, they will have to be disconnected from the bumper as well. The bumper can now be removed. (Figure 5)
Figure 5
5) Place bumper on soft blanket, towels, or body stand to avoid scratching painted surfaces. 6) Remove the lower bumper insert from the main bumper. This will insure you do not accidentally drill through the lower during the following steps which would cause visible holes when installation is complete. It is held to the upper with a series of tongue and groove clips and screws at both corners. |
Figure 6
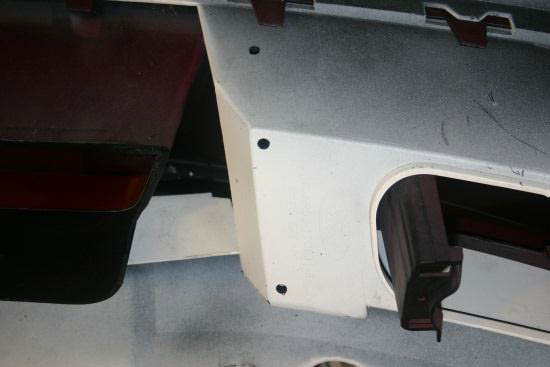
7) For a California Special or Boss 302, see step 7a/c. For a GT, see step 7b/c. a. For the California Special or Boss 302 editions, a total of 10 holes will be drilled in the urethane hidden from view once re-assembled. Use the included .” drill to drill two holes in each vertical support as shown in Diagram 1 & (figure 6), and 3 holes in each brake duct / foglight location as shown in Diagram 2 and (figure 7). |
Figure 7
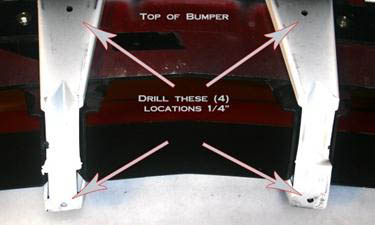
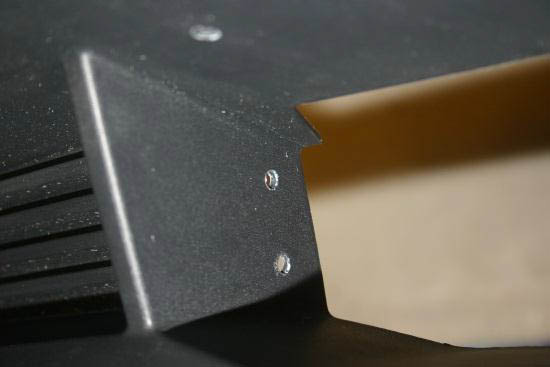
b. For the GT model, a total of 4 holes will be drilled in the main bumper hidden from view as shown in Diagram 1 and figure 6, and 6 holes will be drilled in the lower bumper insert, which will be visible when complete. See Diagram 3 and (figure 8) for locations. |
Figure 8
c. For ALL models - Debur holes with small razor after drilling. Reassemble main and lower bumper sections. 8) Looking at the back of the bumper, align mesh grill so it is approximately centered in the opening from side to side, and the flat side is just touching the bottom of the bumper assembly. “Tuck” the top edge under the clip fasteners holding the lower bumper insert to the upper (figure 9). |
Figure 9
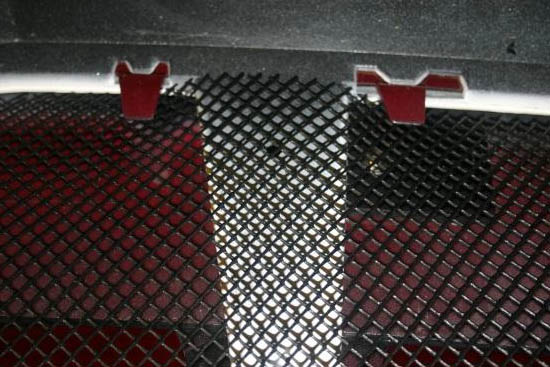
Now, adjust as needed so that holes in the center support bars line up with the mesh, and install 4 plastic rivets through the mesh grill and into the holes (figure 10) – do not push the center of the rivet through yet in case you need to remove it for adjustment. |
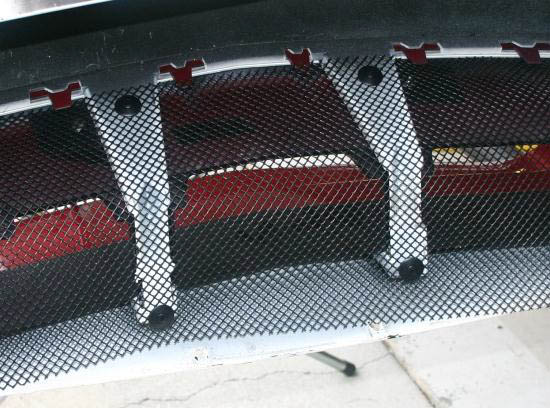
The bottom of the mesh grill is purposely left unsupported so that small debris can fall down after being deflected and eventually out of the car through the bottom, instead of being captured requiring future removal for cleaning. |
Figure 11
a. On the California Special / Boss 302, work out to each side and install the three plastic rivets on each end as shown (figure 11). When all ten rivets are in place and securing the grill, push centers of rivets into the closed position. |
Figure 12
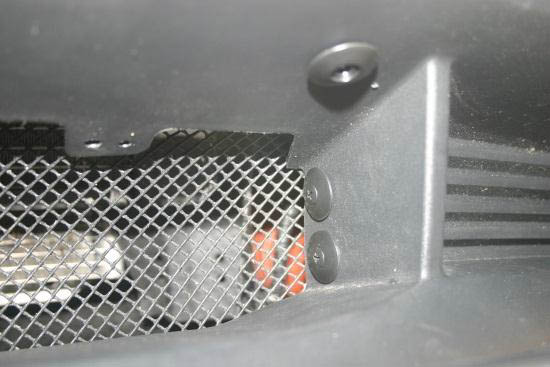
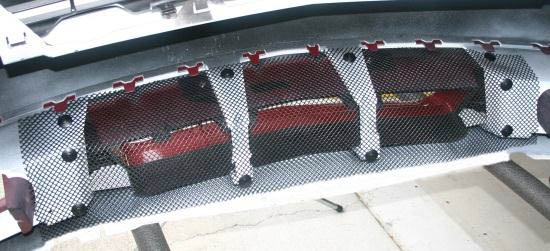
b. On the GT grill, the ends of the grill will be folded around the corners of the lower grill section, and the 3 rivets on each side will be place from the front into the back, with the rivet expanding into the mesh grill as shown in (figure 12). Although the mesh grill will fold with normal hand pressure, a blow dryer or other low power heat source may aid in shaping the grill around the corners of the lower bumper insert. |
Figure 13
9) When you are satisfied with the layout and fit of the grill, you can re-assemble the car reversing steps 6-1 with the finished result looking like (figure 13/14). Be aware that minor trimming of the grill with scissors may be required to reinstall the air charge temperature sensor, although most cars will have sufficient length of wire to feed around the grill back into the sensor’s original location. Also, if desired, minor trimming of the bottom edge may be done to increase the size of debris which can escape from the bottom of the bumper once installed. |
Figure 14
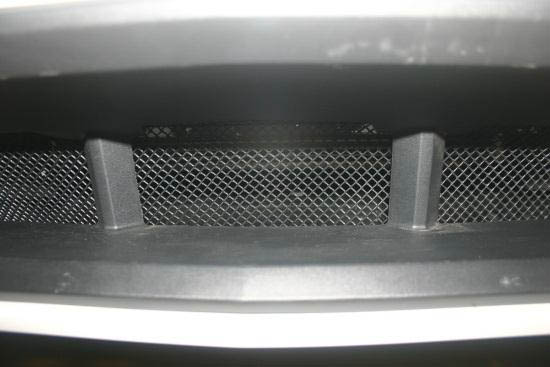
Diagram 1 – Drill these holes for ALL models (GT, CS, Boss 302)
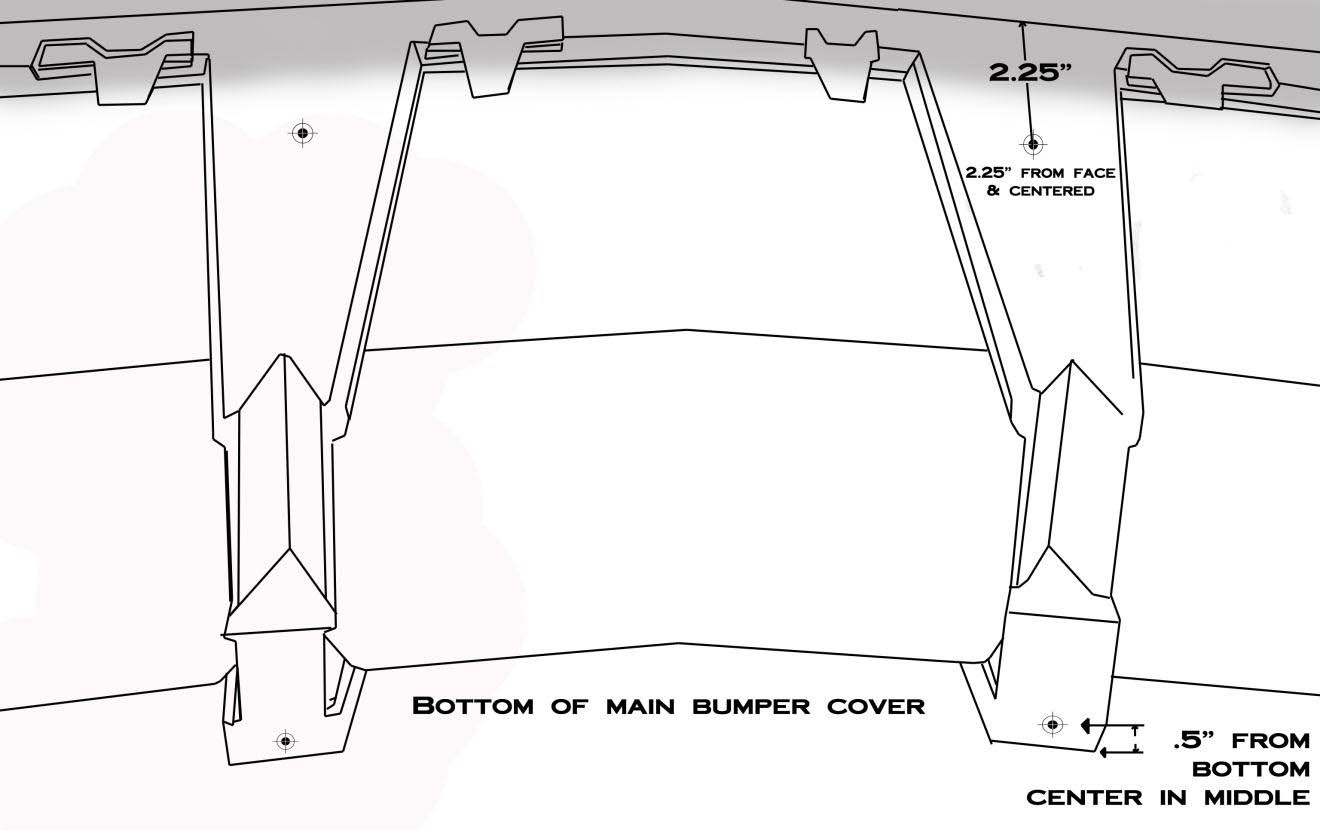
Diagram 2 – Drill these holes for CS and Boss 302 Models ONLY (Passenger side shown, repeat for driv
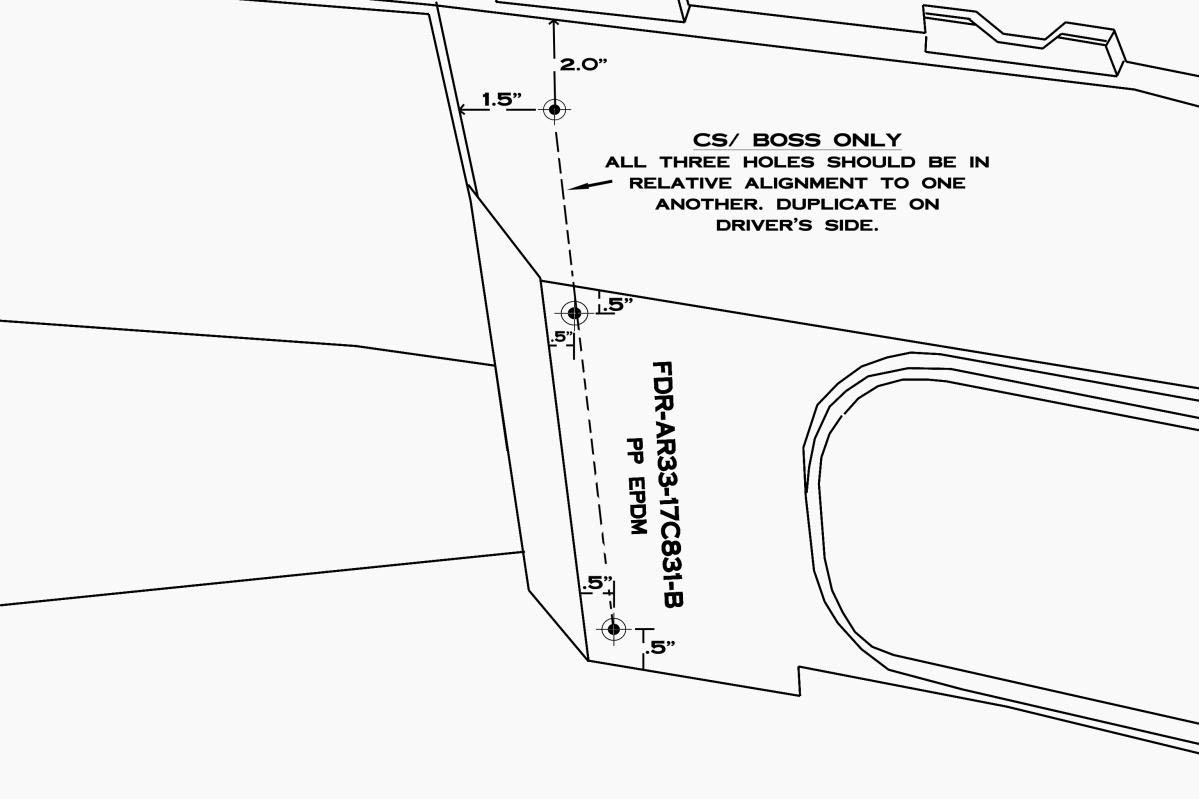
Diagram 3 – Drill these holes for GT model ONLY (Passenger side shown, repeat for driver’s

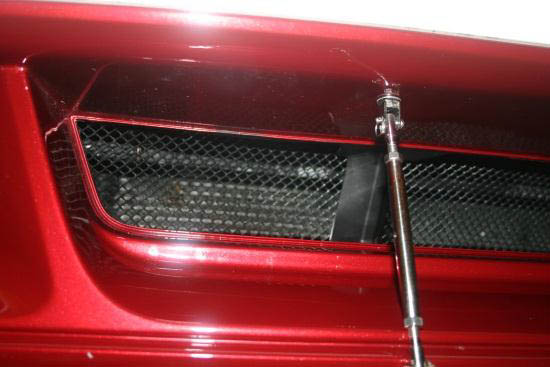
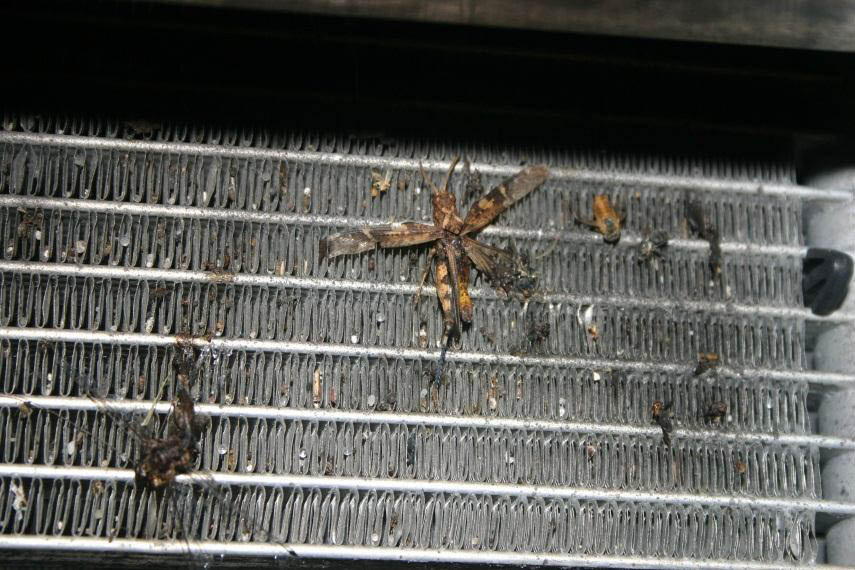
SilverHorse Racing’s lower grill insert will keep your radiator, intercoolers, and air conditioning condenser from looking like this! Grill Insert material is also available in uncut sections for custom-mounting to upper grill, brake ducts, and other exposed areas that are susceptible to damage – contact us for details!
If you have any questions, feel free to contact us at the number listed below or via email. Tech Questions: (321)-722-2813. Email us - [email protected] “If it’s not good enough for our cars, we won’t make it for yours.” |
