 FREE 1 to 3-Day Delivery on Orders $149+ Details
How to install a SLP Power-Flo Axle-Back Exhaust on your 2011-2014 V6 Mustang

PART #M31024
2011 Mustang V6, Powerflo Axle-Back Exhaust
PACKING LIST
Before installation, use this checklist to make sure all necessary parts have been included.
ITEM QTY CHECK PART NUMBER DESCRIPTION
1. 1 310556024
Muffler Assembly, DS, '11 Mustang V6, Powerflo
2. 1 310556025
Muffler Assembly, PS, '11 Mustang V6, Powerflo
3. 2 310305080
Tip, 4" O.D., 9.5"L, 2.5" Inlet, Torca and Logo
4. 2 308144380
Torca Clamp, 2.5”
5. 2 10640
Torca Clamp, 2.25”
6. 1 INSTR
Instructions
WARNING: SLP Recommends allowing the vehicle to cool (not running) for five hours before beginning installation.
INSTALLATION INSTRUCTIONS – # M31024
1. Raise and fully support the vehicle (a vehicle lift is recommended). If you do not have access to a lift, you may raise the rear using a jack/jackstands or by using drive-up type ramps.
2. With a Sawzall or other equivalent tool suitable for cutting metal, cut the factory mufflers off (both driver and passenger side) where shown in figure 1. De-burr the ends of the pipes left on the car.
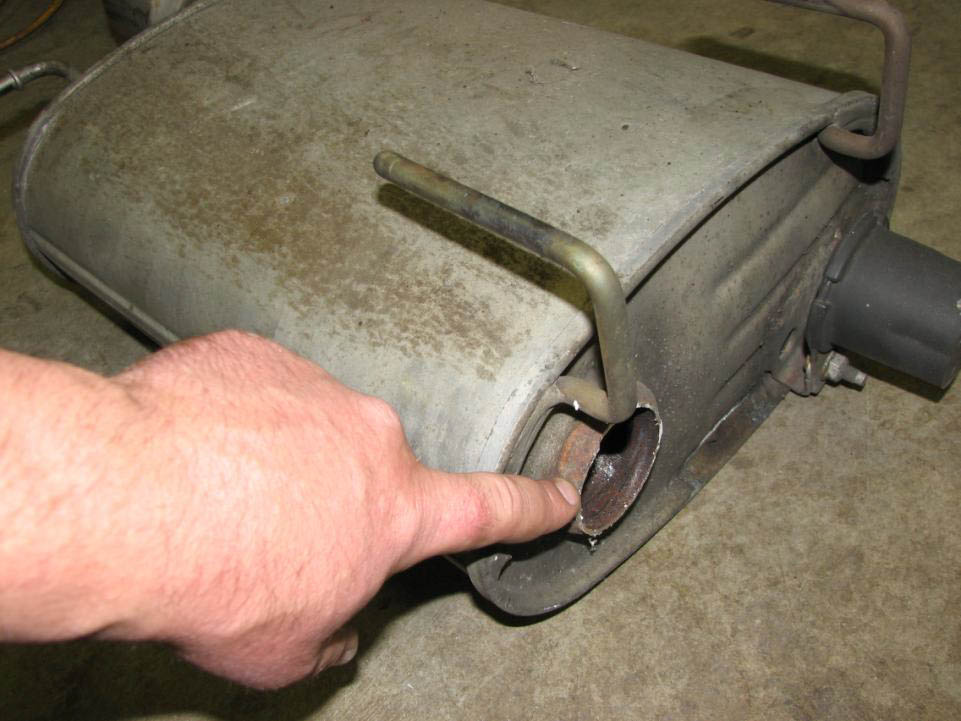
Figure 1: Cut off factory mufflers here
3. Remove the factory mufflers from the vehicle by first removing the rearmost rubber isolator and sliding the mufflers out from the fixed isolator mounted to the chassis. A few sprays of WD-40 on the isolators will make this much easier.
4. Take the SLP muffler, slide a 2.25” clamp over the inlet side, and slide onto the factory pipe you just cut. Slide the hangers into the fixed isolator at the same time.
5. Install the rear-most rubber isolator to hold the mufflers up.
6. Repeat steps 4 and 5 for the other side.
7. Slide a 2.5” clamp over the inlet of the exhaust tip, and slide onto the outlet side of each new muffler. Repeat for other side.
8. Adjust system from front to back to allow for adequate clearance all around and tighten all clamps.
9. Test drive vehicle and inspect for any leaks.
10. The finished installation should look like Figures 2 and 3.
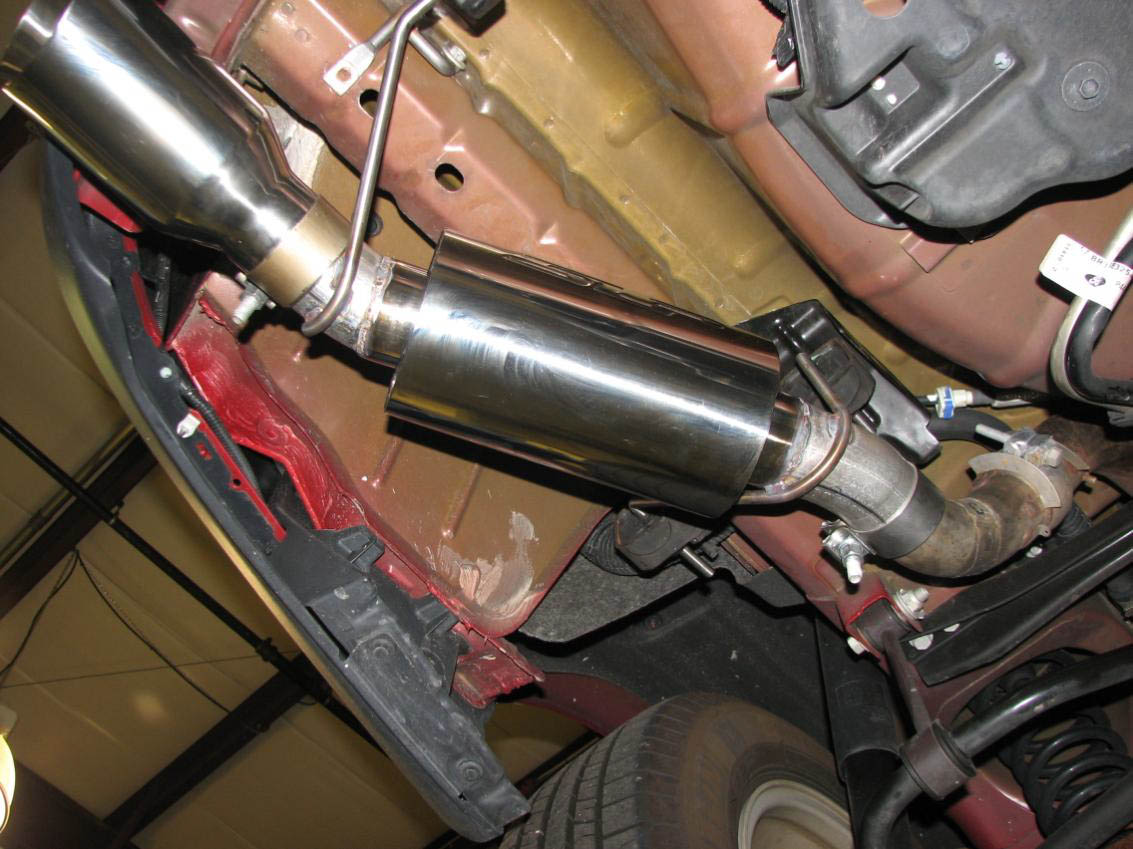
Figure 2: Finished Installation
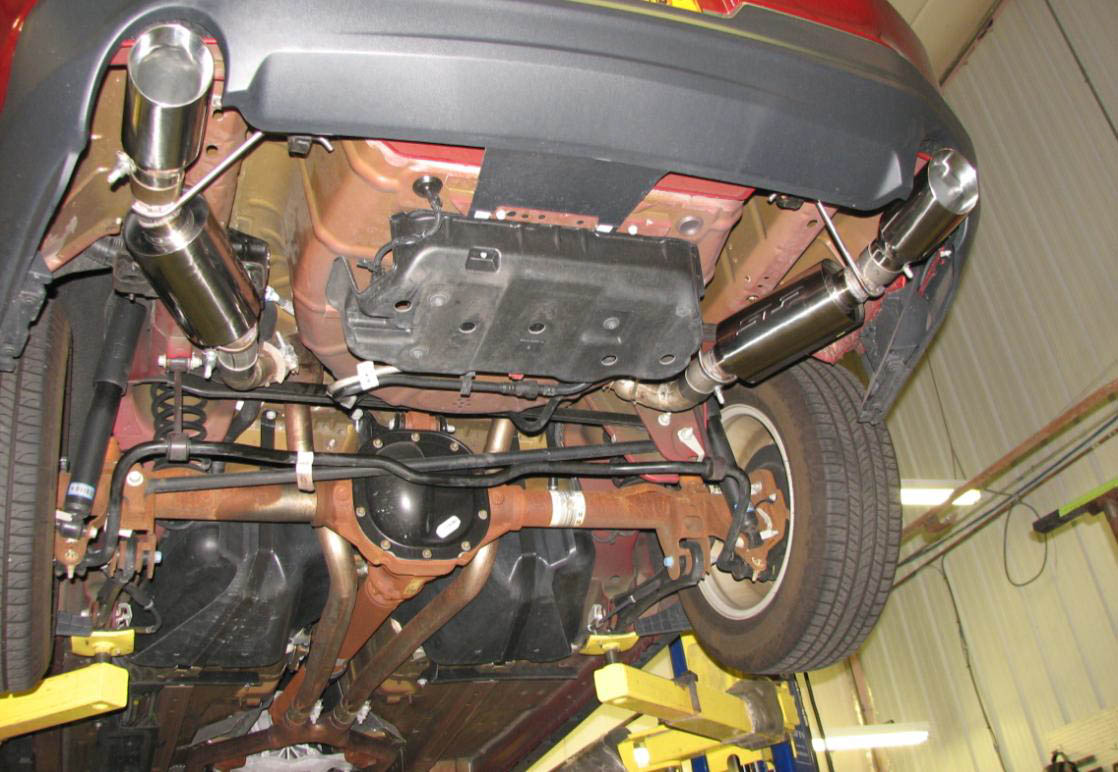
Figure 3: Finished installation
11. The installation is now complete. Enjoy!
