 FREE 1 to 3-Day Delivery on Orders $149+ Details
How to Install SLP High Flow Catalytic Converter Kit on your Mustang
Shop Parts in this Guide
The below installation instructions work for the following products:
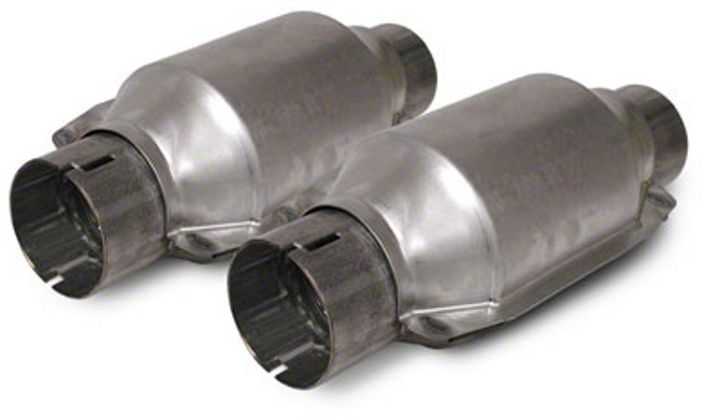
• SLP High Flow Catalytic Converter Kit (96-10)
Please read through the instructions carefully before starting this project. Take the time to get all the materials together as well as all the safety equipment.
Note:
This installation was performed on an Off road H pipe on a 2002 Mustang GT. Installation for X pipes or other brands may differ slightly)
Tools needed:
• 1 floor jack
• 2 jack stands
• 2 SLP high flow cats (included)
• 4 exhaust clamps
• 1 ratchet set (socket size varies based on whether you have OEM bolts or aftermarket. I was able to use a 15mm deep and shallow socket for the entire install)
• 1 open ended wrench set (not necessary in all cases but some spaces are too tight for a ratchet)
• Either a tail pipe cutter, wide mouth pipe cutter, or reciprocating saw (also known as a saws-all) with a metal cutting blade. I found the reciprocating saw with the metal blade to be the easiest to use.
• 1 rounded metal file or dremel with a grinding tip
• 1 shop light (not necessary but it helps)
• 2 bricks or other items to chock the rear wheels
• 1 tape measurer
• 1 marker
• 1 block of wood
• 1 rubber mallet
• 1 friend as an extra set of hands
Installation:
1. Apply the emergency brake and chock the rear wheels with bricks or wheel chocks. Jack the front end of the vehicle up with the floor jack and secure it with two jack stands. I placed the jack stands under the k-member to allow for the most access to the mid pipe.

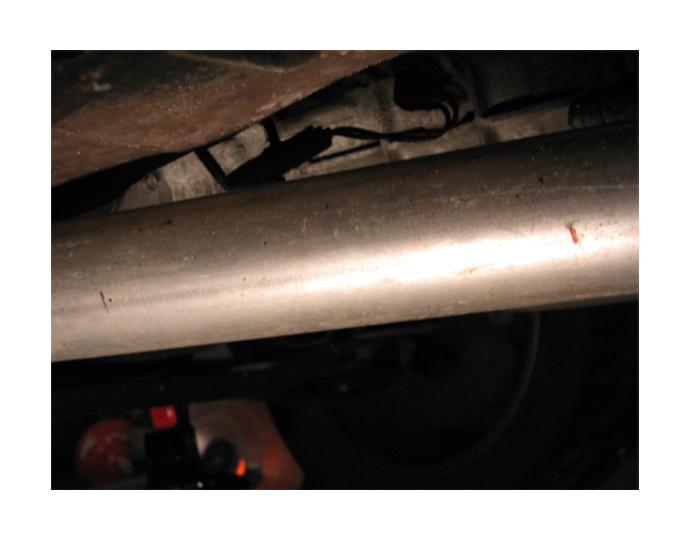
2. Find suitable locations for the placement of the catalytic converters. To do so you will need: 1) A 9" section of straight pipe that is located between the front and rear O2 sensors and 2) Approximately 2" of clearance between the 9" segment and the floor of the car
3. Now with the marker, mark a 7" segment in the middle of the 9" segment. This will be where the cuts are made.
4. Using the reciprocating saw (also known as a saws-all) or pipe cutter cut the front most marks on both sides of the mid pipe. The reciprocating saw cut through the steel like butter thus being my cutting tool of choice. While cutting make sure that the saw is not coming into contact with the floor of the car or anything else. The 2" of clearance should be more than enough to ensure this.
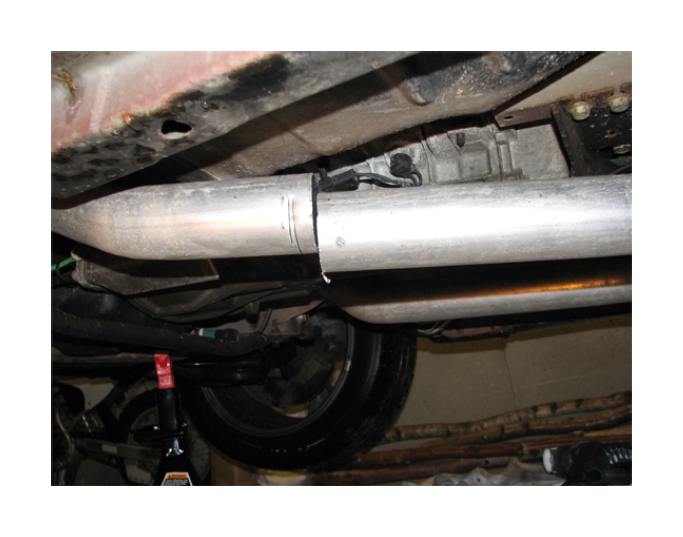
5. After the cuts are made, unplug the rear O2 sensors.
6. Once all of this is completed unbolt the rear of the mid-pipe from the catback and remove it from the car.
7. With the mid pipe off of the car make the remaining rear cuts marked on the mid pipe.
8. Before installing the catalytic converters it is important to recognize the top, bottom, inlet, and outlet of the catalytic converters. No instructions or markings were supplied with the cats so I had to do a little of my own research.
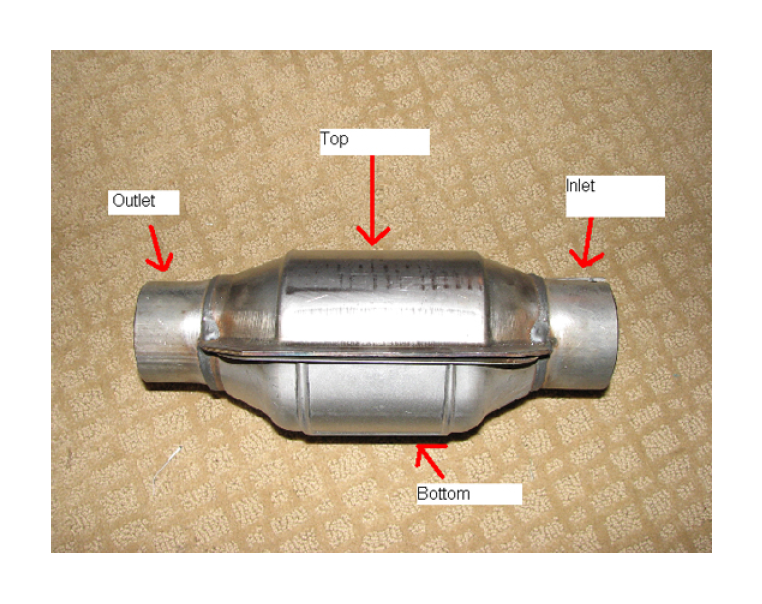
Top: Rounded Side
Bottom: “Flattened” Side. Has an additional external shield
Inlet: Larger Diameter end with visible zigzag cuts in it
Outlet: Smaller Diameter end with no cuts
9. Before installing the cats use the metal file (rounded metal file is ideal) and file the areas where the cuts were made until the edges are smooth to the touch.
10. I decided to attach the cats to the part of the mid pipe still attached at the headers. With the exhaust clamp loosely around the mid pipe insert the existing mid pipe into the inlet with consideration of the top/bottom alignment of the catalytic converter. Keep pushing the cat onto the midpipe until the pipe has completely covered the zigzag opening in the inlet. A rubber mallet and wooden block may be necessary to fully insert the cats on to the mid pipe.
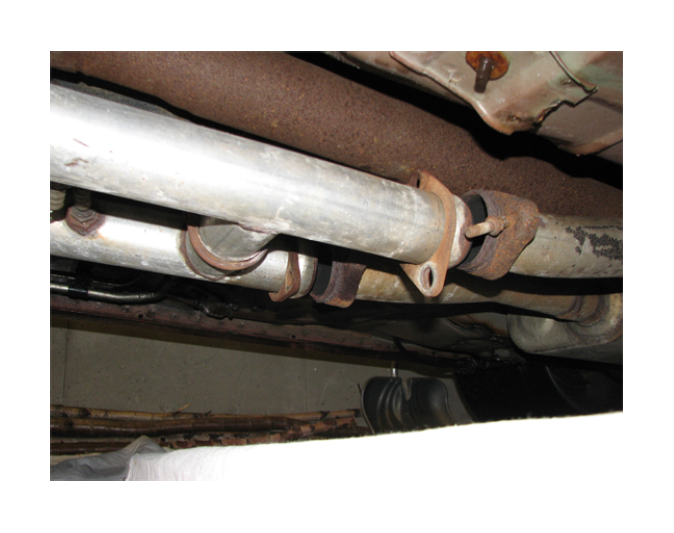
11. With both cats on it is now time to reinstall the existing midpipe (the crossover portion that is off the car). This step is much easier if you have a buddy helping you out.
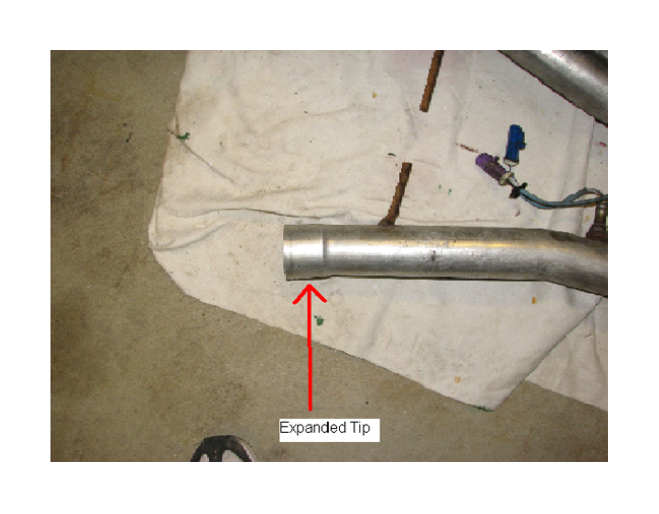
12. Line up the crossover portion with both cats and slide (or hit with the rubber mallet) it onto the cats until the rear lines up properly with the catback. I encountered a problem at this particular step. The mid pipe was about the same size as the outlet of the cats and would not slip over them. I ended up having to take the crossover portion to an exhaust shop so that they could expand the tips with a hydraulic exhaust pipe expander. This literally took 30 seconds and the guy charged me nothing for it. Make sure to bring the cats with you if you encounter this problem so that the employee knows how much to expand the mid pipe.
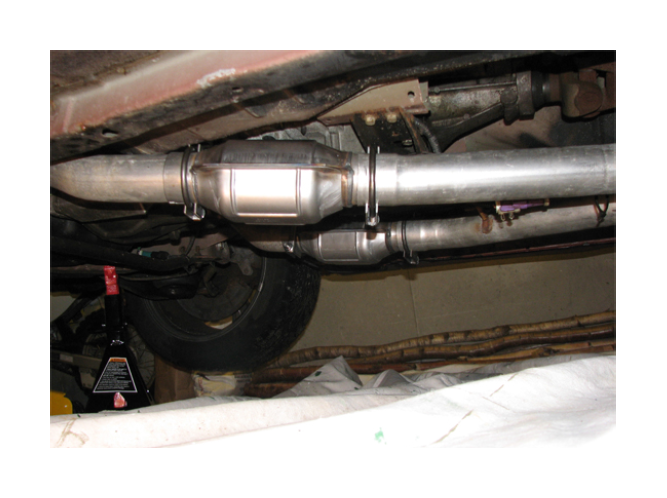
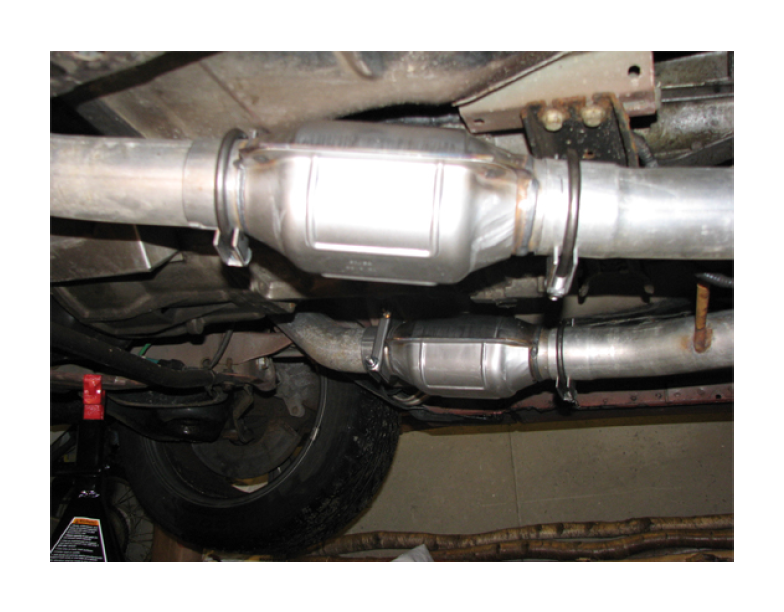
13. Once everything is in place it is safe to bolt all of the exhaust clamps down, reconnect the o2 sensors, and reattach the catback to the midpipe.
14. Turn the car on with it still jacked up to check for exhaust leaks. An exhaust leak will sound like a slight ticking noise and sometimes the exhaust vapors will be visible from the leak. Readjust if necessary.
15. I ended up taking mine to an exhaust shop to have it professionally welded. It should cost no more than $40 and take no longer than 20 minutes. But the included clamps will work just fine.
16. Enjoy your new emissions friendly exhaust!
Installation instructions provided by Andrew Mello 1.7.10
