FREE 1 to 3-Day Delivery on Orders $149+ Details
How to Install Steeda 95 lb./in. Clutch Spring Assist (11-14 GT, V6) on your Ford Mustang

Disassembly:
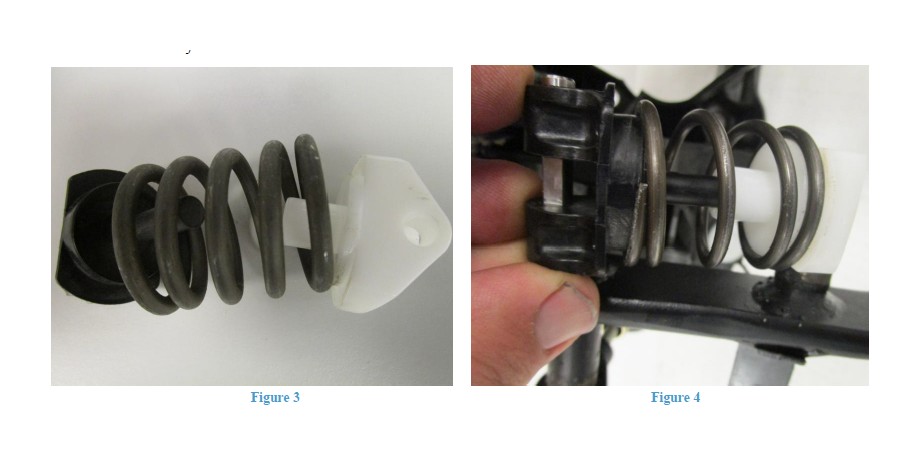
1. Using needle nose vice grips compress the two center coils of the spring until they are touching, and lock the vice grips in this position. This will prevent the spring from rapidly expanding when removed from the assembly.
2. Depress the clutch pedal fully until it rests on the backstop.
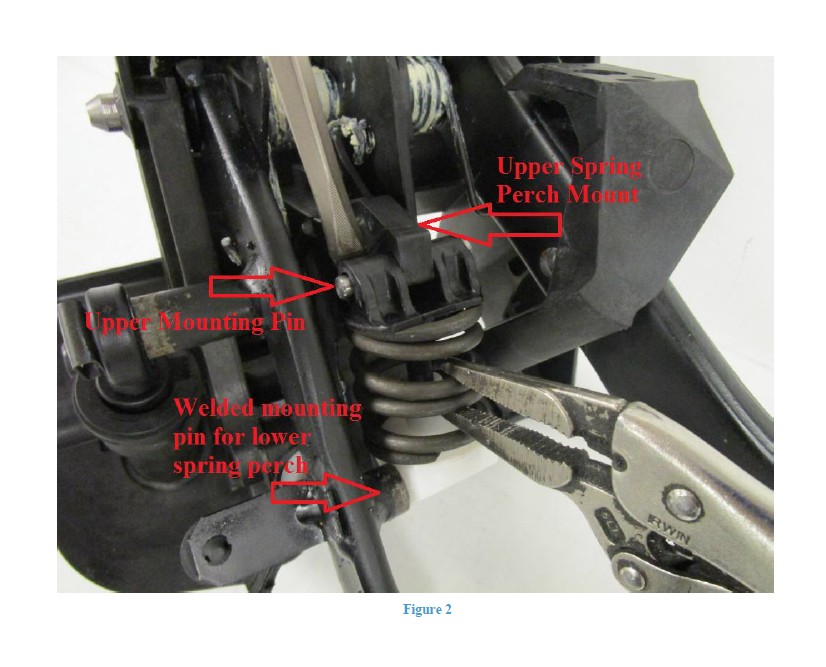
3. Using a flathead screwdriver, pry the top of the unit downwards to release the pin from the upper pedal mount on the housing, the assembly should pop out of the upper spring seat.
4. Carefully remove the assembly and slide the bottom perch off of the pin which is welded to the pedal arm.
5. Carefully release the needle nose pliers.
1. Slide the bottom spring perch back onto the welded pin.
2. Depress the clutch pedal fully until it rests on the backstop.
3. Place the Steeda spring on the bottom spring perch and seat it all the way down.
4. Place the top spring perch onto the assembly, lining up the guide shaft inside the spring.
5. Slide the mounting pin back into the top spring perch making sure to align the flats with the upper pedal mount on the housing.
6. Compress the assembly by hand and place the mounting pin in the upper pedal mount to complete the assembly.