Guaranteed 12/24 Delivery Still Available see item page for details! available on most items - Details
How to Install Spectre Performance Cold Air Intake - Clear Anodized (05-09 V6) on your Ford Mustang
Tools Required
- 5/16” Nut Driver (or flat blade screwdriver)
- 12mm Wrench
- 13mm Wrench
- 8mm Wrench
- Ratchet
- T-20 Torx Driver
- Philips Screw Driver
- 10mm Socket

Shop Parts in this Guide
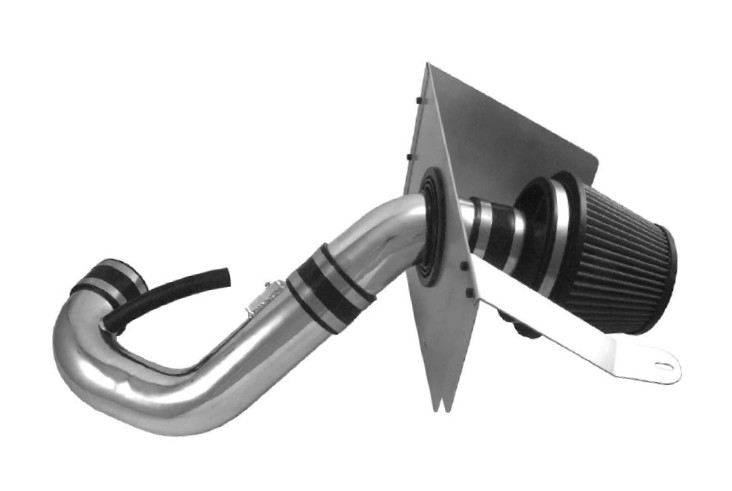
Parts List
1 - Long Intake Tube
1 - 60° Intake Tube Elbow
1 - Heat shield Front
1 - Heat shield support
1 - Heat shield bracket
1 - Heat shield side
1 - 3” Heat shield grommet
1 - Velocity stack adapter
1 - 889886 Air Filter
3 - 3” Couplers
6 - 3” Hose clamps
1 - 6” Hose clamp
2 - M4 Machine screws
1 - 2.75” MAF Calibration sleeve
2 - M6 bolts
1 - M6 Clip nuts
1 - M8 Bolt
1 - M8 Lock nut
1 - M8 Washer
5 - M5 Allen Bolts
5 - M5 Lock nuts
5 - M5 Washers
6” - 5/8” Breather hose
1 - M5 Hex tool
Step 1: Safety first! Before you begin the installation, make sure that the vehicle is in park with the parking brake set. Disconnect the negative battery terminal and verify all components listed are present.
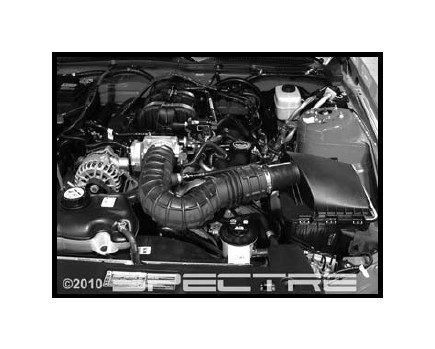
Step 2: Disconnect PCV tube from the intake by pushing on the green tab and pulling the tube off.
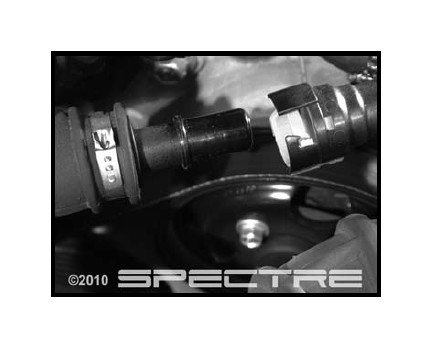
Step 3: Disconnect the MAF sensor connector by sliding the Red clip away from the tube and pulling the connector off of the sensor.
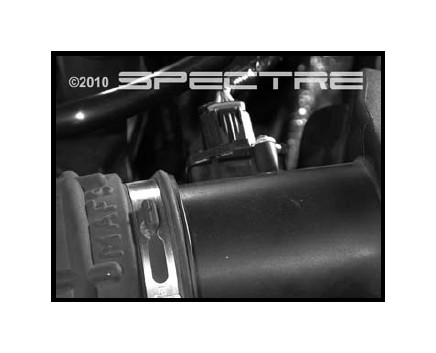
Step 4: Loosen the hose clamp at the throttle body and unclip the air box lid. Remove the intake assembly from the vehicle.
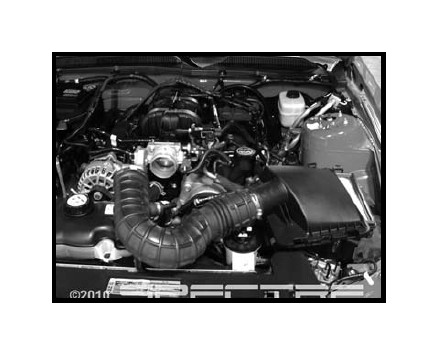
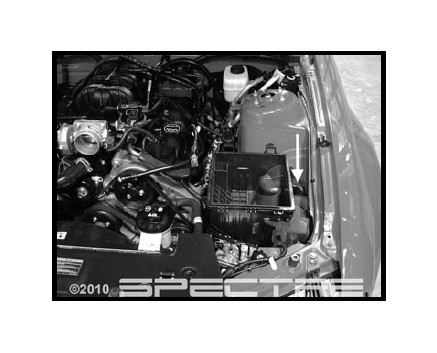
Step 5: Remove the air box base by removing the 10mm bolt and lifting it out. Set the bolt aside for later use.
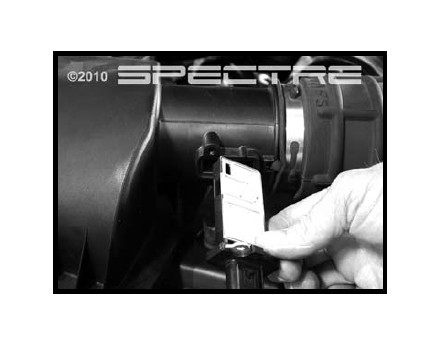
Step 6: Use T-20 Torx to unscrew and remove MAF Sensor from stock air intake box. This will be used again in your new Spectre Performance kit.
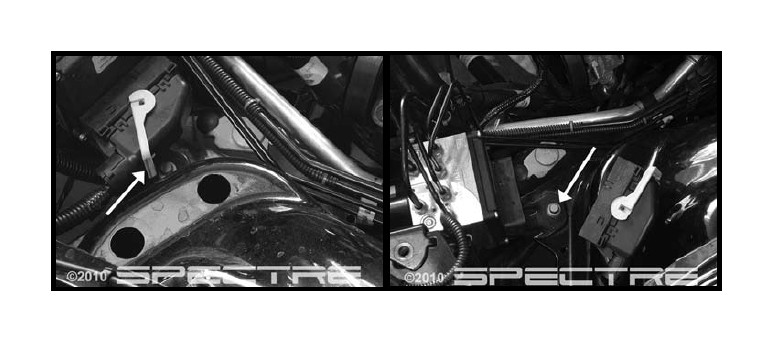
Step 7: Remove the bolt shown in the picture and set it aside for later use. Note: If your vehicle does not have a bolt as indicated, add the supplied clip nut and bolt as shown in the picture on the right.
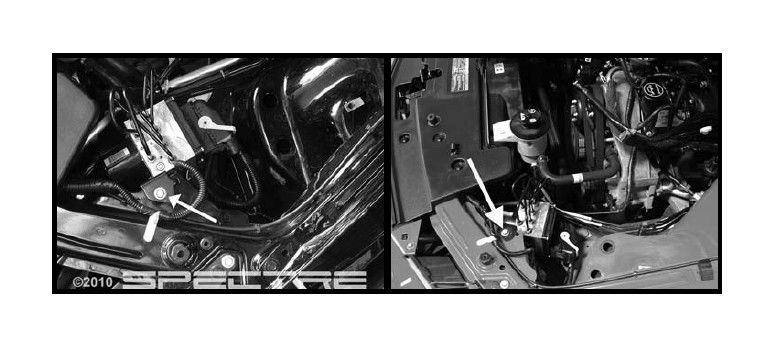
Step 8: Unlatch clip shown and slide counterclockwise to unlatch the connector. Move the connector to the side and remove the bolt shown in the picture. Set it aside for later use.
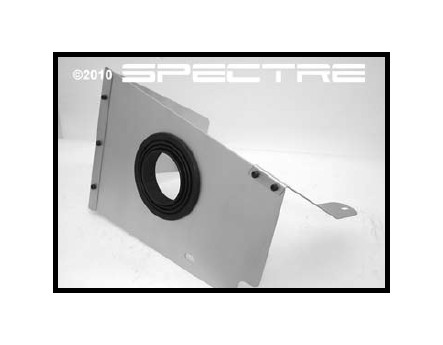
Step 9: Using the M5 Allen bolts, M5 lock nuts, and M5 washers, assemble the heat shield as shown. Install the grommet in the large hole.
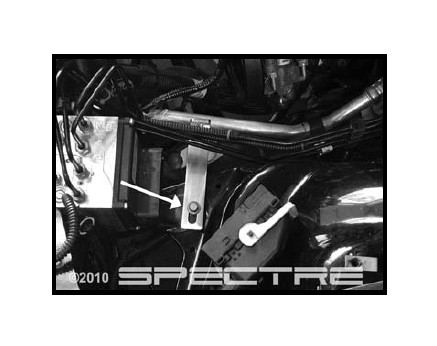
Step 10: Using the bolt removed in step 7, install the lower heat shield bracket as shown. Leave the bolt loose at this time.
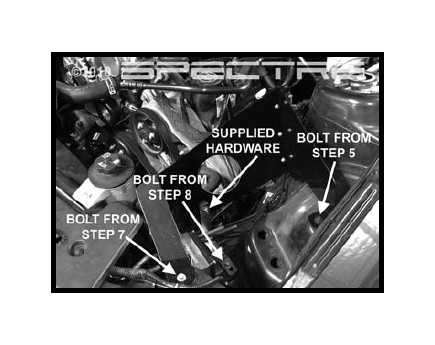
Step 11: Install the heat shield and secure it using the bolts removed in steps 7 & 8, and the supplied 8mm bolt, fender washer and lock nut as shown. Fully tighten all mounting hardware.
Step 12: Reconnect the connector and slide latch clockwise to secure.
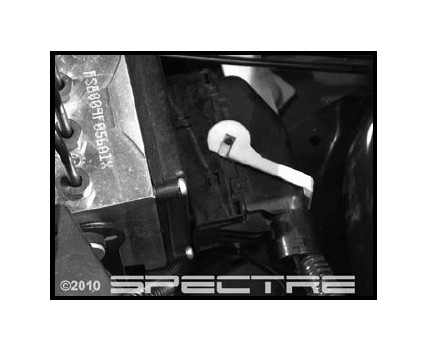
Step 13: Install factory MAF Sensor on the long intake tube using the supplied Phillips head screws.
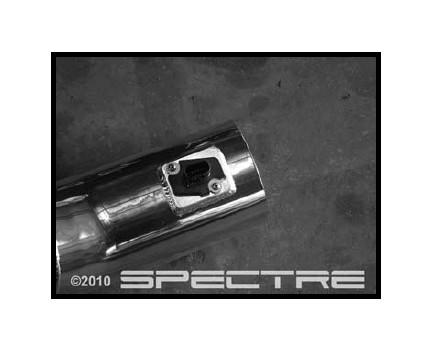
Step 14: Install 3” coupler with clamp onto throttle body. Fully tighten the clamp on the throttle body side.
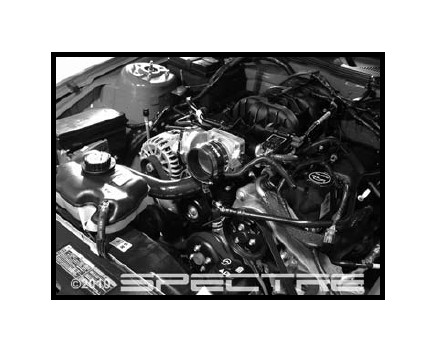
Step 15: Place a 3” clamp on the throttle body coupler and install the new intake tube as shown. Snug the clamp on the intake tube, but do not fully tighten as you may need to adjust placement of the tube in subsequent steps. Reconnect the MAF sensor harness. Insert the MAF sensor calibration sleeve as shown.
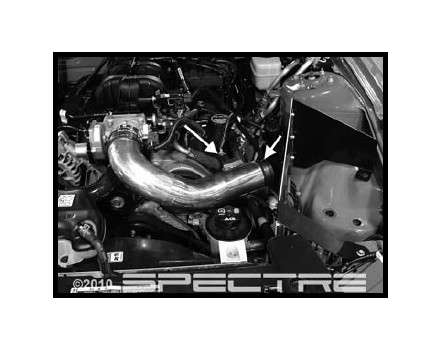
Step 16: Install the 3” coupler with two 3” hose clamps. With the coupler installed half way onto the tube, fully tighten the clamp which is over the tube. Insert the short Spectre intake tube through the grommet in the heat shield and into coupler. Ensure that MAF sensor calibration sleeve is fully seated, making contact with both tubes.
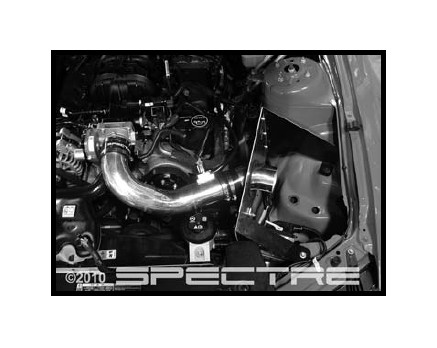
Step 17: Install the 3” velocity stack adapter into the base of the filter and fully secure it with the 6” clamp. Install a 3” coupler with clamps onto the velocity stack adapter.
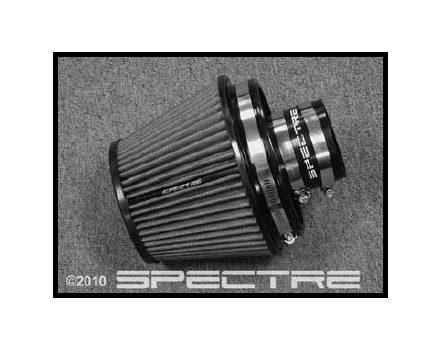
Step 18: Install the filter assembly onto the intake assembly. If necessary, adjust rotation of the short tube so that the filter is not touching anywhere on the car body. Once you have the filter positioned correctly, fully tighten all clamps.
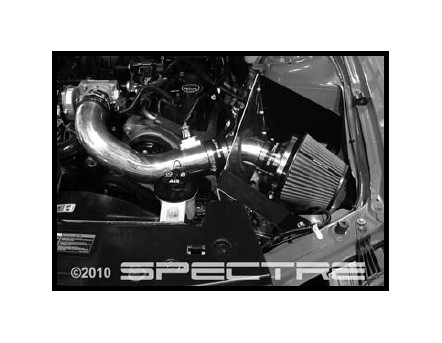
Step 19: Cut the breather tube 4” from the end with a razor knife. Install the supplied breather hose from the bung on the intake tube to the breather tube (retain the cut piece to enable the vehicle to be returned to stock should the need arise).
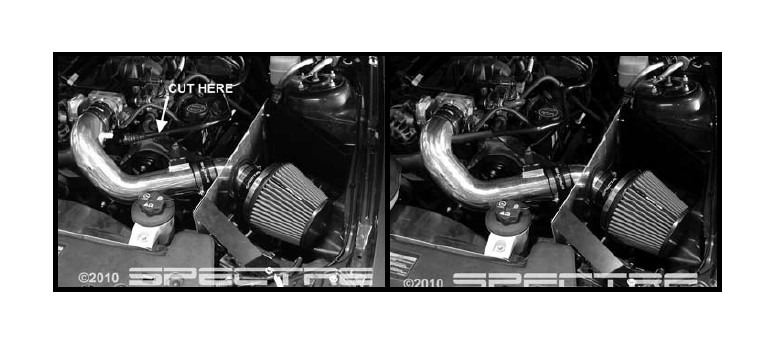
Step 20: Make sure that all clamps and hardware are fully tightened. Reconnect the battery cable, start the vehicle and let it warm up. Shut off and inspect the installation once more for any loose clamps, wires, or hardware. Test drive & enjoy!

