 FREE 1 to 3-Day Delivery on Orders $149+ Details
How to Install SR Performance Coil Over Kit on your Mustang
Installation Time
4 hours
Tools Required
- Floor Jack and Jack Stands
- Ratchet
- Socket Set

Shop Parts in this Guide
Contents:
(2) - Front Shock Assemblies
(2) - Front Adjustable Sway Bar End Links
(2) - Rear Shocks
(2) - Rear Springs
(2) - Rear Lower Spring Mount Assembly
(2) - Lock Collar Wrenches
Shock Adjustment:
Using the supplied adjustment knob/Allen Key, turn the shock adjustment fully clockwise to the firmest setting. Then turn the shock counter-clockwise 10-12 clicks from full firm. Use this as your starting point and adjust as needed.
Front
Step 1:
On a level surface, raise and support the vehicle on jack stands. Remove front wheels. With the car supported on jack stands, place the floor jack under the lower control arm, keeping some light tension on the lower control arm.
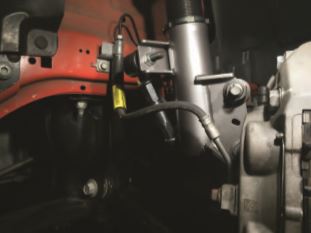
Step 2:
Using a panel removal tool or pliers, remove the abs wiring from the strut.
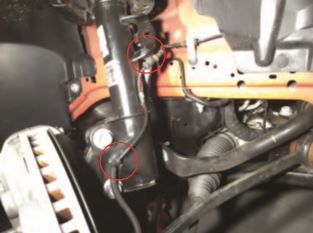
Step 3:
Remove the sway bar end link from the strut. Remove the (2) nuts holding the strut to the spindle. With the nuts removed you can use a dead blow hammer to hammer out the bolts. These bolts are knurled a to prevent them from spinning. **Note: Brake caliper/bracket may need to be removed depending on brake configuration.
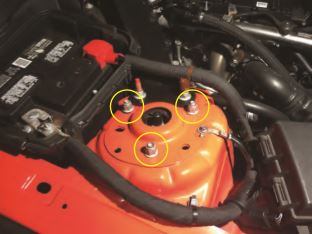
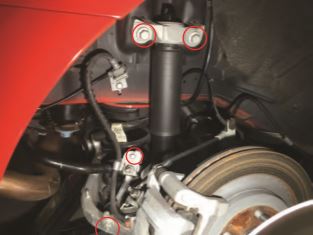
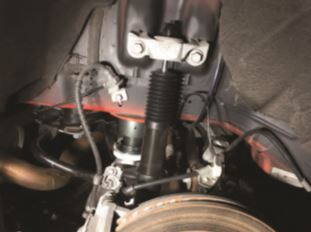
Step 4:
With the strut free of the spindle, hold the strut from below while you remove the (3) top hat mounting nuts. Remove the strut from the vehicle.
Step 5:
Remove the lower sway bar end link from the sway bar.
Step 5:
Reinstall the SR coil over in the reverse order. **Note: Ensure the upper mount/camber plate is perpendicular to the frame rail they are different from side to side. Remove the hard plastic protective cover from the adjustable sway bar end link before installation.
Rear
Step 1:
Raise the rear of the vehicle and support with jack stands under the rear frame rails. Keep the subframe supported by a floor jack. Remove wheels.
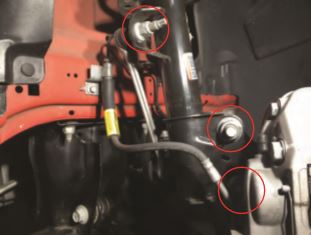
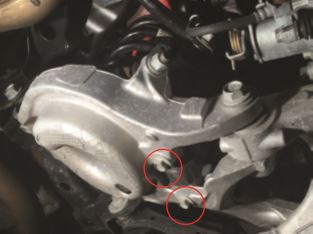
Step 2:
Remove the (2) upper shock mount bolts. Then remove the sway bar end link from the lower control arm. Remove the 10mm bolt holding the brake line to the sway bar end link.
Step 3:
Remove the lower (2) shock mount bolts from the lower control arm, remove the shock from the vehicle.
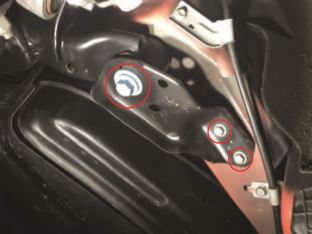
Step 4:
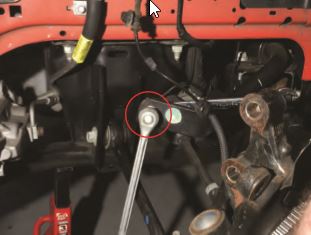
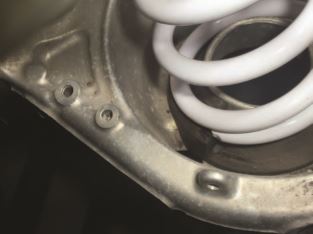
With the rear subframe supported by the floor jack, locate and loosen the (4) 13mm bolts holding the front subframe brace, (2) on each side. **Note: these do not need to be removed all the way. Then remove the (2) forward-most rear subframe bolts, (1) on each side.
Step 5:
Locate and remove the (2) rear-most rear subframe bolts.
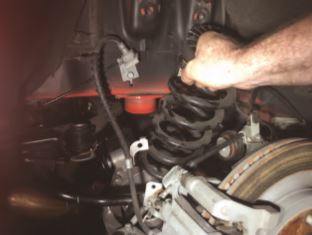
Step 6:
Slowly lower the rear subframe so that you can remove the springs from the vehicle.
Step 7:
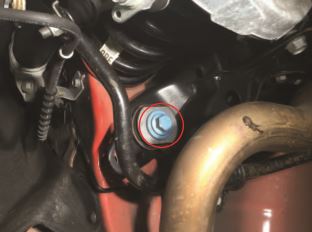
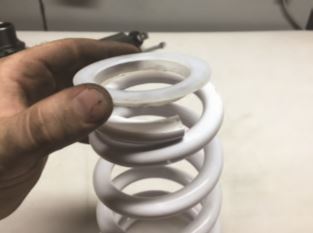
Place the supplied rubber isolator in the upper spring perch.
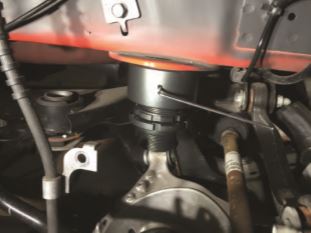
Step 8:
Install the upper spring perch, use the set screw to hold the perch in place.
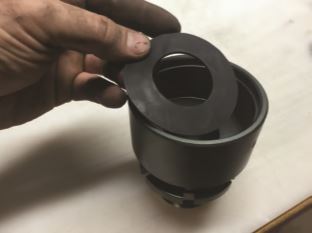
Step 9:
Place the plastic spring isolator on top of the spring.
Step 10:
Install the spring in the lower control arm so that the spring is seated correctly. **Note: Reuse the factory lower rubber isolator.
Step 10:
Raise the rear subframe with the jack and slowly tighten the (4) rear subframe bolts. Then re-tighten the (4) front subframe brace bolts.
Step 11:
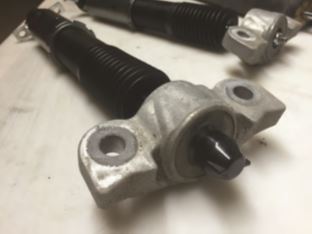
Unbolt the upper shock mount from the shock body.
Step 12:
Reinstall the upper mount on the SR shock, reinstall factory plastic cap.
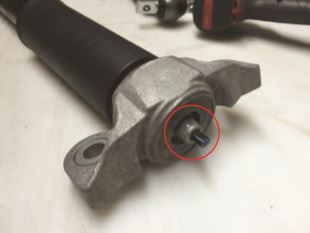
Step 13:
Lengthen the shock body by unscrewing the lower shock mount until the shock is long enough to bolt on. Install the shock.
Step 12:
Make sure all locking collars are tight on the spring and shocks. Adjust as need to produce the desired ride height. Reinstall wheels and torque the lug nuts.
**Note: Professional alignment is highly suggested after installation to prevent poor handling, and premature tire wear.
