 FREE 1 to 3-Day Delivery on Orders $149+ Details
How to Install SR Performance V2 Coil Over Kit on your Mustang

Shop Parts in this Guide
Contents:
(2) - Front Strut Assemblies
(4) - Front Spindle Spacers
(2) - Rear Shocks
(2) - Rear Springs
(2) - Rear Lower Spring Mount Assembly
(2) - Lock Collar Wrenches
**Important Notes:
Professional alignment is highly suggested after installation to prevent poor handling, and premature tire wear.
Shock Adjustment:
Using the supplied adjustment knob/Allen Key, turn the shock adjustment fully clockwise to the firmest setting. Then turn the shock counter-clockwise 10-12 clicks from full firm. Use this as your starting point and adjust as needed.
Front
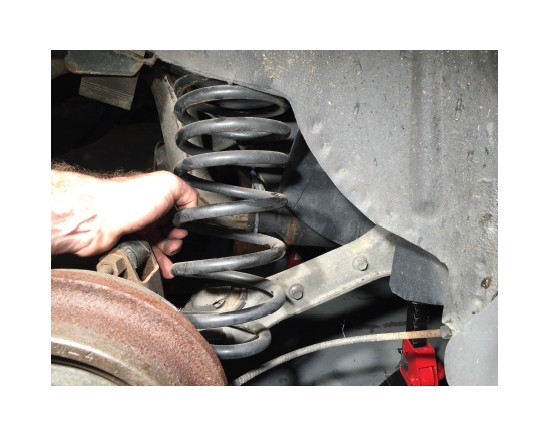
Step 1: On a level surface, raise and support the vehicle on jack stands. Remove front wheels. With the car supported on jack stands, place the floor jack under the lower control arm, keeping some light tension on the lower control arm.
Step 2: Next, drill the (2) factory rivets that hold the upper shock plate in place. Loosen the (3) upper shock bolts. **Note: Do not remove the nuts all the way at this time.

Step 3: Remove the brake caliper and secure it out of the way. Keep tension on the lower control arm using a floor jack. Remove (2) lower shock bolts, (3) upper strut nuts, and then remove the shock, then remove the sway bar end link.
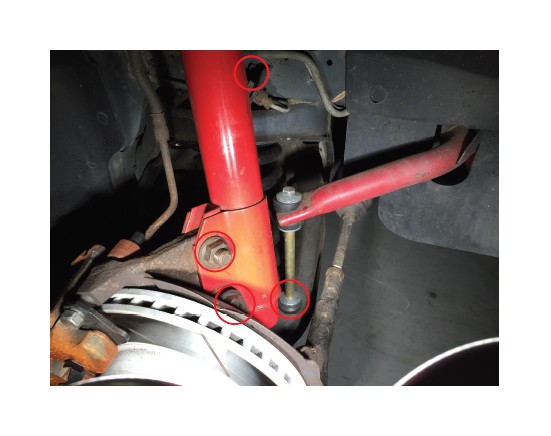
Step 4: With the sway bar disconnected, slowly lower the jack releasing any tension off the spring. Lower the control arm until you can remove the spring.
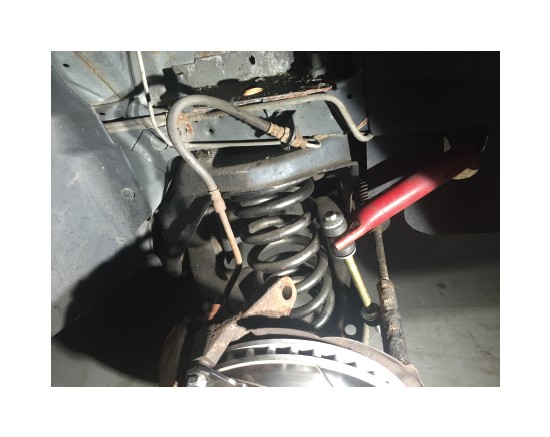
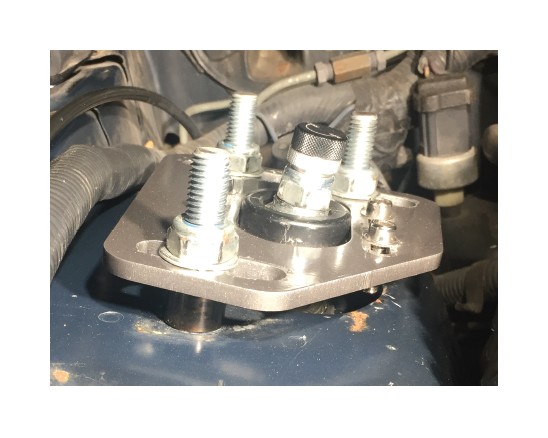
Step 5: Assemble the caster camber plate by installing the studded J bracket from below. Then install the (3) large spacers followed by the caster camber plate, washers and lock nuts. **Note: Loosen the 19mm nuts to set camber. Loosen the (4) Allen bolts to adjust caster. Always ensure these nuts and bolts are tight prior to driving the car.
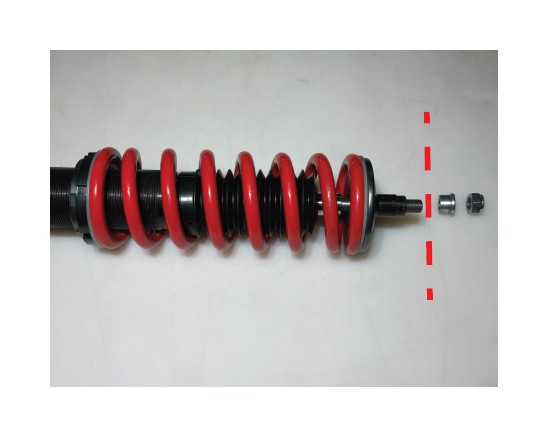
Step 6: Assemble the front struts as seen below.
(2) locking rings->Nylon Spring Seat->Spring->Nylon Spring Seat->Upper Spring Bearing Plate->Larger Spacer.
Install the threaded shaft through the previously installed caster camber plate. Then loosely install the small spacer and Nut.
Step 7: Raise the lower control arm using the floor jack so that you can mount the spindle to the lower strut mount. When mounting the spindle to the strut use the provided spacers on both sides of the spindle as seen below. **Note: When adjusting the ride height, spin the strut assembly in and out of the lower strut mount. Do not make your adjustment on the spring.
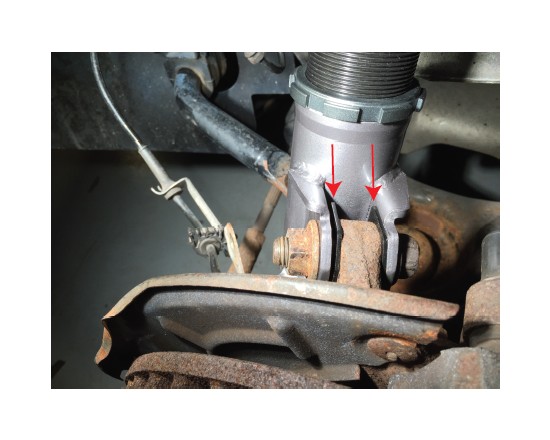
Step 8: Make sure all locking collars are tight on the strut. Tighten the caster camber plate buts, upper strut nut and lower strut bolts. Re-install in reverse order. Adjust as need to produce the desired ride height. **Note: Professional alignment is highly suggested after installation to prevent poor handling, and premature tire wear.
Rear
Step 1: Raise the rear of the vehicle and support with jack stands under the rear frame rails. Keep the axle supported by a floor jack. Remove wheels.
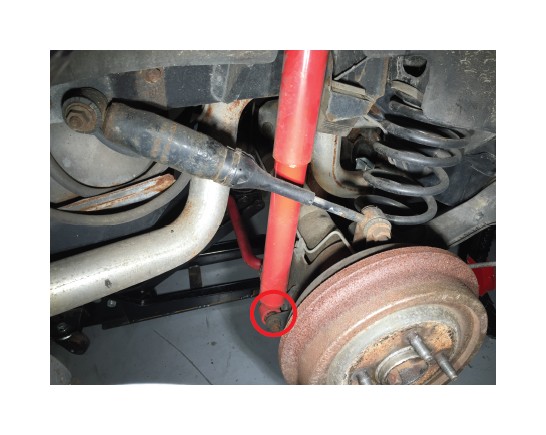
Step 2: Remove the lower shock mounting bolt. Note: you may need to jack the rear up or down so that the bolt comes out easily.
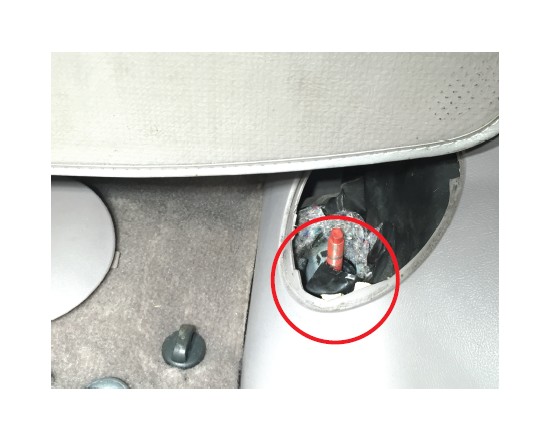
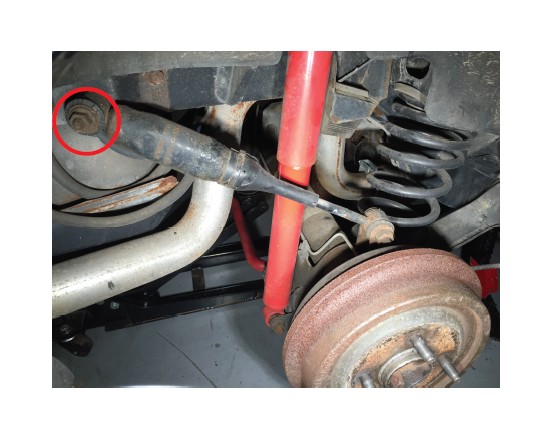
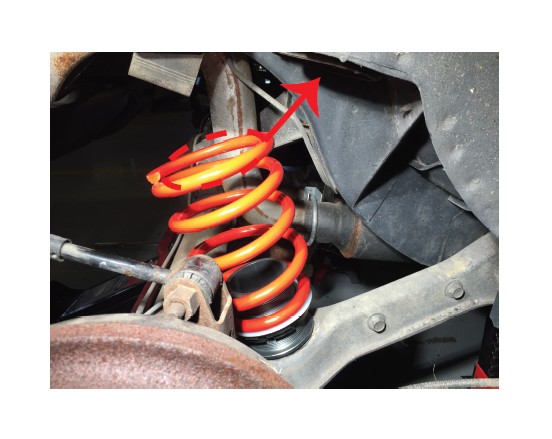
Step 3: Access the upper shock mount. Remove the upper shock nut and remove the shock from the vehicle.
Step 4: Remove the rear quad shock mount to allow you to lower the axle to remove the spring.
Step 5: Lower the axle slowly and remove the factory spring and factory rubber bushing.
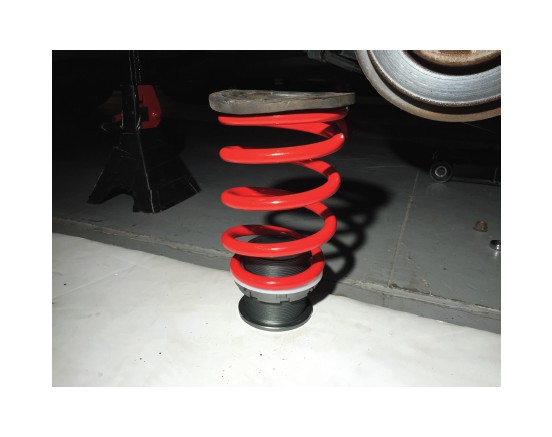
Step 6: Re-use the factory upper rubber isolator. Stack the new rear spring as seen below. Threaded lower mount, locking collar, threaded lower spring mount, supplied plastic spring isolator, spring, and then the factory rubber isolator.
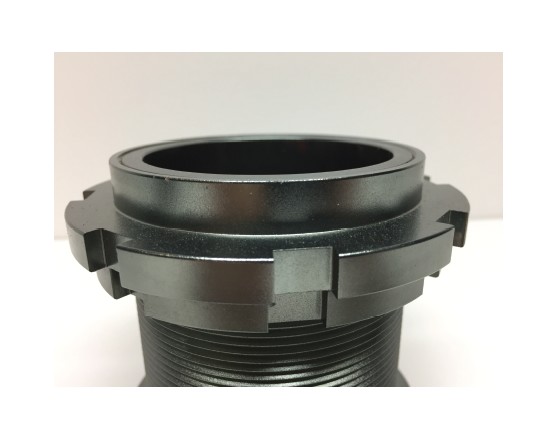
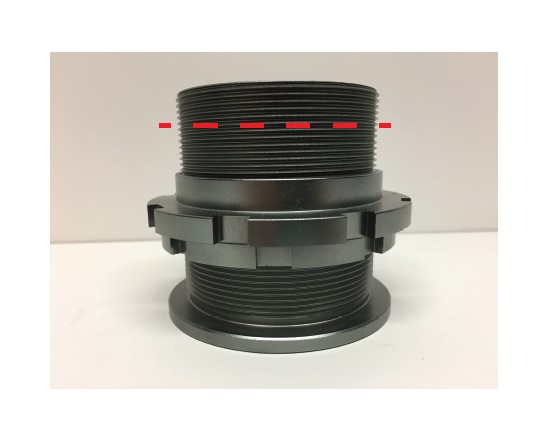
Step 6a: Begin by setting the locking collars in the middle of the threaded spring perch seat. Set both sides at the same height to begin, then adjust accordingly to achieve the desired ride height. When installing the rear lower spring perch mount, Do Not Raise the collar above the top edge of the perch mount. The picture below shows the maximum upper adjustment on the perch.
Step 6b: In extremely low ride height conditions, it may be necessary to trim/cut the rear lower spring perch seat to prevent the spring perch seat from making contact with the spring/ vehicle. Always test fit on the vehicle before trimming or cutting.
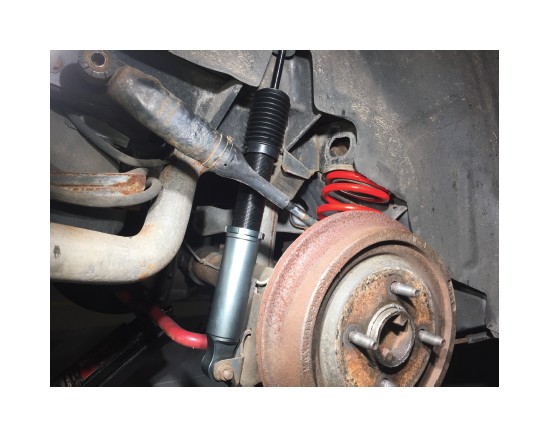
Step 7: Once the spring is placed on the lower control arm, raise the axle while angling the spring towards the upper perch. Raise the axle so that the springs are just making contact with the upper perch on both sides. **Note: This is important for setting your shock length in step 9.
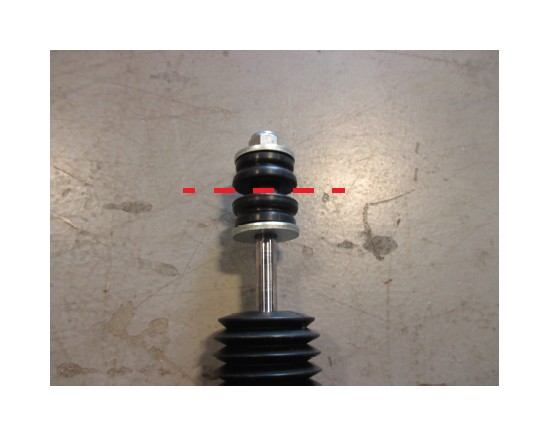
Step 8: Loosely install the shock through the upper shock mount. The dashed line below represents the shock mount, above the line is the trunk.
Step 9: With the springs barely making contact with the upper perch and the upper shock loosely mounted, thread the shock body into the lower shock housing until the lower mounting hole lines up with the lower axle bracket. Reinstall the lower mount bolt. With the suspension loaded, tighten the lower mount bolt.
Step 10: Make sure all locking collars are tight on the spring and shocks. Adjust as need to produce the desired ride height. **Note: Professional alignment is highly suggested after installation to prevent poor handling, and premature tire wear.
