 FREE 1 to 3-Day Delivery on Orders $149+ Details
How to Install SR Performance Aluminum Radiator - Manual on your Mustang
Installation Time
2 hours
Tools Required
- Phillips Head Screwdriver
- 3/8 Ratchet
- 8mm socket
- 7mm socket
- Optional Dremel or file

Shop Parts in this Guide
Installation Instructions:
Step 1
Drain radiator by either removing the bottom radiator hose or by using the drain plug found on the passenger side of the radiator near the bottom
Step 2
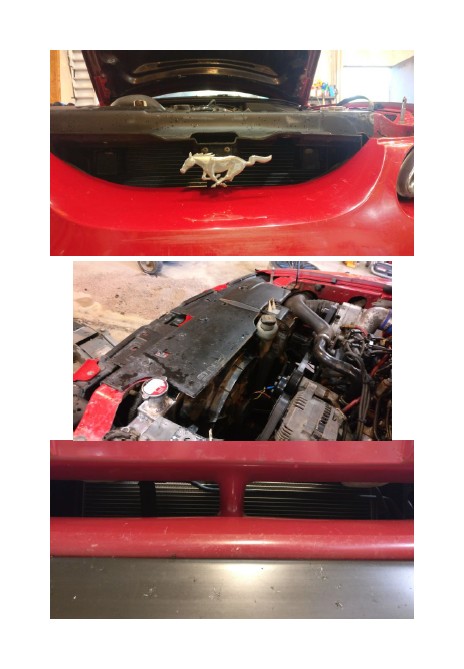
Remove plastic mustang panel covering the top of radiator and core support using a Phillips head screw driver

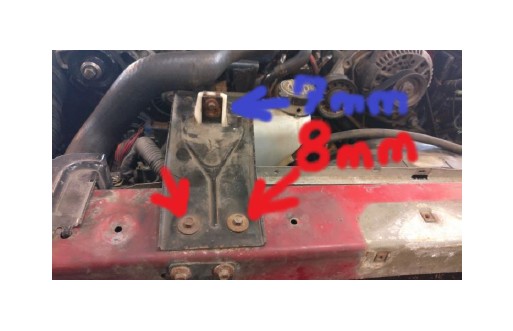
Step 3
Remove the two 8mm bolts that hold the overflow tank bracket in place
Step 4
Remove the 7mm bolt that attaches to the top of the overflow tank
Step 5
Remove the 8mm bolt that connects the wiring harness to the computer on the back of the bracket in step 3 and remove the wiring harness
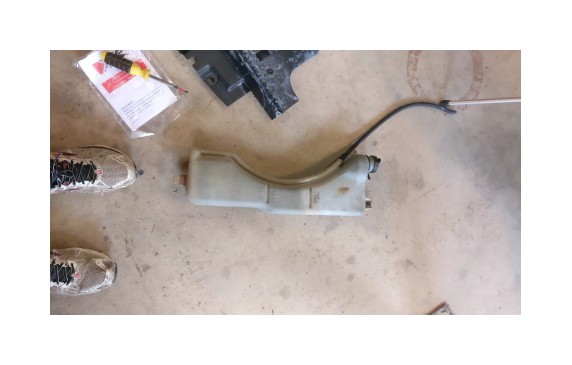
Step 6
Remove the bracket that holds the expansion tank and remove the expansion tank by pulling straight upwards
Step 7
Remove the retainers that slip over the top of the radiator mounts and bolt to the car by unbolting the two bolts on each retainer using an 8mm socket
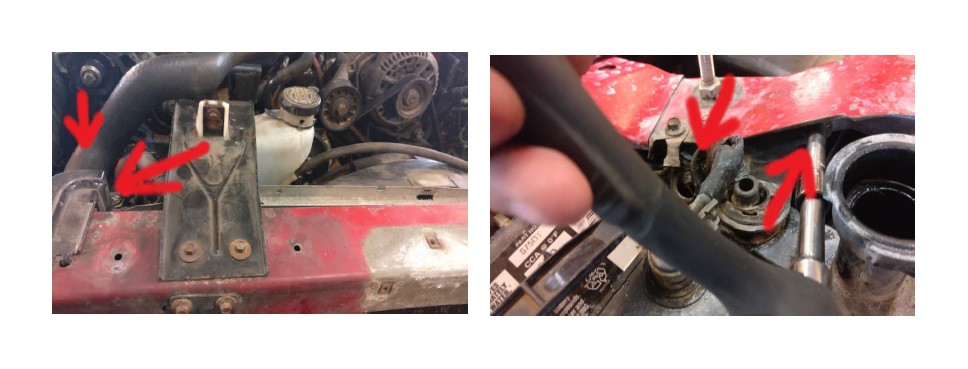
Step 8
Remove the connector that connects the electric fan to the wiring harness of the car
Step 9
Once the retainers are removed, tilt the radiator towards the back of the car and straight up
Step 10
Once radiator is removed, remove the two 8mm bolts holding the fan and fan shroud to the old radiator. This removes all in one piece
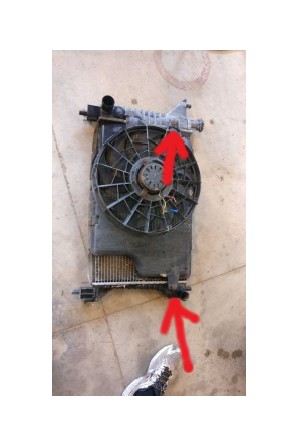
Step 11
Position the fan and radiator shroud on the new radiator and reusing the 8mm bolts that were removed in step 10 reattach the fan and shroud to the new radiator
Bonus Step
If you have previously done an Ac delete or just need more cooling for your mustang, now is a good time to remove that AC cooler that sits in front of your radiator. If your mustang still has the AC condenser and lines make sure that the system pressure is released properly
Step 12
Insert the new radiator in the same way that the old one was removed making sure to line up the pegs in the bottom of the radiator with the holes at the bottom of the car
Step 13
Reattach the retainers to the car slipping them over the top pegs on the radiator using the 8mm bolts that you took out in step 7
Step 14
Reattach the connector for the electric fan to the wiring harness of the car
Bonus Step
It is a very common problem on the sn95 cars for the wires in the factory connector to become either too hot or to corrode inside the connector. For added safety, you can remove this connector and splice directly to the wiring harness of the car eliminating this problem.
Step 15
Reinstall your radiator overflow tank by aligning the tab at the bottom and pushing down
Step 16
Reinstall the bracket that attaches to the overflow tank and the car by reusing the 7mm and 8mm bolts that were removed in step 3
Step 17
Reinstall the wiring harness to the computer attached to the bracket installed in step 16 making sure to tighten the 8mm bolt loosed to remove the harness in step 5
Step 18
Take your mustang cover that was removed in step 2 and check for fitment around the hose that connects to the overflow tank and top of radiator. In some cases, part of this cover will need to be removed using either a dremel or a file
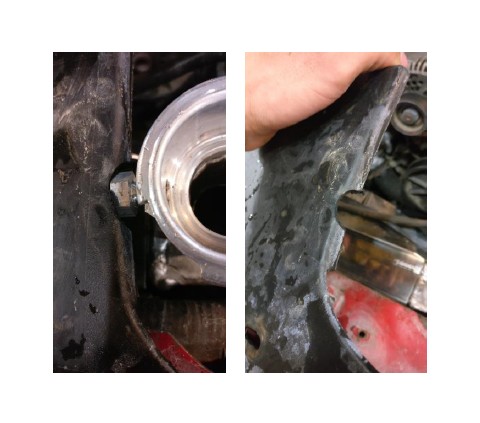
Step 19
Replace the fasteners that hold the mustang cover down
Step 20
Remove new radiator cap and follow the correct filling procedure for filling your mustang with coolant
Finished Product
Installation Guide Submitted by AmericanMuscle Customer: Christian C. on 5/30/17

