 FREE 1 to 3-Day Delivery on Orders $149+ Details
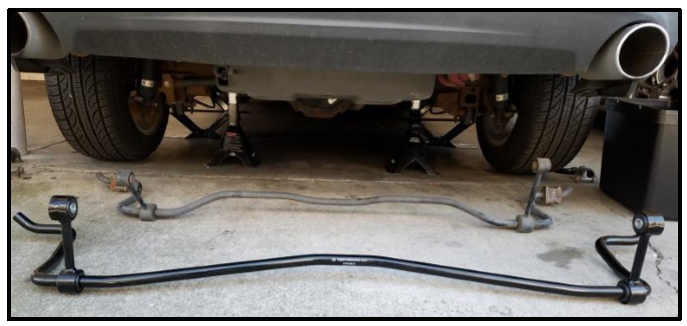
How to Install a Mustang Sway Bar Kit on your 2005-2010 GT, V6 Mustang
Installation Time
2 hours
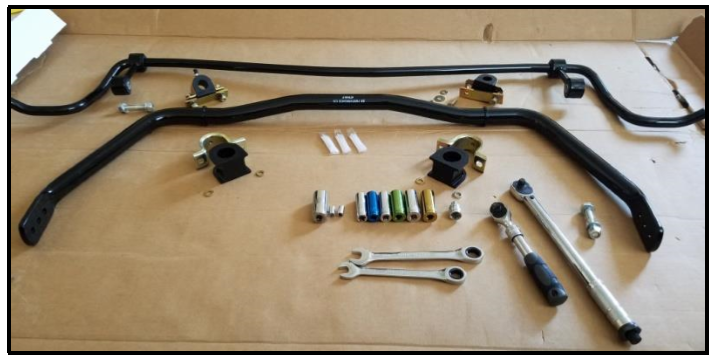
Tools Required
- 15mm deep socket
- 18mm deep socket
- 19mm deep socket
- Ratchet with ½” Drive
- Pliers
- Torque wrench
- 15mm open or ratchet wrench
- Optional: Crescent Wrench
Safety
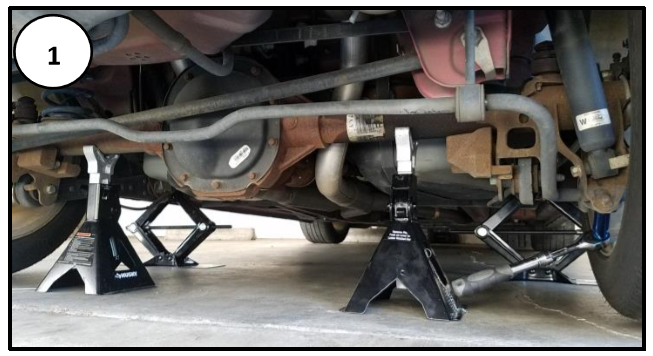
- Use load rated floor jacks/scissor jacks and jack stands for your vehicle’s weight.
- Recommended to wear protective gloves and safety glasses as debris may fall from underside of car.
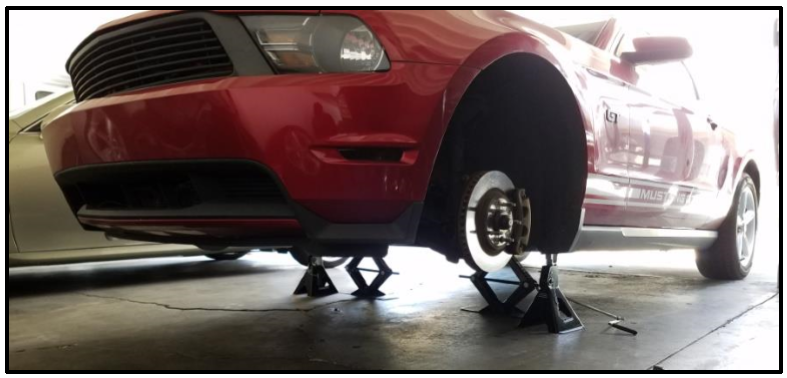
Note: The vehicle will need to be elevated by use of a lift or set of jacks and jack stands. This install is much easier to complete the wheels are removed from the vehicle prior to beginning work. If the wheels are not being removed, turn the corresponding wheel so that the front of the wheel is rotated in towards the vehicle.
Stock Front Sway Bar Removal
1. Remove 4 hex head screws holding plastic cover plate to the bottom of the vehicle.
2. Swing the plate down and slide out of tabs to remove from the vehicle.

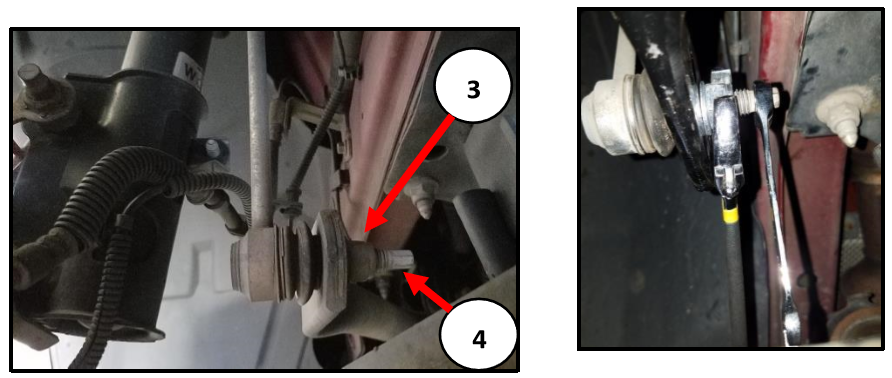
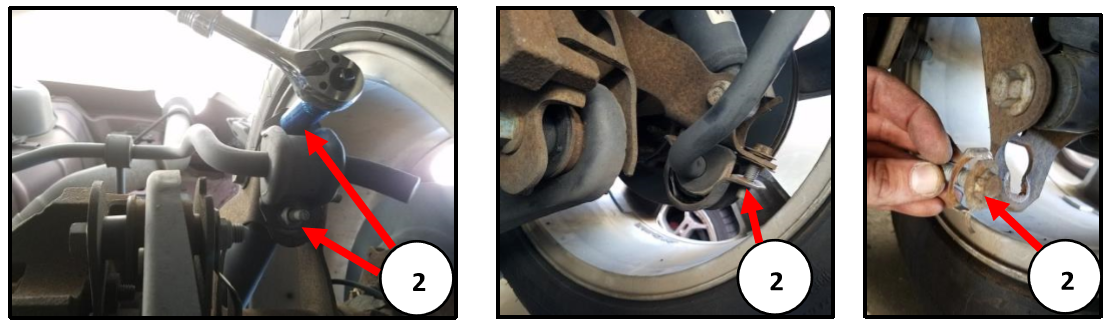
Remove lock nut from lower end link by using:
3. 18mm open or ratchet wrench on nut, AND
4. 8mm open or ratchet wrench on hex shaft.
5. Pull lower end link shaft out from sway bar mounting hole.
6. Repeat steps 3-5 for the opposite front end link.
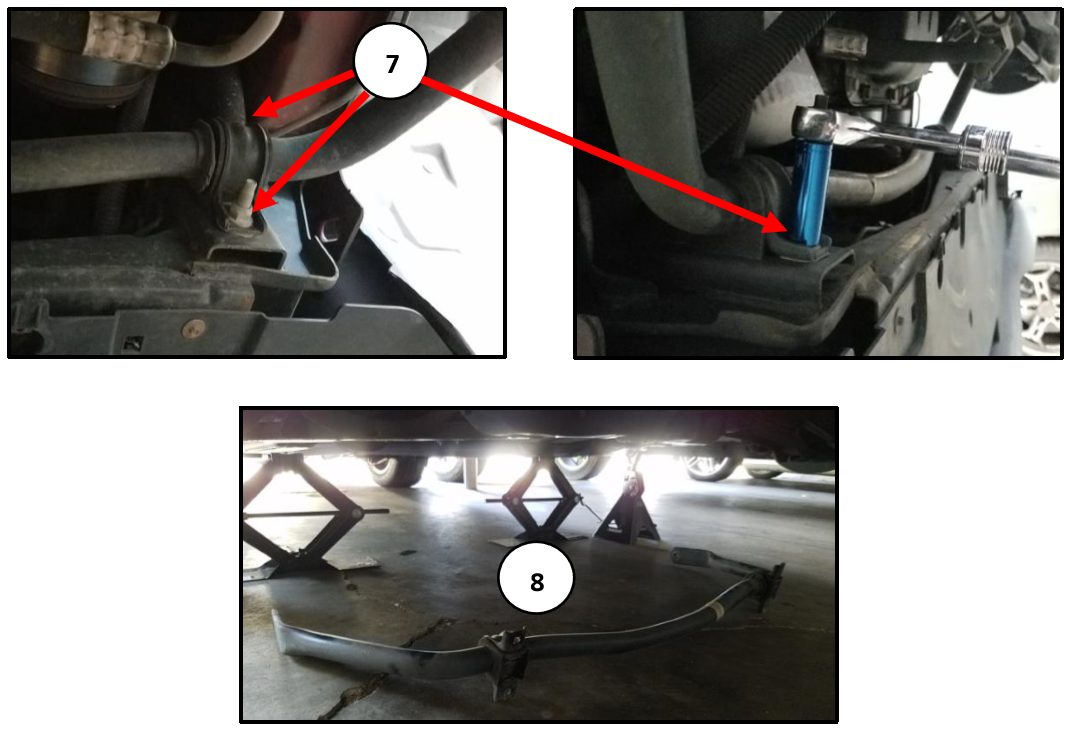
7. Loosen the 2 nuts on each bushing mounting bracket using 15mm deep socket.
*Keep in mind that the sway bar will be released when these nuts are removed.
8. Carefully remove all 4 nuts and lower the sway bar to the ground. U-Steel spring nuts and locking nuts will be re-used during installation.
Installing SR Performance Front Sway Bar
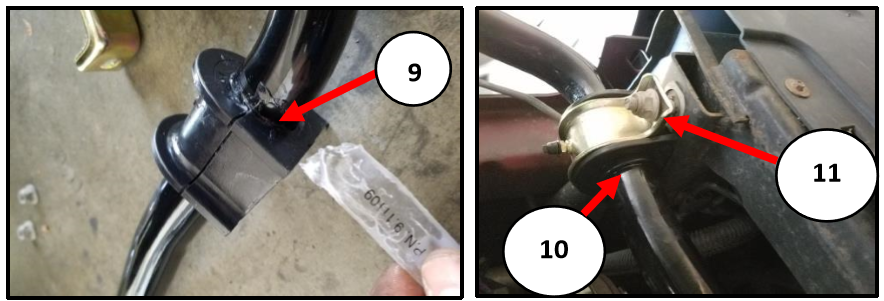
9. Lubricate the inner diameter of the two larger bushings using 1 of the lubricant packets. Make sure surface is clean and wipe off excessive grease.
10. Install bushings onto the front sway bar so that the bushings seat up against the outside of the flange. Install with open side of the bushings facing upward (the bow in the center of the sway bar should be facing down).
11. Place the metal bushing mounts over the bushings and onto the bolts. Install old nuts, but do not tighten down yet.
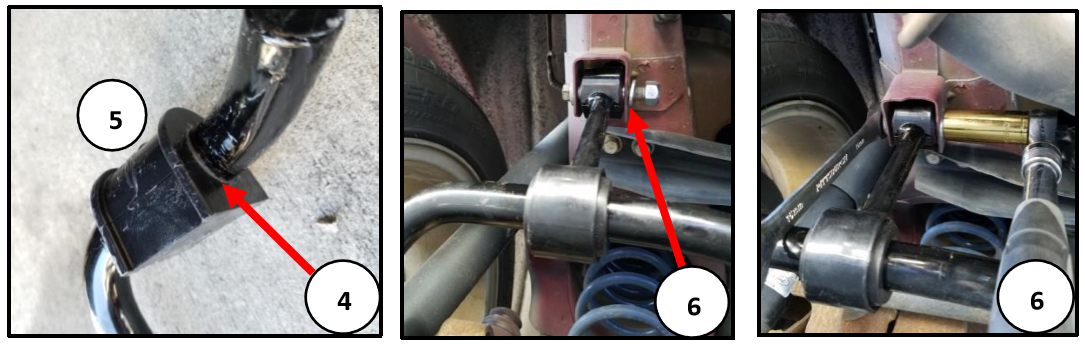
12. Insert bolt on lower part of end link into the desired setting on the new front sway bar.
Front Sway Bar Settings:
a. Setting close to front of car is softest
b. Center for street performance (safe option)
c. Setting closest to rear of car is firmest (Higher probability to slip rear wheels when cornering, not recommended for wet conditions)
13. Re-use the locking nuts and loosely tighten onto the end of the bolt. Do not tighten nuts yet. Repeat for other side.

14. Allow the weight of the car to rest on the front wheels by using car ramps or jacks under the front lower control arms near the brake rotors. Now fully tighten down the nuts on the front end links to 80 lb-ft and the front mounting bracket nuts for the bushings to 40 lb-ft torque values.
Removing Stock Rear Sway Bar
1. Drive the car onto a pair of wheel ramps OR place jack stands under the rear axle and remove wheels for better access.
2. Use the 15mm Deep socket to remove the bolts from each bushing mounting bracket (4 total bolts). Remove the locking nut/washer assemblies as these will not be reused. Pull bushing mounts away from mounting holes.
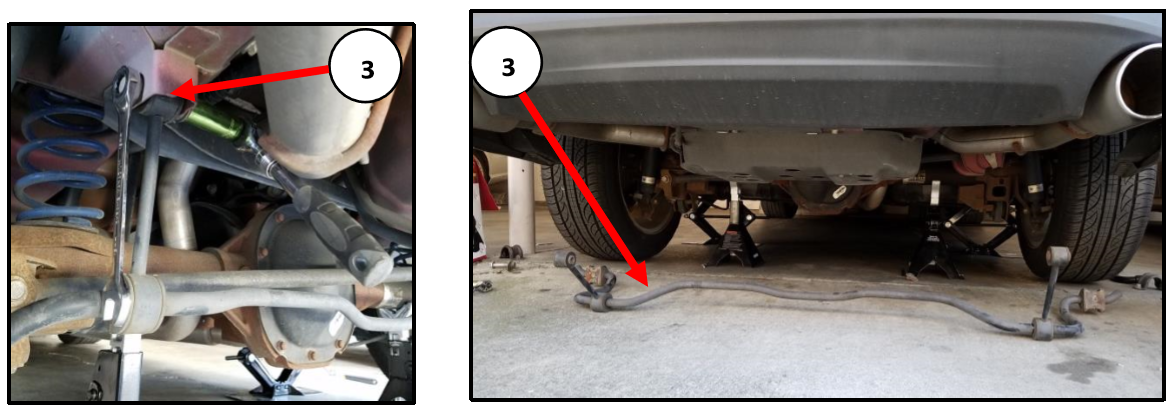
3. Remove the upper end link bolts using 18mm deep socket and 15mm open/ratchet wrench.
*Keep in mind that the rear sway bar will be released when these bolts are removed.
Installing SR Performance Rear Sway Bar
4. Lubricate the inner diameter of the two bushings using lubricant packet. (Make sure surface is clean and wipe off excessive grease.)
5. Slide bushings onto the rear sway bar on the short straight sections near the ends. Install with open side of the bushings facing upward (the two ends of the sway bar should curl towards the front of the car when installed).
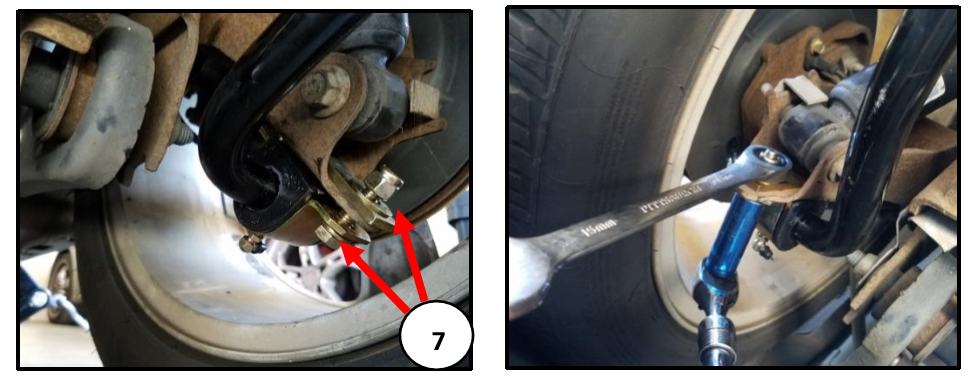
6. Install end links to the chassis mounts using 12mm bolts, washer on outer sides of mount, locking nut, 19mm deep socket, and open/ratchet 15mm wrench. Do not tighten yet. Repeat for end link on other side.
*May need to slide end link along sway bar to position properly onto chassis.
7. Install bushing brackets with backing bars on the inside of stock holders. Install bolts from the bottom with small washer contacting bolt head and large washer contacting locking nut using 15mm deep socket and 15mm open/ratchet wrench. Do not tighten yet.
8. Place the vehicle on the ground or wheel ramps under its own weight. Completely tighten all connections made on rear sway bar. Recommended 40 lb-ft for sway bar bushing brackets; end links should be tightened until rubber bushing is contacted on both sides by metal chassis and slightly compressed.
Installation Instructions Created and Submitted by AmericanMuscle Customer Mark Joseph on 9/23/2017.
