FREE 1 to 3-Day Delivery on Orders $149+ Details
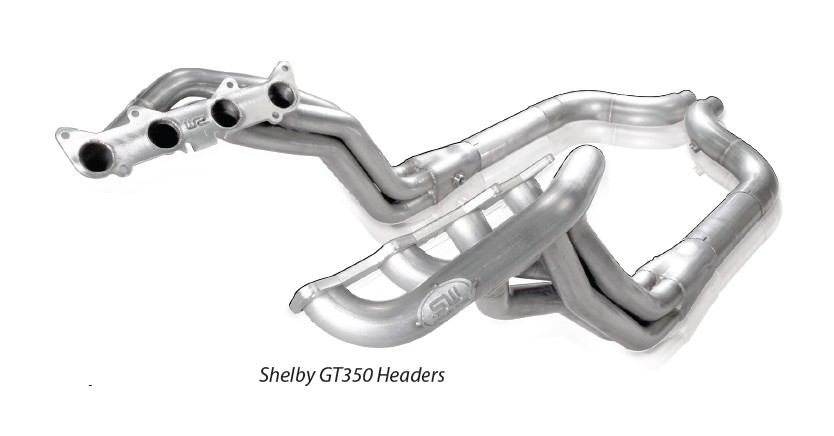
How to Install Stainless Works Long Tube Off-Road Headers - 1-7/8 in on your Mustang

Shop Parts in this Guide
Thank you for purchasing a Stainless Works Header system for your 2015 Shelby GT350. We have gone to great lengths to be sure that our exhaust systems fit and sound great. We are proud to say that this system will unleash the true character of your vehicle. We encourage you to read through the following steps, and check the included Bill of Materials before beginning installation. Please follow these steps to ensure that your installation goes as planned.
1. Stainless Works recommends the use of Hi-Temp RTV sensor safe silicon gasket maker as an option or in conjunction with the use of factory gaskets. The recommended Oxygen Sensor Safe RTV is either Valco All-in-One Aluminum or Permatex Copper P/N 101BR available at NAPA, Autozone and other retailers.
2. Disconnect the battery before starting work on the exhaust system for your vehicle. Reconnect the battery when the job is completed.
3. Your exhaust system can be installed by a weekend warrior but the use of a lift is recommended for ease of installation. If using a jack, the vehicle must be placed on a level hard surface and jack stands are required for safety reasons.
4. You will assemble the components together as specified below, but only snug the clamps as you move along from front to back. After aligning all the components in the vehicle, you will tighten all the clamps working from front to back of the vehicle.

DISASSEMBLY
5. Remove (4) screws (7mm socket) and (6) 6mm (T30 Torx) from lower valance and remove cover.
6. Remove (16) screws (7mm socket) and, (5) push clips, and (6) 6mm (T30 Torx) bolts from engine service cover.
7. Unplug O2 sensors and remove.
8. Remove (4) 10mm nuts (15mm socket), 2 per side. Loosen factory clamps and remove catalytic converter pipes.
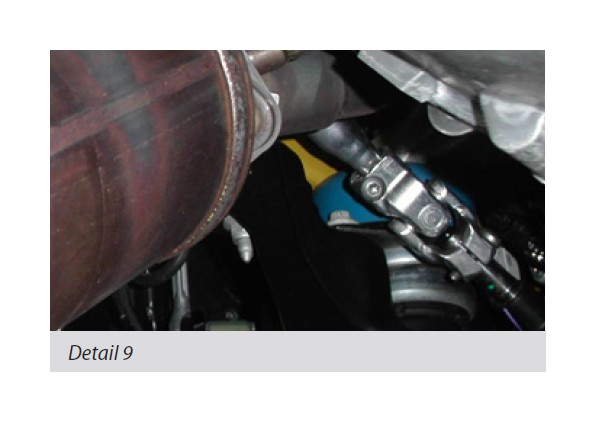
9. Mark steering shaft and remove 8mm (T40 Torx) bolt to disconnect shaft at steering rack.
10. Remove wires from starter by loosening (1) 8mm nut (13mm socket) and (1) 6mm nut (10mm socket).
11. Remove (3) 8mm bolts (10mm socket) and (1) 10 mm bolt (13mm socket) from starter and remove starter.
12. Remove 10mm nut (15mm socket) from right and left motor mount and raise motor slightly.
13. Remove (4) 10 mm bolts (13mm socket) from left motor mount to motor bracket and remove bracket.
14. Remove (2) 10mm nuts (15 mm socket) holding wires to motor mount bracket.
15. Remove (4) 10mm bolts (13mm socket) from right motor mount bracket to motor and remove bracket.
SW HEADER INSTALLATION
16. At this time, install both front O2 wire extensions. The 24” extension will be plugged into the driver’s side, and the 12” extension on the passenger’s side.
17. Run a small bead (3/16” - 1/4” dia.) around the exhaust ports and install the headers from the below vehicle. Use either the 10mm bolts supplied or the factory studs and nuts. If you are reusing the factory studs, the (4) inner studs will need to be repositioned to match our flange bolt pattern.
18. Reinstall the motor mounts and lower the motor and tighten.
19. Put the starter back in and tighten.
20. Reconnect the steering shaft.
21. Reinstall the engine service cover, and lower valance.
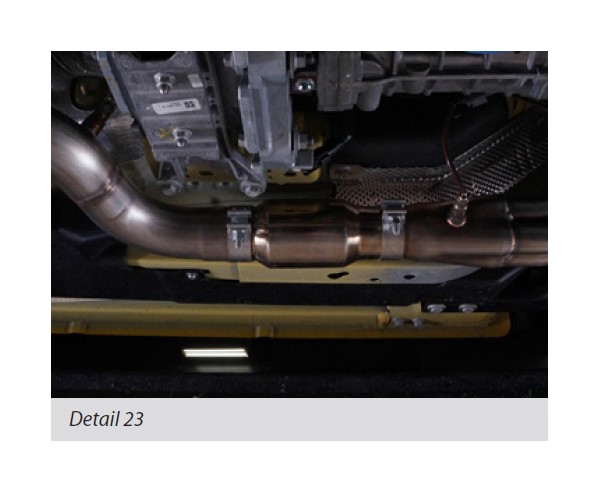
22. Install catalytic converters, or off road pipes, by sliding onto header collector using (2) 3” clamps.
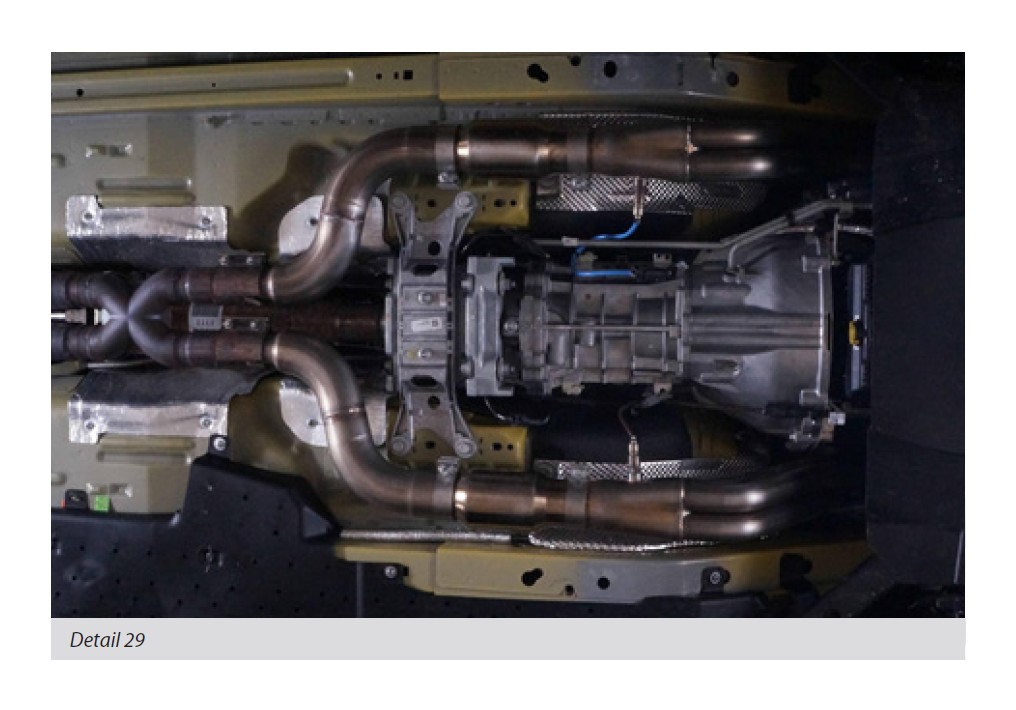
23. Install the lead pipes onto the catalytic converters, or off road pipes, using (2) 3” clamps.
24. Reinstall O2 sensors in both the collectors and the lead pipes. Rear O2 sensor wires will need to be un-loomed from the transmission to reach.
25. Based on the product purchased, the lead pipes will connect to the factory exhaust at the X-pipe.
26. Adjust all tubes for fitment, and tighten all clamps.
27. Be sure to have adequate clearance around all wires, hoses, and lines. If anything is in contact with the exhaust system, it will melt. Make sure to have at least ½” clearance and wrap any suspect areas with DEI thermal barrier wrap.
28. Lower the vehicle.
29. After double checking for clearance and making sure all lines, wires, and hoses are secured, drive the car for 10-20 miles and re-check all clamps and clearances. Your system may be tack welded at the joints/clamps to reduce shifting of the system during heating and cooling cycles. Make certain to disconnect the battery before performing any welding.