FREE 1 to 3-Day Delivery on Orders $149+ Details
How to Install Steeda Adjustable Motor Mounts on your Mustang
Note: Follow all safety rules and use caution whenever working on any vehicle. It is best to consult a shop manual for your vehicle before beginning this project. Failure to do the job correctly could result in serious injury. Read all of the instructions before you start. Have the job done by an experienced technician if you are not sure you can complete it correctly.
1. Install only one side at a time.
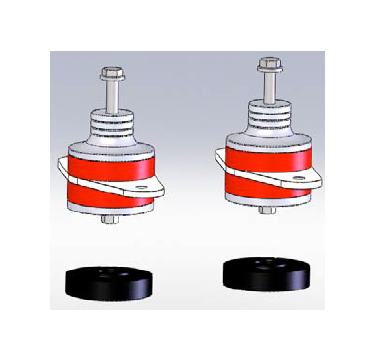
2. This kit includes four (4) red and two (2) black bushings (GT500, just the black ones, because of increased engine weight and horsepower). The red bushings are a softer durameter and should be used for lower NVH requirements. If you are drag racing or open tracking your car, install a black bushing on the bottom side of the new left motor mount (driver’s side) and on the top side of the new right motor mount (passenger side). The harder black bushings will reduce engine rotation under performance conditions.
3. The kit also includes height adjustability. Please refer to the addendum for instructions on setting up the motor mount height.
4. Raise the vehicle by supporting it on a lift or jack stands so there is room to access the motor mounts from under the car.
5. Remove the nut that attaches the factory motor mount to the aluminum engine
mount bracket. Do not remove the bolts that attach the engine mounts to the engine block.
6. Use a jack to raise the engine slightly.
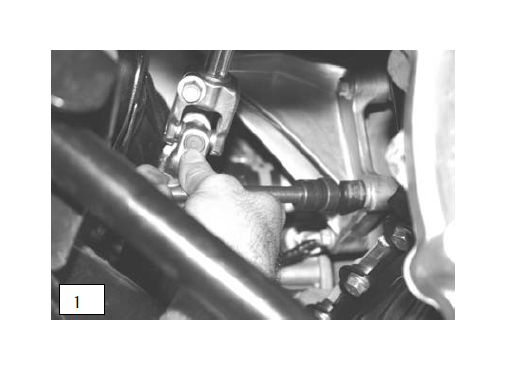
7. Remove the bolts that attach the engine mount bracket from the engine block. It
may be possible to remove the motor mount without removing the engine bracket by disconnecting the exhaust H-pipe. (Pic 1)
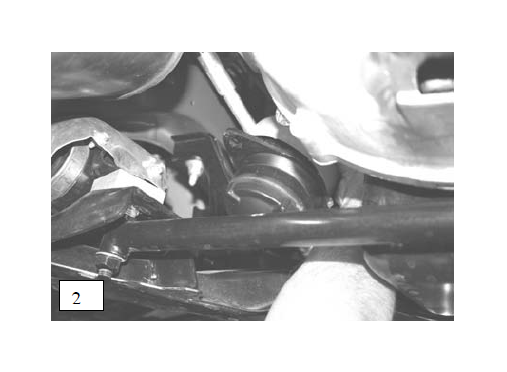
8. Remove the two bolts that attach the motor mount to the crossmember and remove the motor mount. (Pic 2)
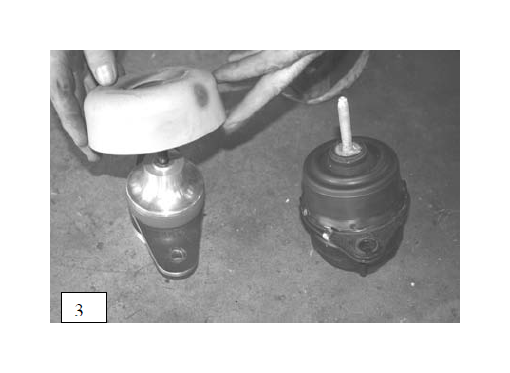
9. Temporarily tape the assembly together with the bushings selected in step 2. The tape will hold the assembly together until the mount is completely secured with the provided bolt. Place the flexible factory heat shield onto the new mount. (Pic 3)
10. Insert the new mount into place with the bolt passing through the hole in the engine mount bracket, if it was not removed.
11. Re-install the motor mount bolts that attach the mount to the crossmember. Do not tighten yet.
12. Reinstall, if removed the engine mount bracket. Lower the engine down onto the
new mount and remove the jack. Secure the new bolt and re-torque all bolts to factory specifications.
13. Repeat steps 2 through 10 for the other side. Remove the car from the lift or jack stands and enjoy.
Addendum A
Motor Mount Height
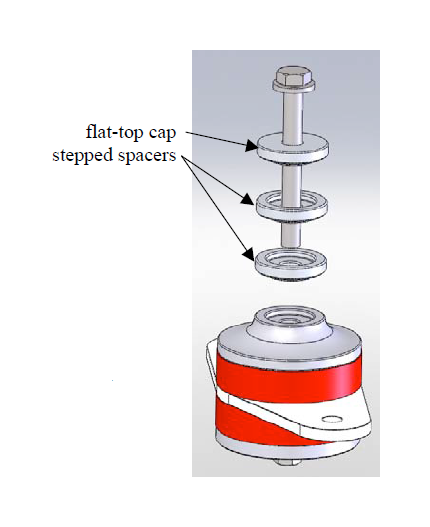
The motor mount provides adjustment to the height of the motor in 1/4” increments via spacers. For each side, the kit includes a flat-topped cap and 2 stepped spacers.
flat-top cap
stepped spacers
All of them must be used either above or below the bracket that goes from the motor mount to the engine block (see below). The cap should always be the first part below the bracket.
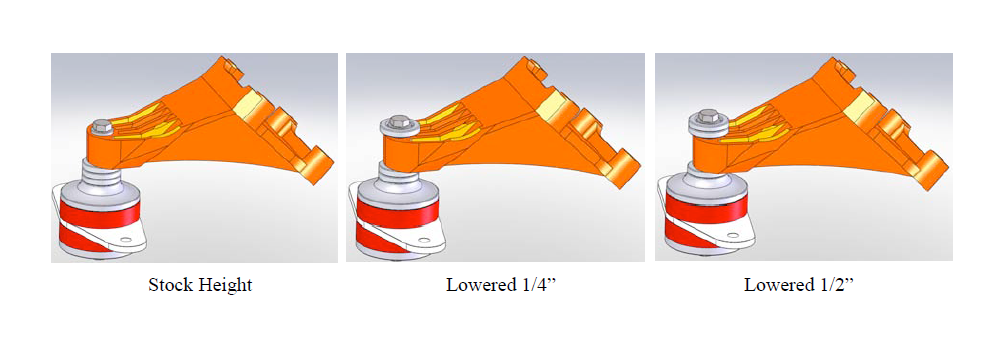
Putting both stepped spacers and the cap below the bracket is the stock height setting.
Moving one stepped spacer between the bolt/washer and the top of the engine bracket will lower the motor 1/4”. Note that the washer and bolt sit in the recess of the stepped spacer that is on top.
Putting both stepped spacers on top and leaving only the cap on the bottom will lower the motor 1/2”.