FREE 1 to 3-Day Delivery on Orders $149+ Details
How to Install Steeda Adjustable Front Swaybar Endlinks (15-17 All) on your Ford Mustang
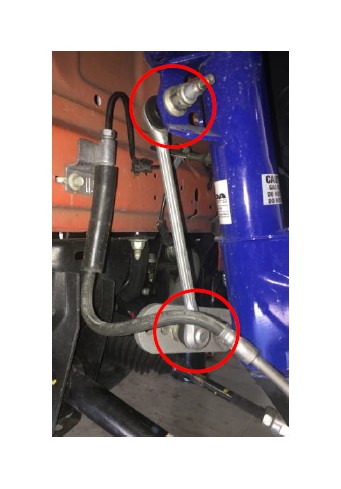
Stock Front Swaybar Endlink Removal
1. Support the car on a drive on lift, two post lift, or jack stands to do this install.
2. Remove the front wheels for easier access to the necessary components.
3. Undo the nuts holding the factory swaybar endlink in place (indicated in Figure 1) by using a 6mm hex key and an 18mm box end wrench.
Steeda Adjustable Front Swaybar Endlink Installation
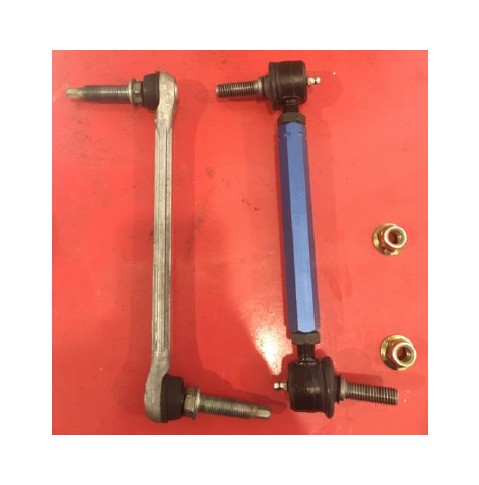
1. Set the Steeda adjustable front swaybar endlink to the same length as the factory endlink, as shown in Figure 2.
2. Tighten the jam nuts using a 3/4” box end wrench to secure the rod ends in place.
3. Install the Steeda adjustable front swaybar endlink on the vehicle and torque the provided nylon locknuts to 76 ft-lbs. NOTE: Use 14mm box end wrench to hold the rod end stud in place.
NOTES:
• Endlinks come pregreased from Steeda.
• Lightly grease the endlinks via the grease fitting as a part of your regular vehicle maintenance.
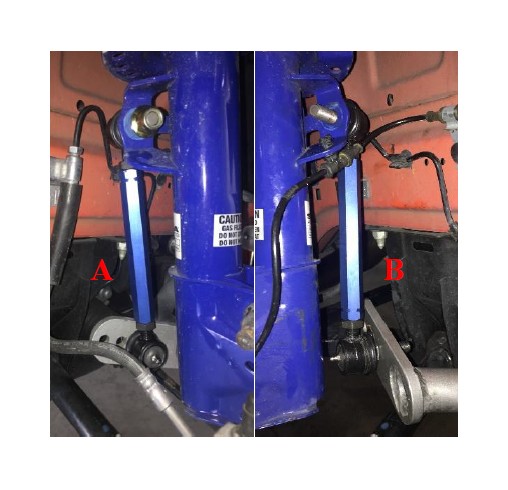
• When pairing these with the Steeda Adjustable Front Swaybar (555-1015), use the forward most strut mount for the stiffest setting (as shown in Figure 3B).
Adjustment/Competition Notes
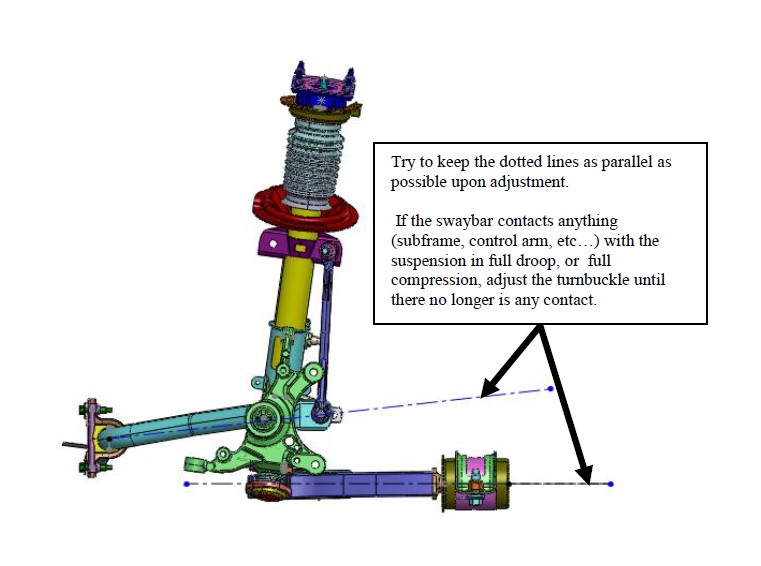
If you are using your car in open-track, solo autocross, or sanctioned road racing events, it is important to adjust the end links so the swaybar bar bushing pivot and swaybar endlink mount is parallel to control arm bushing centerline. This is particularly acute with S550 cars that are running performance springs that lower the car. It is important to correct the bar arm alignment to best approximate a linear roll stiffness.