 FREE 1 to 3-Day Delivery on Orders $149+ Details
How To Install a Steeda Adjustable Rear Swaybar on your 2005-2014 Mustang
For: 2005+ Mustang(s)
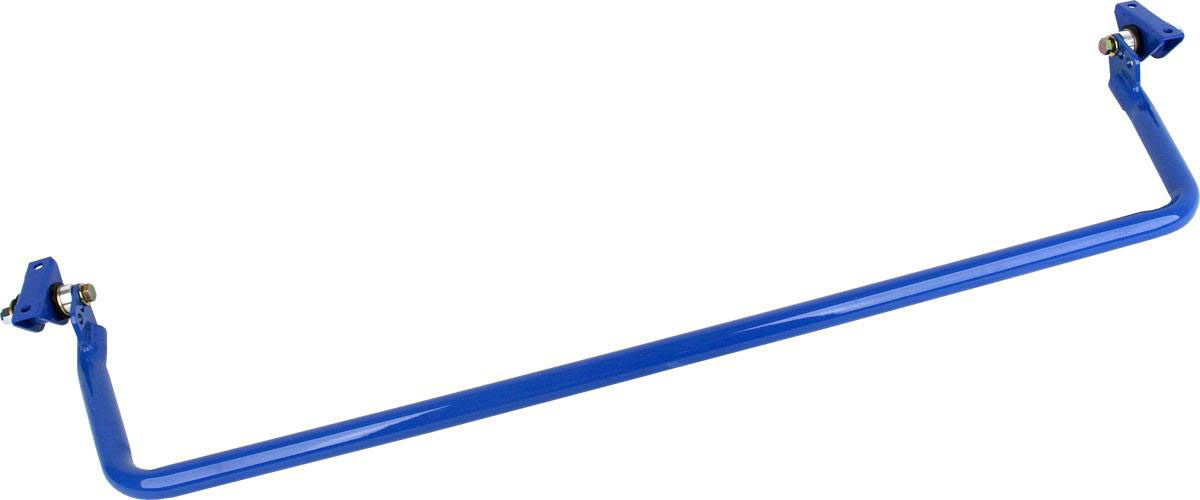
Installation Instructions For 555-1073
-A qualified technician should be used if you are not confident with replacing the rear swaybar assembly.
-Refer to a service manual for fastener torque specifications.
Removal of the Factory Rear Swaybar
1. Lift the rear of the car so that the rear wheels are off the ground. Use caution operating a lift or jack stands to ensure the car is stable and safe to work around and underneath.
2. Remove the rear wheels.
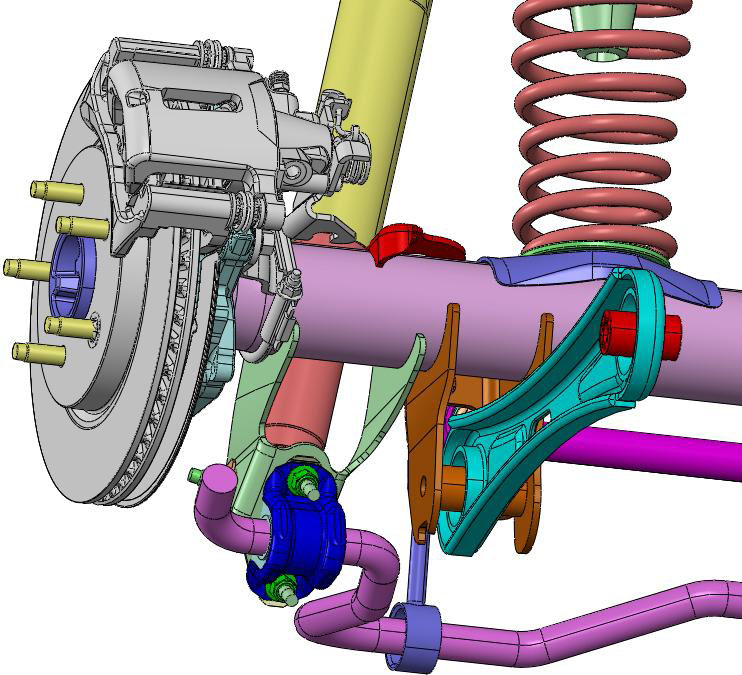
3. Remove the four 15mm nuts (two on each axle mount) securing the rear swaybar D-bushing brackets to the axle. See figure 1.
1
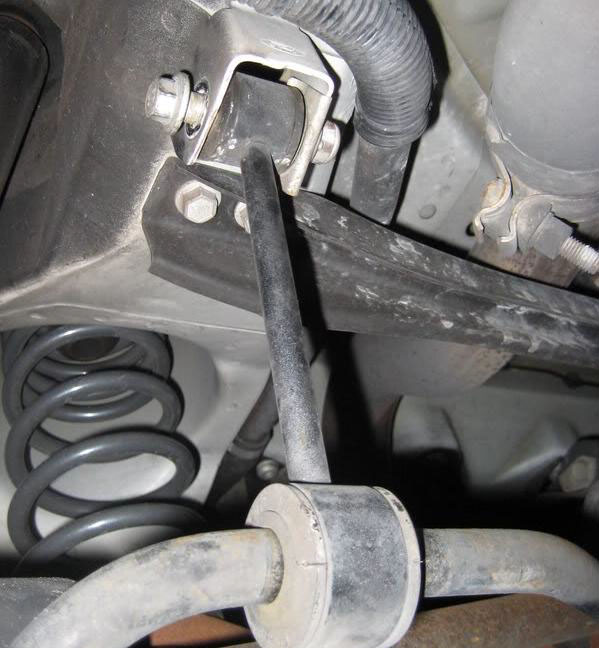
4. Remove the upper chassis endlink bolt (where the swaybar endlink mounts to the chassis) at each of the swaybar endlink chassis mounts. See figure 2.
5. Lower and remove the entire swaybar as one assembly.
2
Installation of the Steeda Adjustable Rear Swaybar
6. Remove and flip the Panhard bar bolt around at the chassis mount (not at the axle end). The bolt head needs to be towards the rear of the car, not the front. Torque to specification.
7. Generously grease the faces of the new swaybar axle bracket bushings with the supplied grease pack. To do so, simply back off the Nylock nut from the end of the assembled axle bracket to access the bushing faces. Reassemble the axle brackets and install them back onto the swaybar, do not fully tighten the nuts yet.
STIFFNESS ADJUSTMENT:
The swaybar has three available stiffness settings. The hole furthest from the center section of the bar is the least stiff setting, whereas the hole closest to the center section of the swaybar is the stiffest setting. You can use any setting you prefer. Be sure that you have the axle brackets on matching holes on each end of the swaybar. Due to the significant increase in rear suspension roll stiffness, over the factory rear swaybar, you may want to start out on the softest setting and increase the stiffness as you become more familiar with the vehicle’s handling characteristics. We highly recommend using Steeda’s competition front swaybar (555-1067) with this rear swaybar to provide the most balanced handling for the vehicle. Different tires/sizes, suspension springs, and vehicle weight may all affect the vehicle’s handling characteristics and require different swaybar stiffness settings for optimal performance. Therefore, we recommend trying different stiffness settings as you change other components.
3
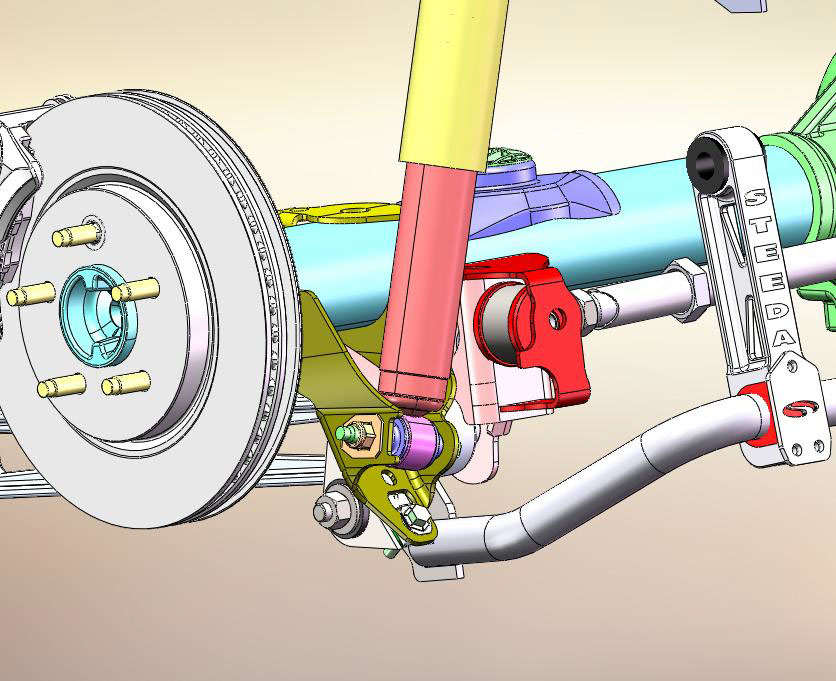
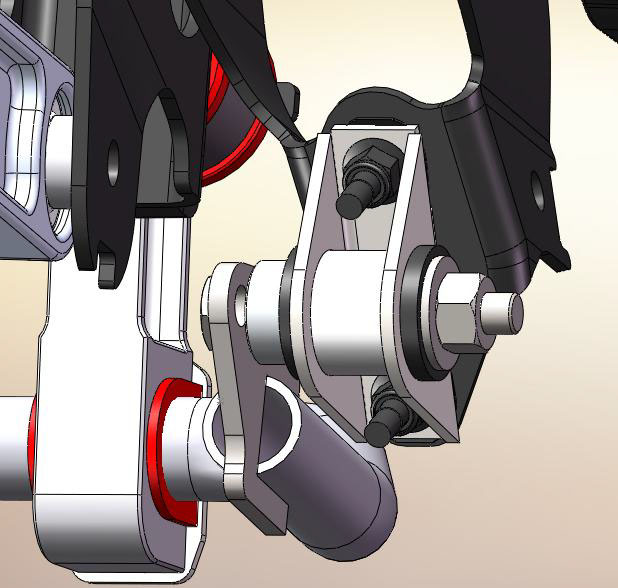
8. Install the Steeda swaybar in the same general location as the factory swaybar. See figure 3. Mount the axle brackets over the studs for the factory axle brackets and re-use the four nuts you removed. Tighten the nuts to specification. Tighten the 1/2” swaybar axle bracket bolts and Nylon lock-nut to 85-95 ft-lbs. See figure 4.
4
9. Generously grease the inside of the supplied polyurethane D-bushings. Slip the bushings over the swaybar in the general location of where they will mount with the chassis endlinks.
10. Install the billet chassis endlinks over the D-bushings you just installed over the swaybar. The “STEEDA” engraved face is intended to face the rear of the vehicle. Fit the steel logo plates over the back of the D-bushings and secure with the six supplied bolts. Torque to 18 ft-lbs.
Note the bushings are intended to be a tight fit in the endlinks, and a small dead blow hammer may be gently used on the bushings to seat them in the endlinks, if needed.
11. Generously grease the outer faces of the round bushings at the chassis end of the billet chassis endlink.
12. Lift the swaybar and endlinks up into the same location as the factory swaybar assembly.
13. Reinstall the factory upper chassis endlink bolts and nuts. Torque to spec.
14. Re-install the wheels and lower the vehicle. You are done! Road test the vehicle, no squeaks or rattles should be present. If any noises are present recheck installation of the swaybar and check the torque on all fasteners.
Thank you for choosing Steeda Autosports! If you have any questions or comments please call us at 954-960-0774 or email [email protected]
Copyright: Steeda Autosports 555-1073 5/23/2011
