 FREE 1 to 3-Day Delivery on Orders $149+ Details
Steeda Billet Charge Motion Control Plates ('05-'08 GT) - Installation Instructions
Installation Time
4 hours
Tools Required
- 10mm Socket (Deep)
- 8mm Socket (Deep)
- T27 Torx bit
- Socket Extension
- Socket Wrench
- Flat head screwdriver
- Motor oil (small amount for fuel injector o rings)
- Needle Nose Plyers
- Torque Wrench (Newton Meters (nm)
- Magnetic Tool
Installation
1. Disconnect positive battery terminal from the battery.
2. First remove the passenger side plug that connects into the Idle Air Control Motor on the Throttle Body by pulling back on the red clip and pressing the tab.
3. Remove the driver side plug from the Throttle Position Sensor on the Throttle Body by pulling back on the red clip and pressing the tab.
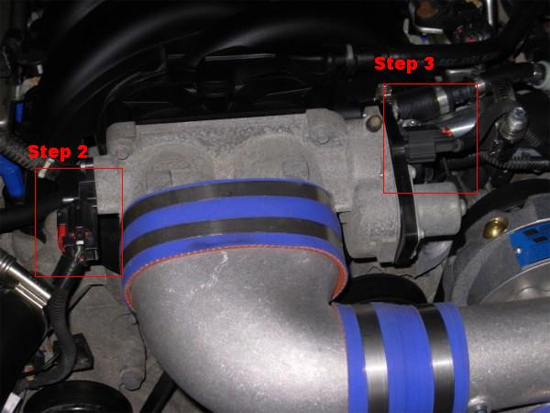
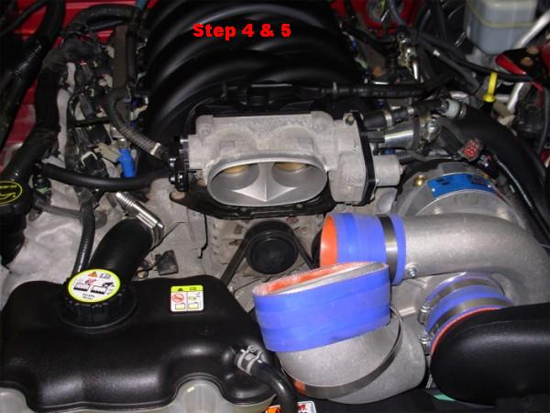
4. Loosen the clamps for the factory intake tube that connects to the Throttle Body using a flat head or phillips depending upon your application.
5. Remove air intake tube from Throttle Body and position this out of the way.
6. Remove vacuum line from the driver side Fuel Pressure Sensor.
7. Remove connector on the driver side that plugs into the Fuel Pressure Sensor.
8. Remove top and bottom Breather Tubes from the driver side of the Intake Plenum right behind the Throttle Body by pressing on the tabs and pulling.
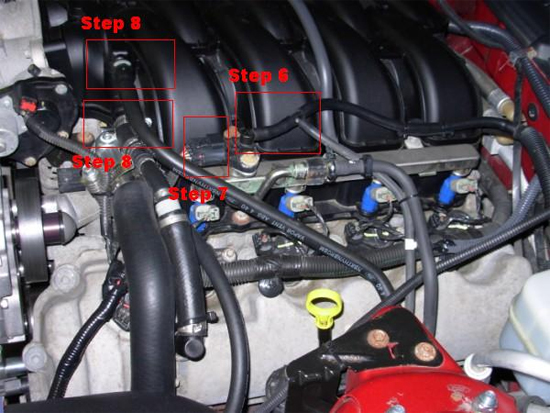
9. Remove the passenger side Breather Tube that connects into the valve cover by moving the green piece clock-wise and pulling straight up on the tube.
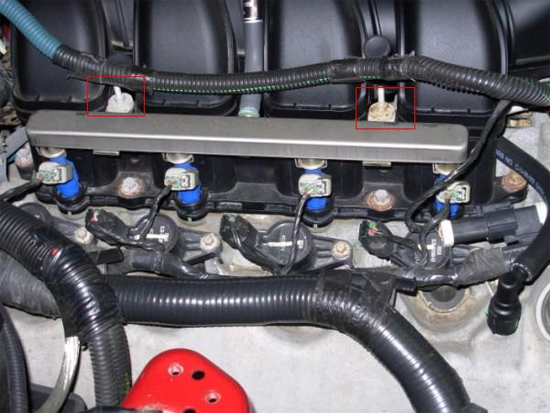
10. Remove plastic snaps that sit on top of the Fuel Rail Studs by pulling straight up on wire and move it away from the fuel rail and plenum so it does not get tangled.
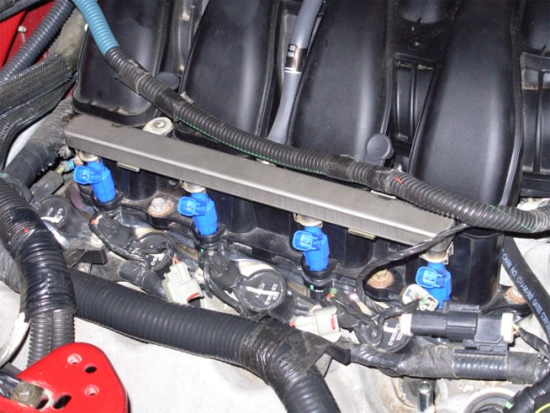
11. Remove all eight Fuel Injector Plugs by pushing in on tabs and pulling. Be gentle!

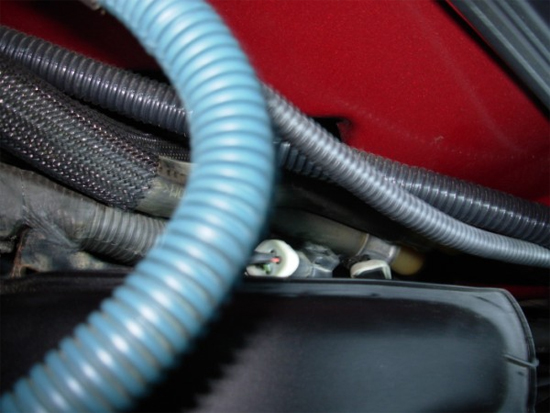
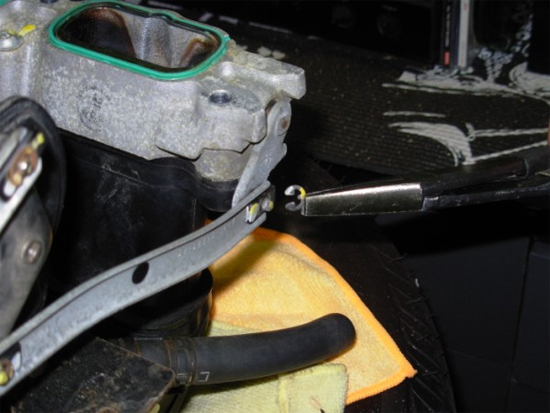
12. Also remove Motion Plate Actuator Plug (near firewall) from the rear of the plenum by depressing the tab and pulling straight out.
13. Use the 8 mm deep socket to remove all four (two on each side) Fuel Rail Stud Bolts
14. Before removing the fuel rail, remember to make sure there are rags or old towels to soak up any fuel you spill. There is no need to depressurize the fuel system.
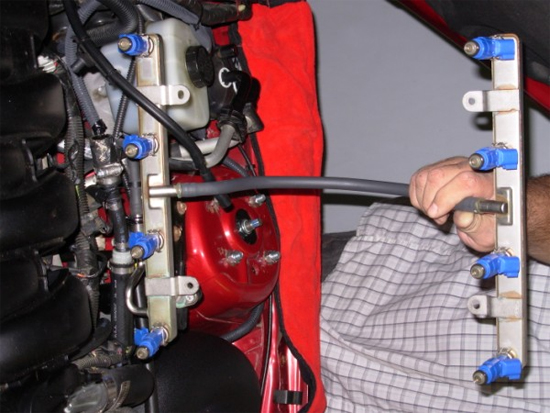
15. Remove the passenger side fuel rail by pulling directly up and applying even pressure. You can wiggle the fuel rail a little bit, DO NOT force them out by moving it back and forth - the O Rings are very sensitive and can be broken easily. Once this side is free, leave it sit there.
16. Remove driver side fuel rail by following the exact same procedure, once it has been removed- move the entire fuel rail over to the driver side of the car and make sure it is out of the way.
17. Remove eight bolts (Four on each side) from the Intake Plenum using a 10 mm (deep) socket with an extension.
18. Remove the two inner bolts (One on each side)from the Intake Plenum using the 10 mm socket (deep) with an extension. These will be a little difficult to remove. If you do drop one underneath the intake, you can recover it with a magnetic stick or wait until the intake has been removed.
19. Once the bolts have been removed, you must remove the breather tube from the back of the intake plenum as well.

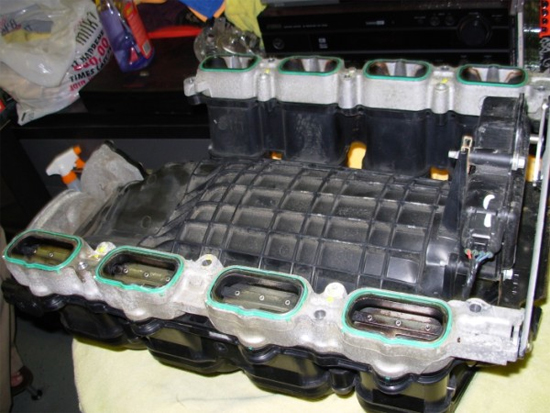
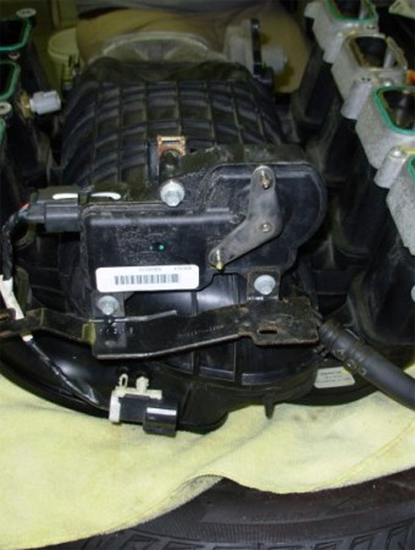
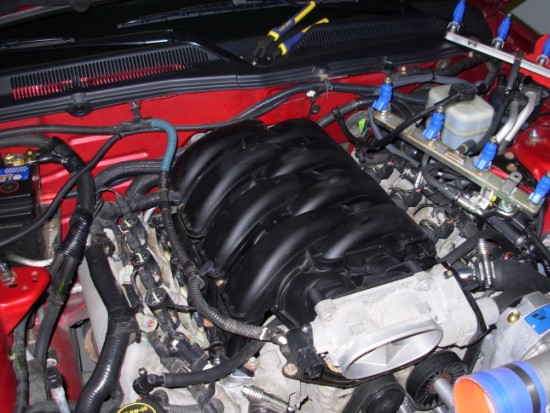
20. Remove the Intake Plenum by lifting directly upwards, making sure not to hit anything on the intake.

21. Place the intake on it’s top side on a steady work surface.
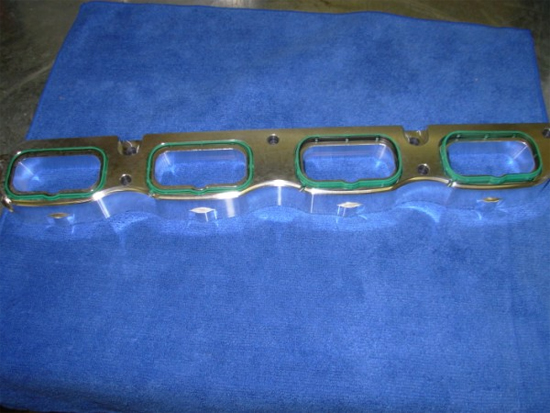
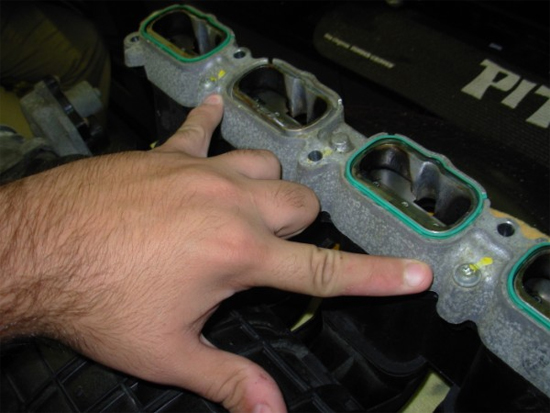
22. You will now need to remove all eight green gaskets from the old control motion plates. Be careful – these rip easily and you want an even tight seal on the new delete plates.
23. Place old gaskets onto new delete plates by lining them up with the nub on the delete plates and pushing down firmly as far as they can go. Make sure they are cleaned with just a towel to make sure there is no residue on them.
24. Remove the 4 C-clips from the charge motion plate actuator arms.
25. You will be keeping the charge motion actuator in place so the computer thinks it is still there and does not set off an engine light.
26. After the gaskets have been successfully transferred, remove the old motion plates using a T27 torx bit. There will be a total of four screws (Two on each motion plate).
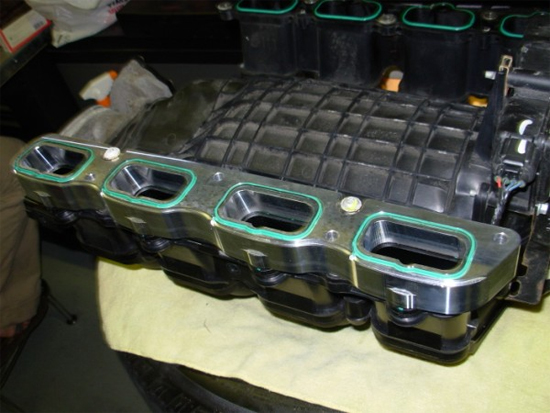
27. You will see another set of eight green gaskets. These will sit on the top of the new delete plates. Wipe these down with a clean, dry towel or rag.
28. Once that has been completed, install the new delete plates.
29. Make sure that the Left delete plate goes on the left side of the intake and the same goes for the right side. They are clearly marked on the intake and on the delete plates with LH and RH.
30. Tighten the four bolts as tight as you can get them. DO NOT use a power wrench, use a regular wrench.

31. Lower the Intake Plenum back onto the engine making sure you do not set it down hard or on any hoses that it could break.
32. Re-install the back vacuum tube.
33. Plug Control Motion Actuator connector back in.
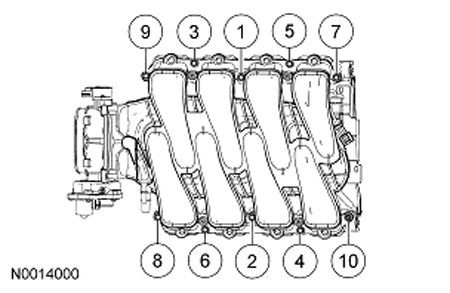
34. Install all bolts for the intake plenum. This is where it gets a little tricky. Ford has a specific way it wants the bolts torqued down. The following is a diagram that you MUST follow, all bolts will be torqued to 10 Nm starting with number one first.
35. Once that has been completed, re-install the fuel rails. Make sure to put a little oil on each O ring to allow them to slide in easier and you will not damage them this way. Push each fuel rail straight down into fuel injector slots until they click or pop.
36. Re-install Fuel rail studs (a total of four) and re-torque to 10 Nm.
37. Reconnect vacuum hose and electrical connector back up to fuel pressure sensor block on the driver side fuel rail.
38. Reconnect Throttle Position Sensor connector and Idle Air Control connector on the front on the intake near the throttle body on the driver side.
39. Plug all eight fuel injector connectors back in and connect wire snaps back onto fuel rail studs.
40. Using a ¼ inch Allen wrench, and thread the supplied bolts into place. I’d recommend against using threadlock, so you can remove the bar easier later should the need arise for maintenance of speaker or window components.
41. Re-install air intake tube and retighten clamps.

42. Re-check all components and make sure everything has been re-connected if it was removed.
43. Re-connect the battery and check for any leaks
44. Go for a drive and Enjoy!
Installation instructions provided by AmericanMuscle customer Kyle Bisnett 10.28.09
Related Guides
-
Installation
-
Installation
-
Installation
