Guaranteed 12/24 Delivery Still Available see item page for details! available on most items - Details
How to Install Steeda Strut Tower Brace (15-17 GT350) on your Ford Mustang
Installation:
1. Remove the battery cover panel. There are 3 threaded push pins to remove, and then the panel can be removed.
2. Disconnect the positive battery cable, and unclip it from the stud on the shock tower. Safely relocate for install.
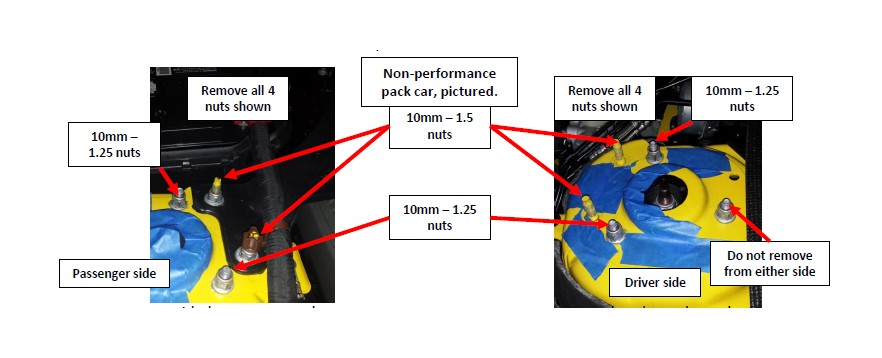
3. Remove the two nuts from the brace on the passenger side (on the performance pack cars, this brace is on BOTH sides, so 4 nuts total, all 10mm-1.5), these nuts are 10mm -1.5, there are 4 new ones included in the Steeda kit and they are labeled. These nuts go on the factory studs that are painted to match the body color, 2 on each side. See below on the orientation of the nuts. Do not get them mixed up!
4. Remove the forward and rear-most upper strut nut on both sides, these nuts are 10mm -1.25, replacements are included. All the nuts will be removed except the outside nut on each side of the strut tower.

5. Install the provided spacers onto the studs of the strut tower in the locations that do not have the factory brace installed. 4 spacers are installed on the performance pack models (2 on each side). On the Non performance pack models, all 6 spacers will be used (2 on the passenger side and 4 on the driver side).
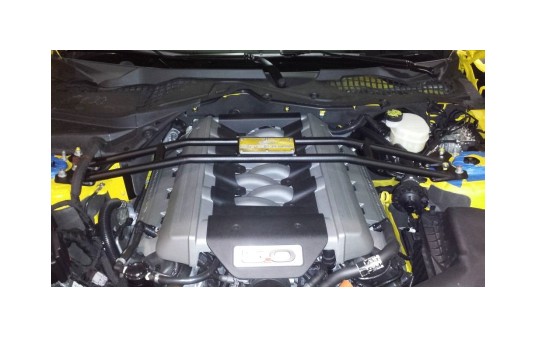
6. Place the strut tower brace into position, over the appropriate studs.
7. Install and tighten the provided replacement locking nuts. The (4) 10mm x 1.5 lock nuts will be used on the two independent studs on the strut tower, painted the body color. The (4) 10mm x 1.25 lock nuts will be used on the stud of the strut. The strut stud is the stud closest to the front and rear of the car. The only nuts not touched or replaced are the ones to the outside of each strut tower brace. Tighten all of the nuts to 35ft-lbs.
8. Reconnect the battery cable, and reinstall the battery cover.

