 FREE 1 to 3-Day Delivery on Orders $149+ Details
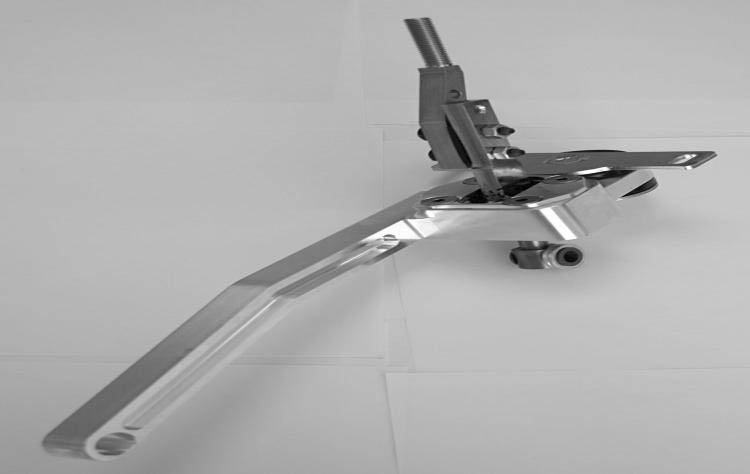
How To Install a Steeda Tri-Ax Shifter - TR-6060 on your 2010-2014 Mustang GT500
2007+ Steeda GT 500 Tri-Ax Shifter
Installation Instructions for 555-7307 and 555-7308
Note: The installation of this shifter can be accomplished by someone with average mechanical skills. However, it is strongly suggested that a factory service manual be available to fill in the instructions that have not been addressed in this procedure.
I PREPARING THE CAR FOR THIS PROCEDURE
1. In order to access the shifter the car must be placed on jack stands or on a car lift. If you are using jack stand, be sure that the car is on solid level ground before attempting this procedure.
II REMOVING THE FACTORY SHIFTER
2. From inside the car, on '07-'09 models (555-7307) unthread the shift knob and remove the shifter boot. Unclip the shifter boot by prying upward on the corners of it. On 2010 (555-7308) models unclip the center console by gently tugging upward near the rear by the storage bin and moving forward, unclipping necessary wiring harnesses/connectors. Leave the shifter knob and boot attached to the console.
3. Remove the upper shifter lever by removing the two bolts connecting it to the lower shift lever Picture 1. for 2010 models (555-7308) unbolt the upper lever and remove the console, boot, knob and lever in one piece.
1
4. Remove the insulation material at the base of the shift lever.
5. Remove the rectangular steel plate and boot. It is connected to the chassis
at it’s four corners.
6. To remove the shifter you will need to loosen and remove the four driveshaft bolts. Mark the bolt holes on both the driveshaft flange and the transmission flange to insure exact location when reinstalling the driveshaft. As this is a two-piece shaft, you need to remove the bolts on the driveshaft center mount. Some cars have shims between the center mount and the chassis. Be sure to note this and mark any shims to insure they are reinstalled in their original location. Failure to do this could cause the driveshaft to vibrate.
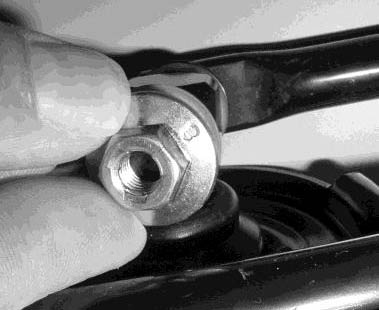
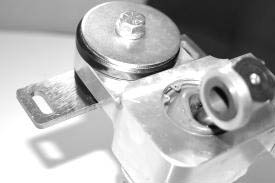
7. Remove the nut that secures the factory shift rod to the shift lever. Remove the shoulder bolt and pull the shift rod out of the way Picture 2.
2
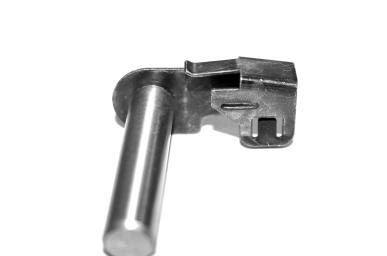
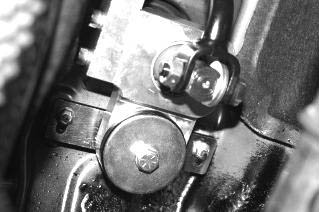
8. Remove the pins that attach the shifter arms to the transmission. The pins must be rotated up to release the clips then can be pulled out Picture 3.
3
9. Remove the two nuts that attach the rear shifter mount to the chassis just above the driveshaft flange on the transmission. Remove the shifter from the car.
III INSTALLING THE STEEDA SHIFTER
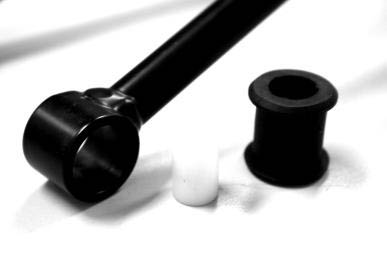
10. Remove one of the front shifter bushings from the OE shifter for use in the Steeda shifter arm. Press the rubber bushing into the Steeda shifter first, then the white nylon tube Picture 4.
4
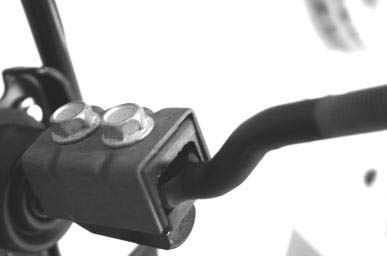
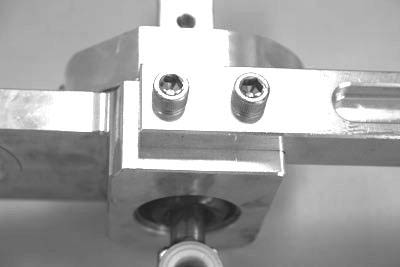
11. Attach the arm to the base with the provided Socket Head Cap Screws. Picture 5
5
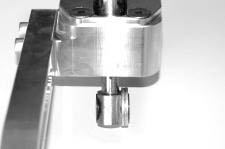
12. Press the two grey bushings in the lower hole of the lever. Use the provided Aluminum spacer to offset the bushing on the drivers side Picture 6. This will require a small press or vice.
6
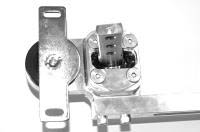
13. Assemble the rear shifter mount. Sandwich the rear hole in the shifter with the two provided urethane bushings. Then insert the flanged tube from the top with the round edge facing forward. Bolt the assembly together as shown using large washer, then the lock washer, and provided hex bolt Picture 7 & 8.
7
8
14. Fit the new Tri-Ax shifter into the opening in the chassis and attach the transmission arm to the passengerside of the transmission using the factory pin removed in Step 8.
15. Attach the rear of the shifter to the factory studs on the chassis using the nuts removed in Step 9, Picture 9.
9
16. Grease the new bushings and the shoulder bolt for the factory shift rod, Reinstall the nut and shoulder bolt using thread locker.
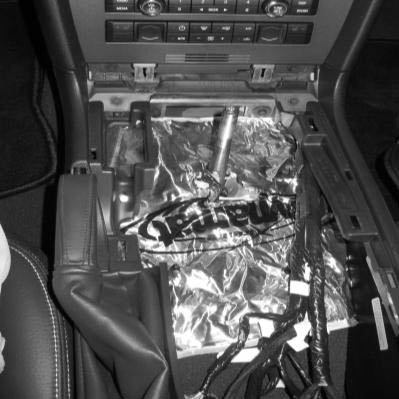
17. From above install the provided sheet of Dynamat. To do so
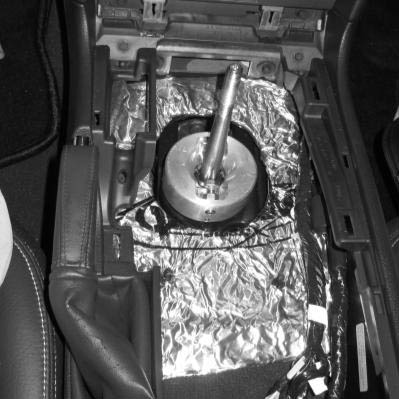
install the full sheet of Dynamat over the transmission tunnel with the adhesive backing paper still on the sheet. Once fitted, use a razor blade to cut out the shifter hole and any excess from the sides. Remove the sheet and the adhesive backing paper then re-install in the car and smooth it down (Process illustrated in Pictures 10 – 12 on a 2010 Mustang with a Steeda Sport Shifter installed).
10
11
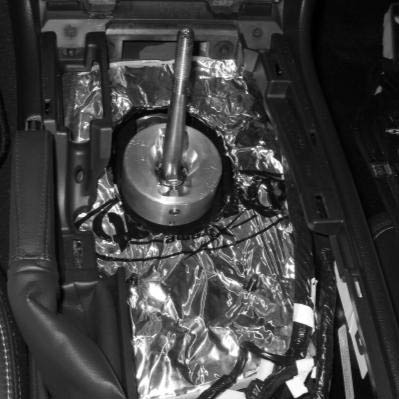
12
18. Reinstall the steel plate with rubber boot. Place the insulation back into position.
19. Install the provided upper shift handle by bolting it to the lower shift lever. It is recommended that the handle be installed in the higher position for the greatest driver comfort. For the shortest throw, install the handle in the lower position. For Clearance purposes it is recommended that the handle be installed on the passenger side of the shift lever offset away from the driver.
NOTE:
2010 models (555-7308) reuse the factory upper shifter lever.
20. Be sure all bolts are tightened securely. Thread locking compound is highly recommended.
21. For 07-09 models (555-7307) reinstall the shift boot and knob. Important: Always use an anti-seize compound on the threads when installing an aluminum shift knob onto the Steeda shift handle.
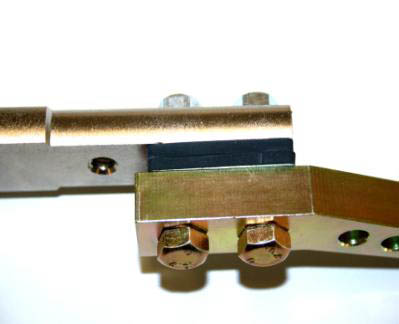
STEEDA SHIFTER ISOLATOR KIT
1
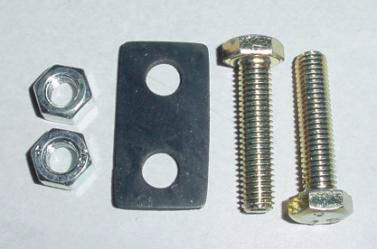
1. The rubber isolator is designed to go between the shift lever and the shift handle for kit 555-7307 (07-09 models).
2. Insert the supplied bolts through the handle, through the isolator and then screw them into the shift lever. Tighten to desired firmness and lock the assembly together using the two supplied jam nuts. See Pic #2.
2
TECH TIPS
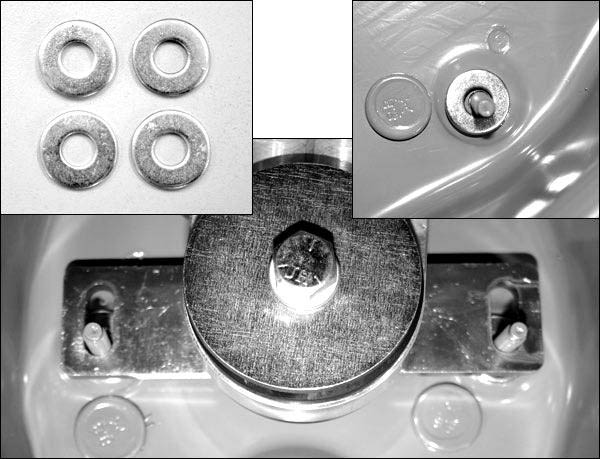
1. Variation in the transmission height may cause the shift to be extremely tight and very difficult to move. If this is the case, use two of the four washers (shown below) between the rear of the shifter body and the chassis. If problem persists, add the second set of washers.
Steeda Autosports Inc. All Rights Reserved 2006 GT500 Shifter.doc11/06
Thank you for choosing STEEDA. Any questions on these instructions contact us at (954) 960-0774 or e-mail us at [email protected]
