Guaranteed 12/24 Delivery Still Available see item page for details! available on most items - Details
How to Install Steeda Ultra-Lite Low Profile Chassis Jacking Rails (15-17 Convertible) on your Ford Mustang
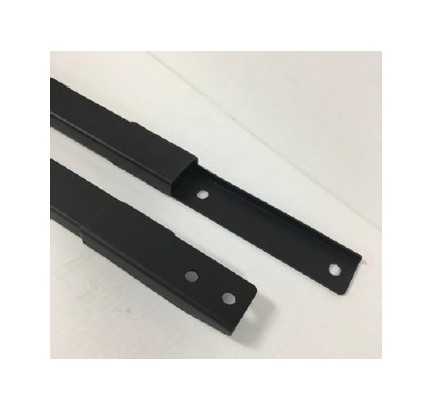
Installation
1. With the vehicle on the ground and the parking brake engaged you may begin the installation.
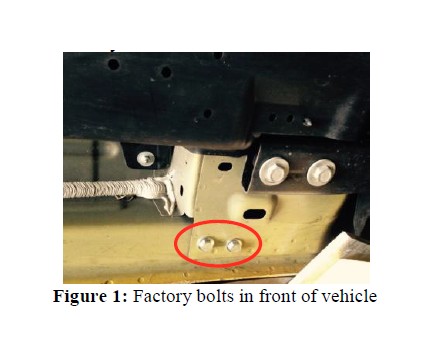
2. Remove the four (4) factory bolts from the front of the chassis (2 on each side) using the 15mm socket and ratchet.
> NOTE: It is common for factory cars to have less than four bolts. See Figure 1 for reference.
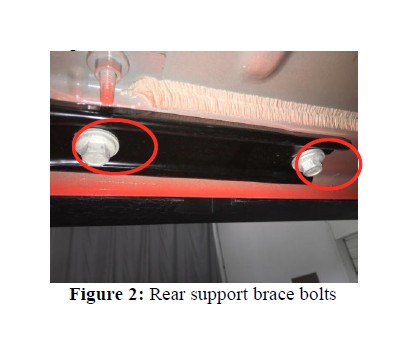
3. Remove the four (4) 15mm factory bolts from the rear support brace (2 bolts per side) using the 15mm socket and ratchet. See Figure 2 for reference.
4. Orient the Steeda chassis jacking rail as shown in Figure 3. Ensure that the short bracket with the holes closest together is facing the front of the vehicle and bent side of that bracket faces towards the center of the vehicle.
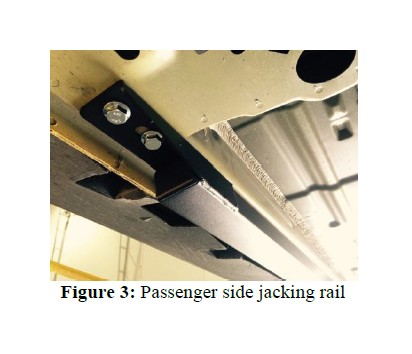
5. Line up the mounting holes in the Steeda chassis jacking rail brackets with the threaded chassis holes in the front and rear.
6. Using the supplied hardware, start the short bolts in the front.
7. Place the supplied aluminum spacer block in between the rear mounting bracket and the chassis as shown in Figure 4.
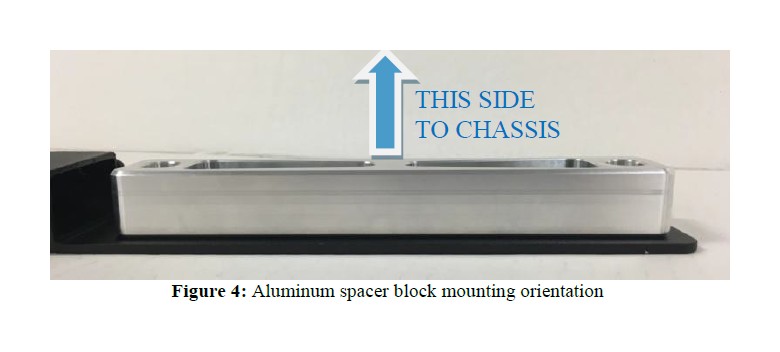
8. Using the supplied long bolts, start them in the rear until they can hold the Steeda chassis jacking rail in place.
9. Tighten all of the supplied bolts.
> NOTE: Tighten the bolts evenly front to back to ensure proper fitment.
10. Repeat Steps 4 - 9 for the opposite side.
NOTES
> Steeda chassis jacking rail powder coating is only designed to withstand vehicle jacks with padded rubber jacking plates. Surface damage can be caused by using jacks without these rubber pads.
> Sometimes the factory seam sealer will prevent the rails from sitting flat. Simply scrape it off for better fitment.
