FREE 1 to 3-Day Delivery on Orders $149+ Details
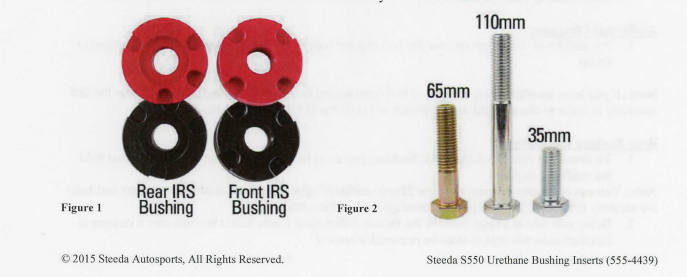
How to Install Steeda IRS Differential Bushing Insert System - Urethane on your Mustang
Installation Time
1 hours
Tools Required
- 18mm socket and ratchet
- 7/8 socket and ratchet
- 21mm socket
- 13mm socket
- Blue Loctite
Rear Bushing Installation
1. To install the rear IRS differential bushing, you must loosen the two rear 21 mm bolts that hold the subframe in place.
Note: You can only remove these two rear 21mm subframe bolts if the front subframe brackets and bolts are securely fastened. This is to prevent misalignment of the subframe.
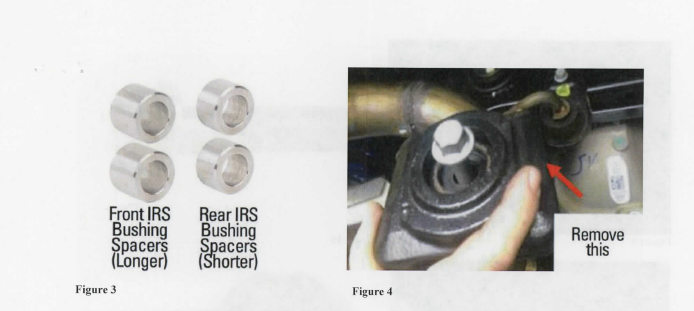
2. Doing one side at a time, remove the factory differential 18mm bolt. On some cars a damper is installed onto this bolt, it must be removed. Figure 4
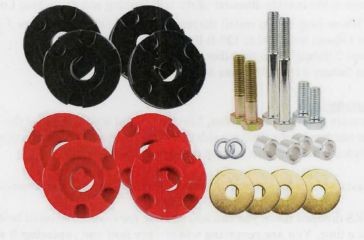
3. Once the bolt is removed, insert the aluminum top hat spacer into the original subframe bushing as shown. Figure 14, 15 and 16.
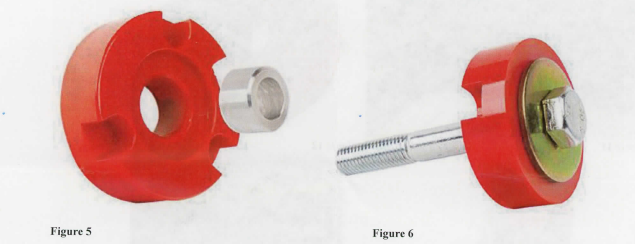
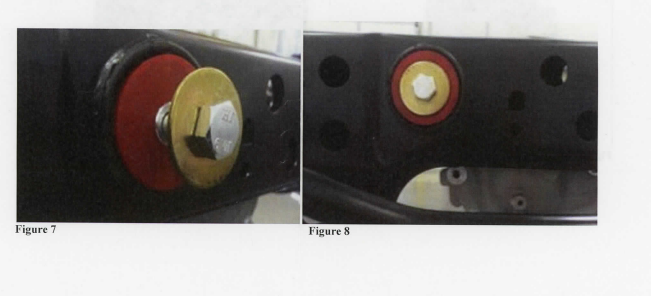
4. After the aluminum top hat is in place, install the urethane bushing with the provided large
washer. Figure 5, 6, 7 and 8
5. First insert the shorter billet aluminum spacer into the rear urethane bushing and then install the bushing into place where the 18mm factory bolt was removed. Figure 5
6. Apply grease to the outside diameter of the rear bushing and apply blue Loctite to the 7/8" (head) 14mm x 110mm long bolt to install the rear bushings in the rear. Figure 5 and 6
7. Torque the 110mm long bolt to 129 ft-lbs.
8. Repeat steps 2 through 6 on the other side.
9. Tighten the factory 21mm subframe bolts to 129 ft-lbs.
Front Bushing Installation
Locate the main subframe bolts (blue, 21 mm hex head bolts). Remove the two front bolts and four 13mm hex head bolts (two per side) securing the front subframe support bracket to the chassis, allowing the subframe to drop down in the front.
Note: If more clearance is needed, loosen the rear subframe bolts, but do not remove them completely.
2. With the IRS drooped down you can now remove the front differential bolt. Figure 9. Remove only one at a time. You are removing one factory bolt and replacing it with two new bolts.
3. Remove the 18mm bolt completely. Figure 9.
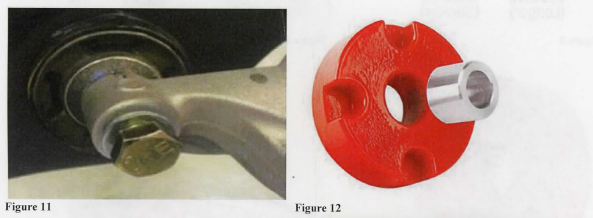
4. Then install the included 7/8" (head) 14mm x 65mm long bolt and 7/8" washer with blue loctite from the rear towards the front, in the same manner the stock bolt was. Figure 10 and 11.
5. Torque to 129 ft-lbs.
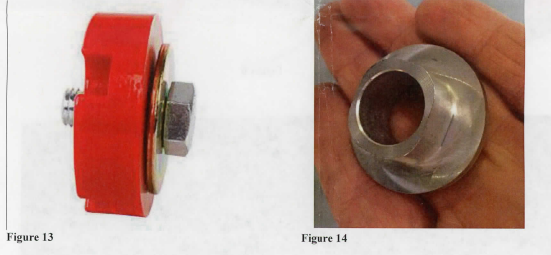
6. Take the longer billet aluminum spacer and insert it into the front urethane bushing. Figure 12.
7. Fit the bushing into place from the front side of where the original factory bushing and apply some grease to allow the bushing to slide into place with less resistance.
8. Rotate the bushing so the grooves match the factory bushing and apply some grease to allow the bushing to slide into place with less resistance
Note: Grease is included for ease of installation only and is not required for operation.
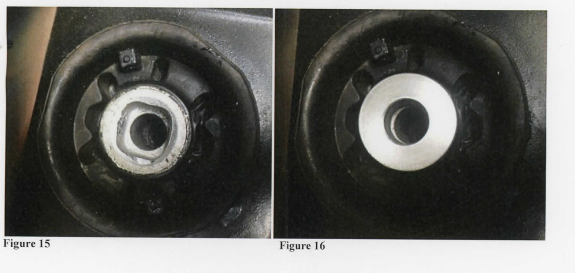
9. Bolts the front bushing into place with the provided 7/8" (head) 14mm x 35mm long bolt and washer with Loctite. Torque to 35 ft-lbs. Figure 13.
10. Repeat steps 3 through 9 for the other side front differential bolt.
11. Once both front IRS differential bushings are installed, tighten back up the subframe support bracket plate and subframe bolts. Torque the 21mm main subframe bolts to 129 ft-lbs and the 13mm bolts to 41 ft-lbs. Then reattach the factory exhaust brackets.