 FREE 1 to 3-Day Delivery on Orders $149+ Details
How to Install Standard Steering Rack Bushings on Your 1985-2004 Mustang
Installation Time
1 days
Tools Required
- Hammer
- Ratchet (1/2" is recommended but 3/8" will do just fine)
- Marking Crayon
- Pliers (needle nose and regular)
- Sockets to fit your ratchet sizes: 13mm, 15mm and 18mm
- Jack and Jack stands
- Some type of penetrating oil
- Rags
- Torque wrench
Installation
Removal:
1. In order to install your new bushings, you will first need to remove your steering rack. You do not necessarily need to take it all the way out, but it must be at least taken off of the posts in order to get to the rear bushings.
2. Jack up the front of your car and place it safely on jack stands. Center your steering wheel and lock it in place. The steering wheel must not be moved at all when removing your steering rack to prevent misalignment of the steering shaft and pinion gear.
3. Take your marking crayon and mark the relationship between the steering shaft flexible coupling and the input shaft. Once this is set, remove the 13mm pinch bolt. In the picture below, the red line shows you how to mark it; the red circle shows where the pinch bolt is.
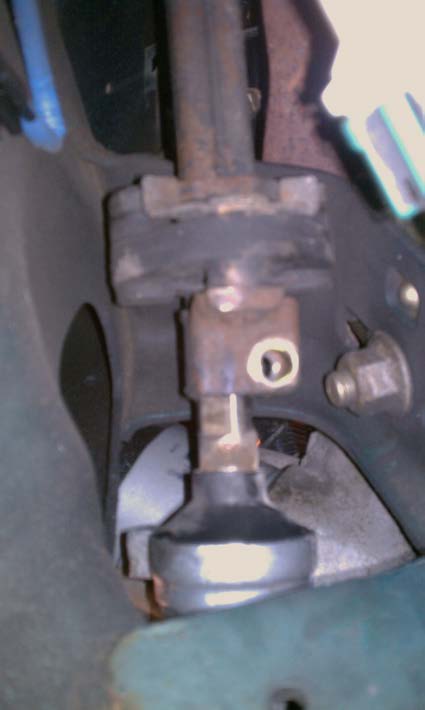
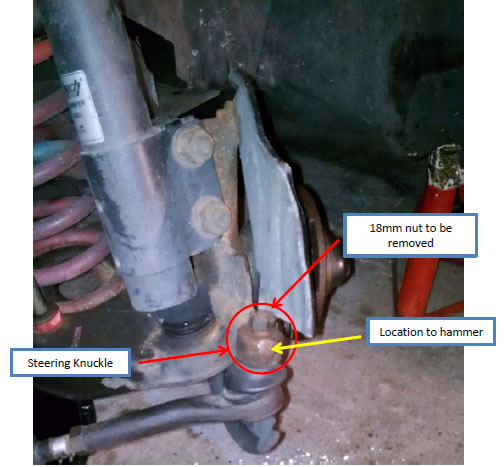
4. Disconnect both outer tie rods from the steering knuckles. You will first have to remove each cotter pin. Then take the ratchet and 18mm socket to remove the nut (you maybe need a different size depending on what tie rod is there - either OEM or aftermarket).
NOTE: It helps to use penetrating oil first and then jack up underneath the tie rod just enough to put some pressure on it. This will prevent the joint from turning while you try to remove the nut.
5. Once you have both nuts off, take the hammer and hit right on the knuckle outside of the tie rods. The location to hammer is shown below by the yellow arrow and the steering knuckle is circled.
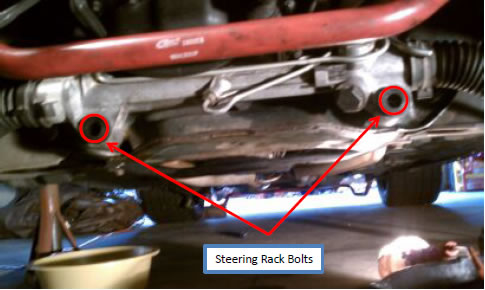
6. Once both of the tie rods are separated from the knuckle, the (2) steering rack bolts holding the rack to the K-member need to be removed. There are 18mm nuts and big washers on the front and there are 15mm bolts on the back of the frame. Remove both nuts and then slide the bolts out; they are really long and are shown in the picture below.
7. Once you have all those out, the steering rack can slide right off of the mounting posts. Be careful as the rack is heavy and you don’t want to drop it as the lines are still connected. Bring over the jack stands to support it in the air as close to its original level as possible.
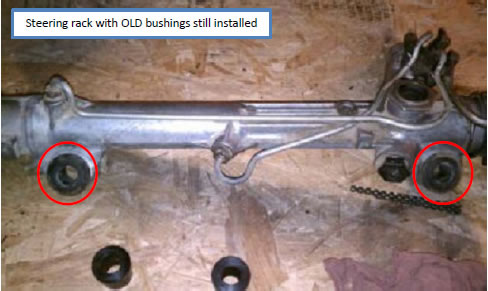
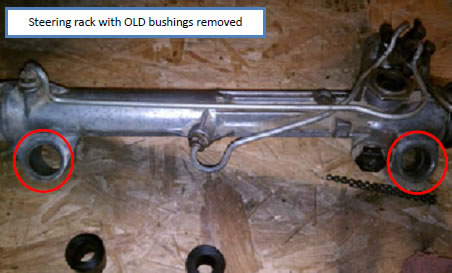
8. Take some pliers and grab hold of the (4) bushings: (2) come out of the front and (2) come out of the back.
NOTE: For this and the installation of the new bushings, I went ahead and took the rack completely out to put on my table for better views of the bushings.
Installation:
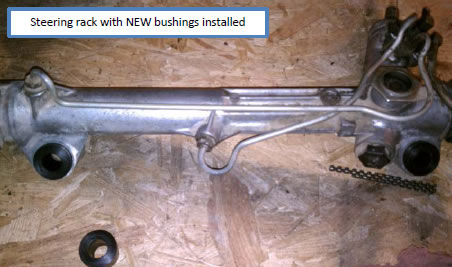
1. Simply take your new bushings and set them right where the old ones were.
2. Put the rack back up into position and line up the marks you made on the steering shaft flexible coupling and input shaft. Attach them and install the pinch bolt; hand-tighten the pinch bolt at this point.
3. Slide the rack back onto the posts. Reinstall the bolts from the back of the K-member and attach the washers and nuts to the front. Torque the nuts to 30-40 ft/lbs and then torque the pinch bolt to 30-40 ft/lbs as well.
4. Reattach the tie rods to the steering knuckles and torque the nuts to 35-47 ft/lbs.
5. Raise the car off of the jack stands and lower it to the ground.
Installation Instructions written by AmericanMuscle customer Thomas Bernier 12.28.11

