 FREE 1 to 3-Day Delivery on Orders $149+ Details
How To Install Steeda Full Length Subframe Connectors on your 1979-2004 Mustang
Installation Time
3 hours
Tools Required
- Jack and jack stands or a drive-on lift
- Arc grinder (best), power sander (good) or sanding block with at least 100-grit sandpaper (not great)
- Ratchet with 5/8" socket
- Hammer
- Permanent marker
- MIG welder or a shop that has a MIG welder and a drive-on lift
- Isopropyl alcohol (rubbing alcohol), available at any pharmacy
- Clean rags or shop towels
- Rust-prohibiting primer
- Painter's masking tape
- Plastic sheet
- Eye protection
- Gloves
- A dust mask (okay) or respirator with replaceable cartridges (better)
- Hearing protection, if using power tools
- Welding mask or helmet if welding it yourself
Installation Instructions
This product is best installed by an experienced welder/fabricator. Incorrect installation could result in damage to the vehicle, including burning holes though the sheet metal structure of the car and / or interior fire. Use caution. Bring the car to a professional if you are not sure you can complete it correctly.
Step 1. Raise the car.
Place the vehicle on a drive-on lift, so the weight of the car is supported by the wheels. If you don‟t have access to a drive-on lift, raise the front wheels with ramps and support the rear axle with jack stands (solid axle only).
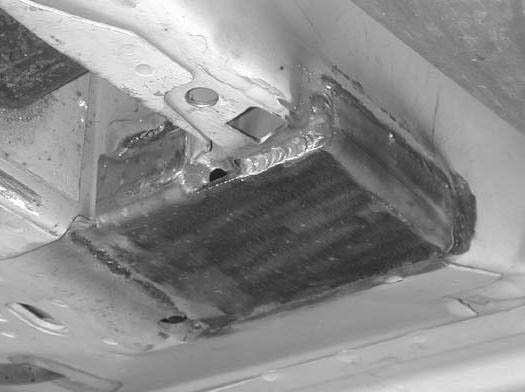
Step 2. Torque box adapter.
The purpose of the adapter plate is to provide a stronger attachment for the subframe connector. We have found that the area directly above the subframe connector produces very inconsistent welds because of the thin metal and many factory spot-welds. The adapter plate provides a stronger attachment and reinforces the torque box area.
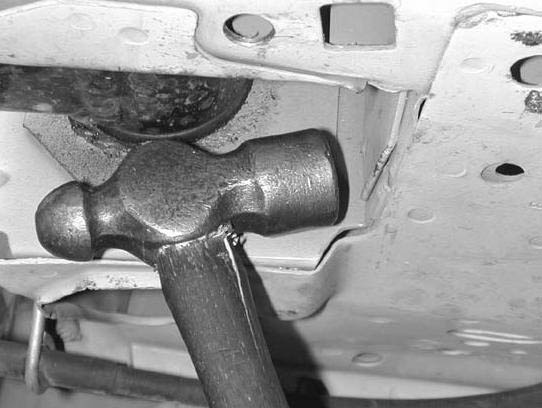
1 Some cars will have a small lip that sticks out on the bottom of the torque box. Hammer in the lip so the adapter plate sits flush.
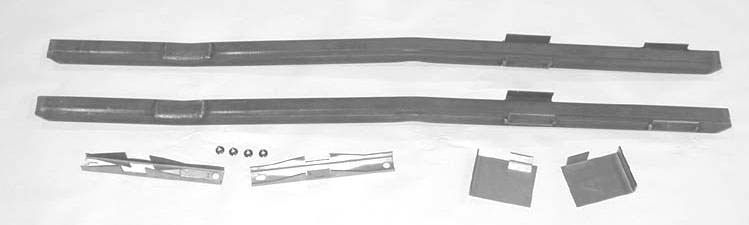
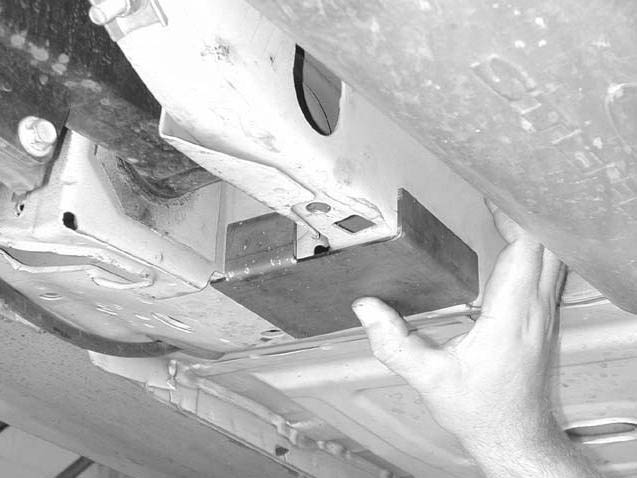
2. Hold up torque box adapter plate to the car as pictured and trace its outline on the car. Disconnect the mufflers for more clearance if necessary. There are left and right adapters plates. 3. Sand or grind off the paint around the outline of the adapter plate to get clean metal for welding. 4. Hold the adapter plate up tight against the torque box and MIG weld it into position. Note: The thickness and “weldability” of the metal around the torque boxes varies greatly. Some areas will require much more heat than others.
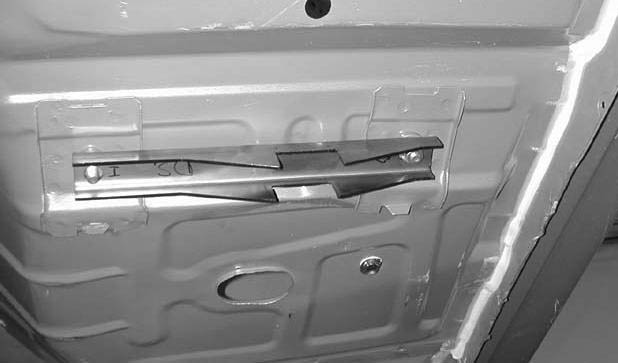
Step 3. Crossbrace
There are left and right crossbraces. Install the cross braces over the seat bolts with the taller side toward the front of the car, and the round hole towards the center of the car. The slotted hole goes towards the outside of the car. Attach the cross braces with the nuts provided.
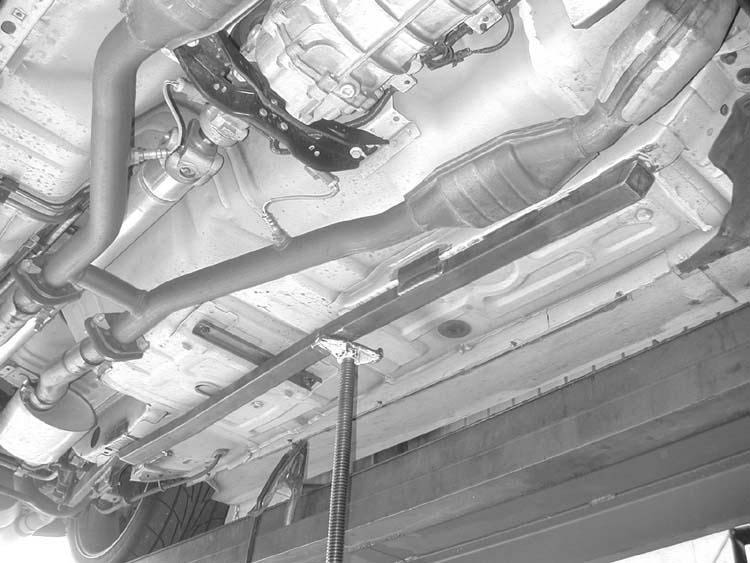
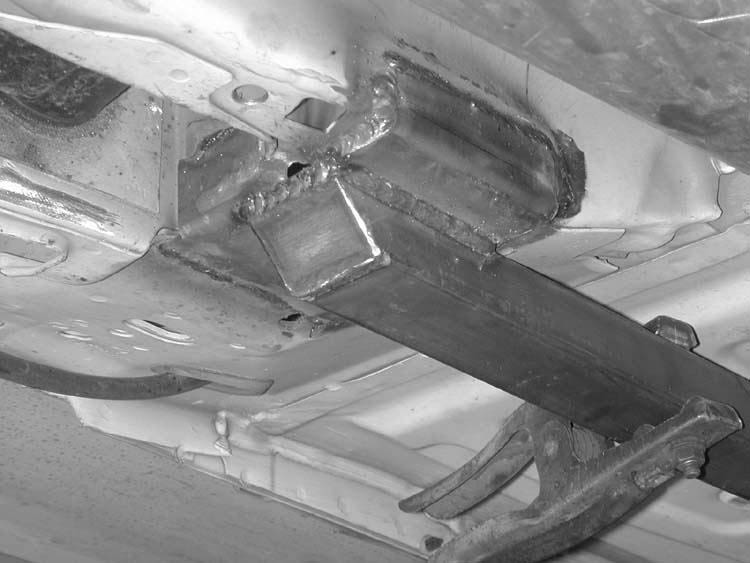
Step 4. Install the subframe connector.
1. Line up the connectors under the subframes with the tabs forward. There are left and right connectors. The front tab goes on the outside of the subframe. The back of the subframe connector lines up with the back of the torque box adapter plate. Use the tabs on the front half of the connector to control left-right alignment. The back of the connector will be near the middle of the torque box adapter, not directly under the rear subframe.
Use a jack to push the connectors up until they are flat against the front subframe. On some cars you will have to pull the fuel line out of the way for clearance while welding.
Note: On '96 - '98 Cobra the transmission crossmember brackets must be notched to clear the subframe connectors. Cut away just enough material to clear the subframe connector. Once the connector is welded in position, weld the crossmember brackets to the subframe connector.
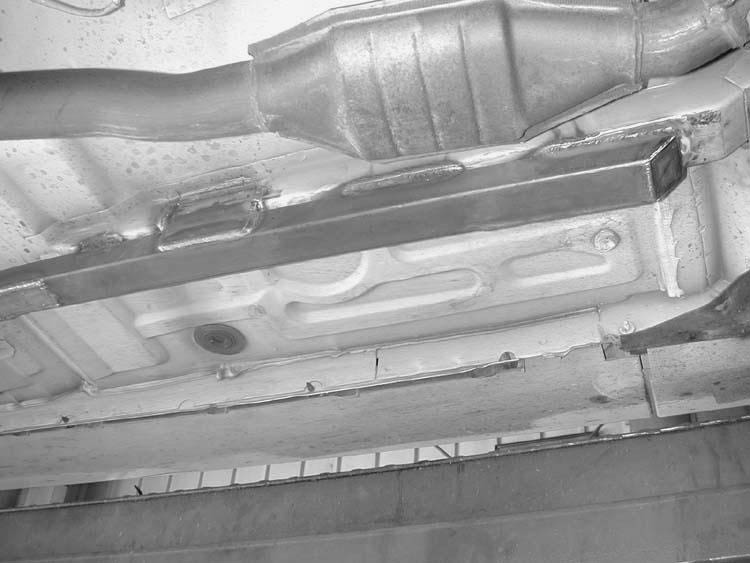
2. Trace the outline of the connector on the front subframes with a marker.
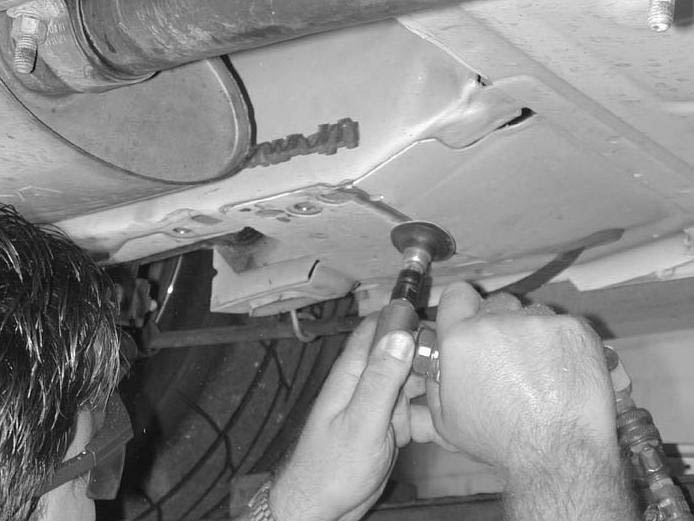
3. Remove the connector and sand or grind the paint off around the tabs and every 2 to 4 inches along the subframe where you will weld it. It is not necessary to weld the along the entire subframe connector.
4. Reinstall the subframe connector. Jack up the connector until it is flat with the front subframe. MIG weld the connector to the front subframe and rear torque box adapter plate. Weld around the tabs and in short sections along the length of the subframe. Use caution when welding over the top of the tabs and weld small sections at a time to prevent the floor pan from getting too hot.
5. Weld the crossbrace to the subframe connector.
Step 5.
Paint the subframe connectors with a primer and finish coat.
DISCLAIMER: Often during the powdercoating process blemishes or small imperfections in the finish will occur. Although we try to insure that all our subframe connectors have optimum finishes, sometimes these small imperfections are considered insignificant. It is important to note that these imperfections in the finish do not in any way affect the performance or warranty of the product.
© Copyright Steeda Autosports Inc. 2004. All rights reserved.
