 FREE 1 to 3-Day Delivery on Orders $149+ Details
How to Install Matte Black Upper Rear Surround Decal on your Mustang
Installation Time
1 hours
Tools Required
- Spray bottle with soap & water mixture
- Plastic Squeegee
- Snap knife
- Painters tape

Shop Parts in this Guide

Step 1: Peel backing from insert exposing the adhesive.
Also spray back of decal as your peeling the backing paper off.

Step 2: Place the decal on the car. You will be able to maneuver it into position because of the soap and water solution you sprayed on earlier.
If it doesn't slide enough peel back and spray on more solution.
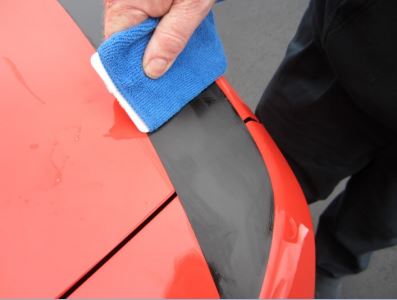
Step 3: Squeegee out the water from underneath the decal.
Cover it in a cloth that will not scratch the vinyl and keep it wet.
Step 5: Use a hair dryer when needed to help the vinyl conform to the surface and help dry the underneath so the vinyl can stay in position.
Once the vinyl has conformed to the shape of the car let it cool, holding it for a moment.
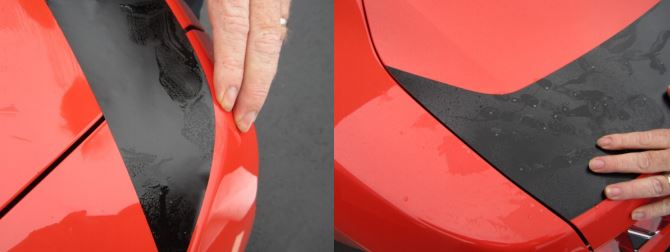
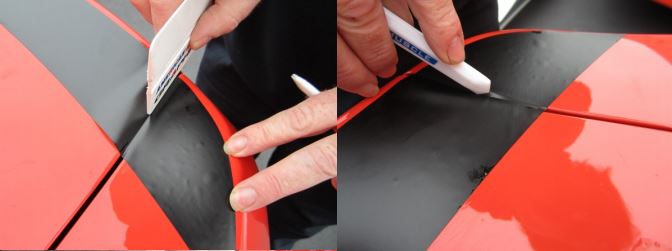
Step 6: 2015 rear surround alignment
On the rear surround decal, place the deck lid section keeping the side edges to fall in the middle of the deck lid and fender gap. You will match up the edges of the deck lid section to the fender section. The fender section should ride just near the ourt edge of the top of the fender. The deck lid section should come close to were the body starts to round over in the rear.
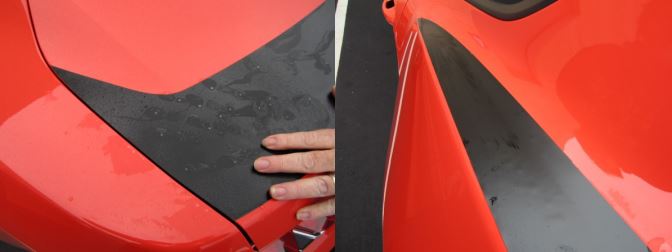
Step 7:2015 rear deck alignment and trim
The deck lid section should come close to where the body starts to round over in the rear. Once the decal has been squeegeed and is dried in a bit, it will need to be separated at the lid/fender gap.
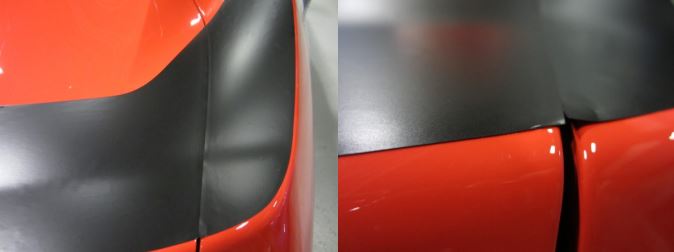
Do so by using the edge of the squeegee and lightly letting it crease the vinyl in the middle of the gap.This will give your knife a guide to cut.
Use a snap knife with the blade extended out to only the minimum and cut through the vinyl being careful of the paint.If necessary tape of any paint that maybe in contact with the blade.The vinyl can be pulled back and tape removed before final drying of the vinyl after the cutting.
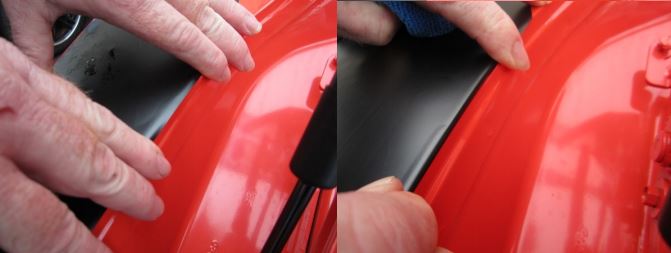
Step 8: vinyl edges
Using a hairdryer heat the vinyl at the body gap were the vinyl will roll over the body panel. Heat will help conform the vinyl and dry it as it goes over the body. Being careful too much heat can wrinkle the vinyl.
Leave several hours, depending on climate, of dry time before cleaning car.
Use a quick detailer in a spray bottle for the initial cleaning then hand wash car waiting at least several days for the first time after drying.
Do not power wash vinyl or wax vinyl.
In these instructions a hood is pictured but the process is similar for other products.

