Guaranteed Free Delivery by 12/24! available on most items - Details
How to Install Xtreme Stop Precision Cross-Drilled & Slotted Rotor w/ Carbon Graphite Brake Pad Kit - Rear (05-10 All) on your Ford Mustang
Installation Time
120 minutes
Tools Required
- Set of Jack Stands
- Car Jack
- Rubber Mallet
- Sockets 11mm 15mm
- Disc Caliper Kit (1” 5/8)
- Brake Fluid

Shop Parts in this Guide
Installation Instructions:
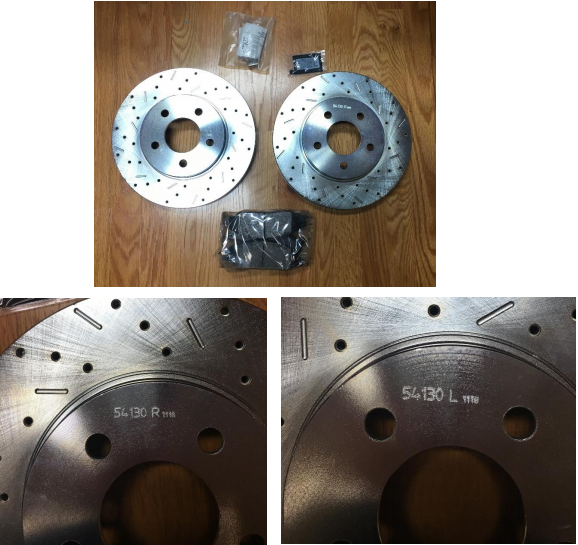
1. The box comes with the left and right rotors, 2 pairs of brake pads, a set of brackets for the pads, and some brake pad grease. The “L” rotor goes to the driver side the “R” rotor goes to the passenger side.
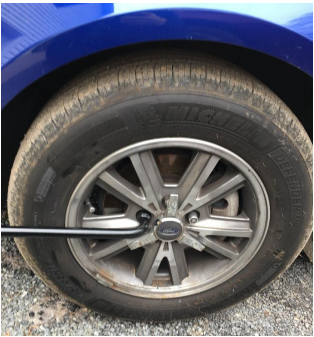
2. Loosen the lugs on both sides of the car prior to lifting the vehicle.
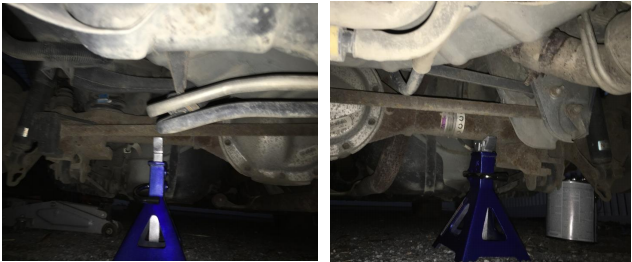
3. Jack the car up and use stands to support the car safely. The lug nuts can be fully loosened, and the wheel removed.
4. Locate the bolts on the back of the caliper and proceed to remove them with a 11mm socket. Be care when removing the lower bolt since its close to the brake line. The caliper should slide off once the bolts are removed.
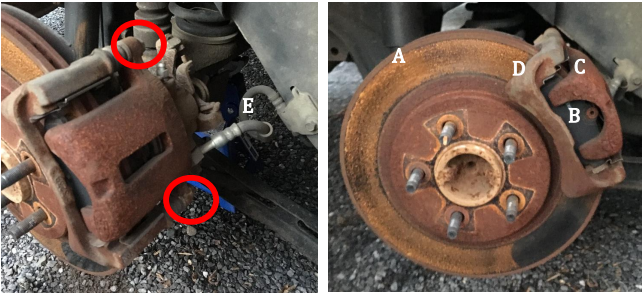
A= Rotor, B= Brake Pad, C= Caliper, D= Caliper Bracket, E= Brake Line
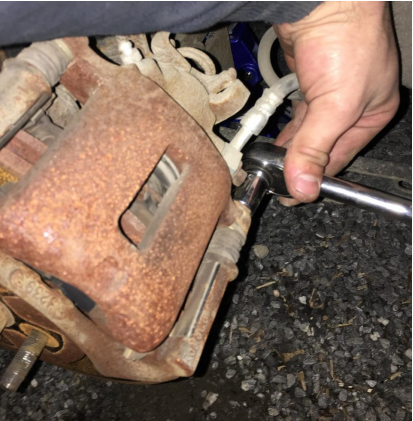
5. Be careful pulling of the caliper since torqueing the brake line could cause damage. DO NOT LET THE CALIPER HANG!!! Sit it on something (paint can, bucket, etc.) The brake pads will now be exposed and ready for removal.
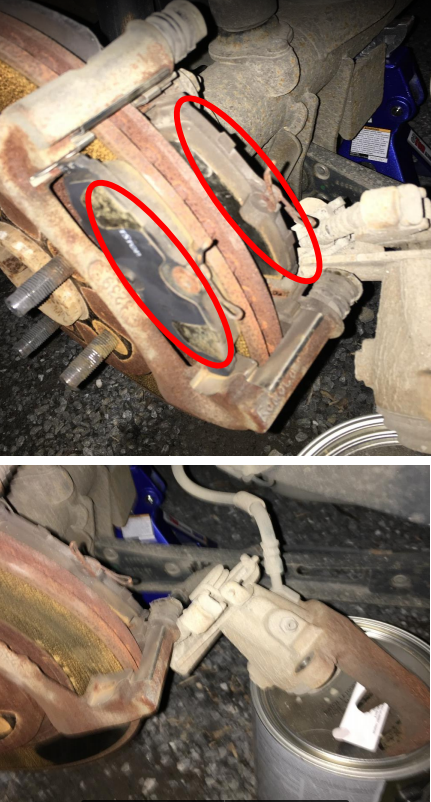
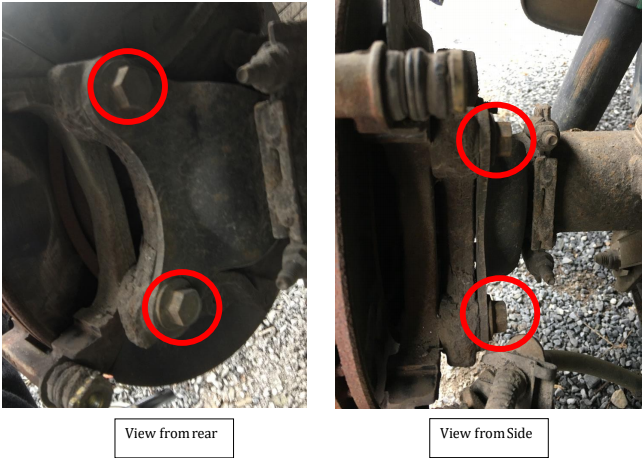
6. To gain access to the rotor the rotor bracket must be removed by loosening the two bolts behind the rotor.(use 15mm socket)
7. Be mindful of the clips on the inside of the caliper bracket. These should be replaced when changing the pads. The kit comes with replacements.
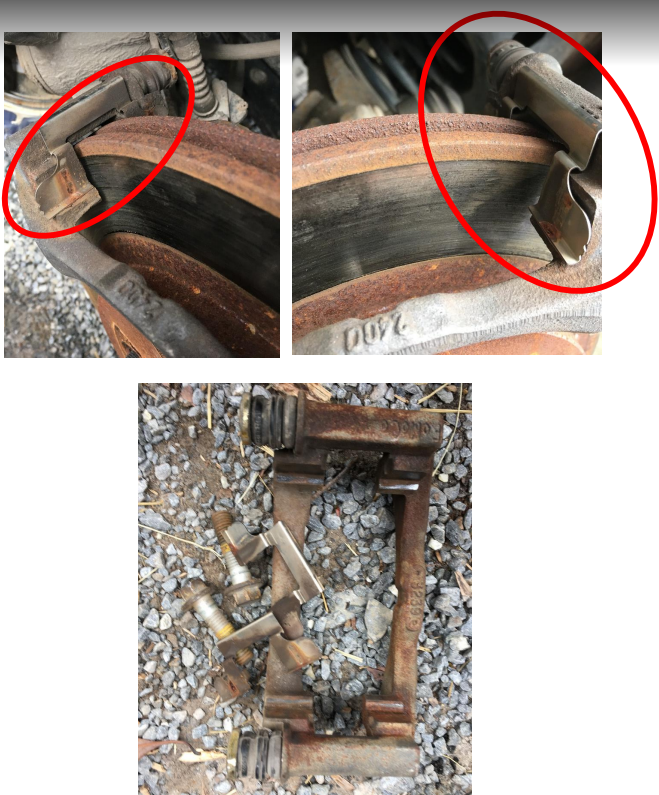
8. The rotor can now be removed. If the caliper is rusted on the rotor should be tapped with a rubber mallet. The old rotor can be swapped out with the new one.
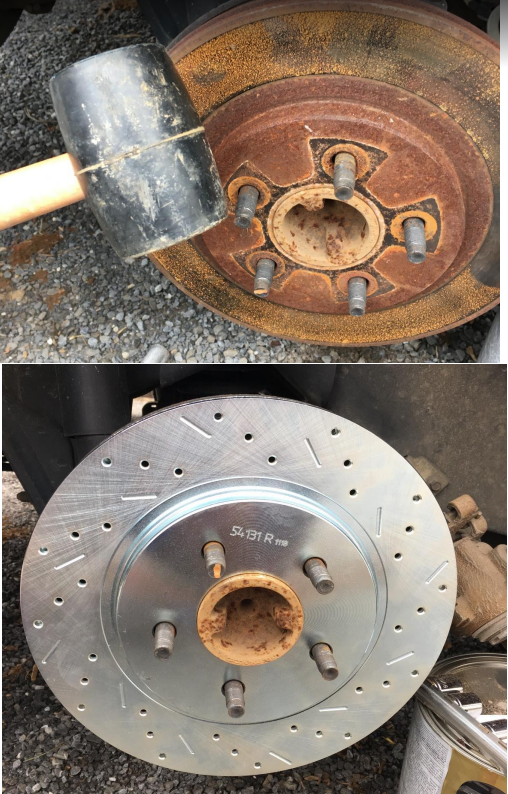
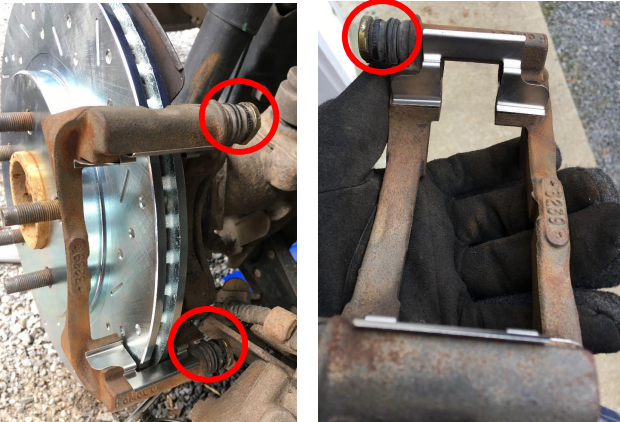
9. Before remounting the caliper, bracket put the new clips back into the bracket and remount the bracket. Check the caliper bracket and make sure the market section (in red) compresses. If not, the internal pin will need to be replaced or the caliper will not compress correctly.
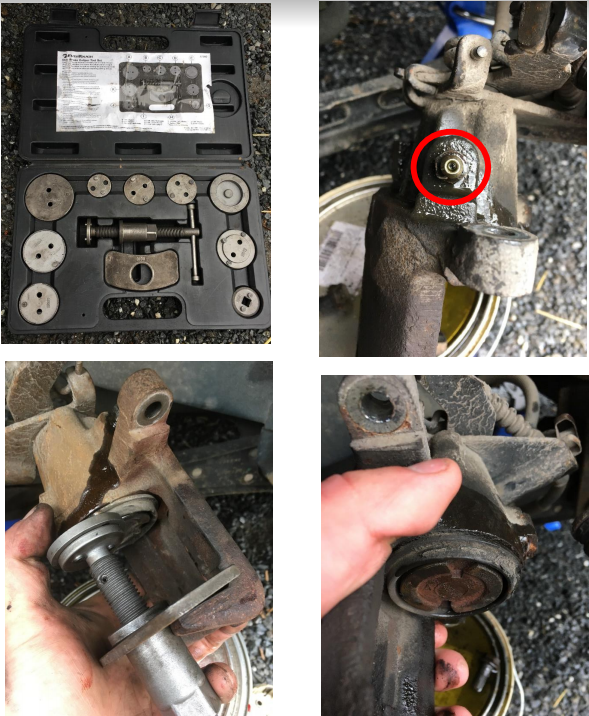
10. Before remounting the caliper, the piston inside the caliper must be compressed. Otherwise, the caliper would not be able to fit over the new thicker pads. The rear brake CANNOT be compressed with a c-clamp. While normal pistons compress via a push, the rear brakes compress via a twist. This requires a disk brake compression kit (you can rent them from an auto shop). The seal (in red) on the caliper should be twisted open to allow brake fluid to exit as the piston compresses. Compress the piston until it is flush. The first few turns maybe be rather difficult. Retighten the oil seal.
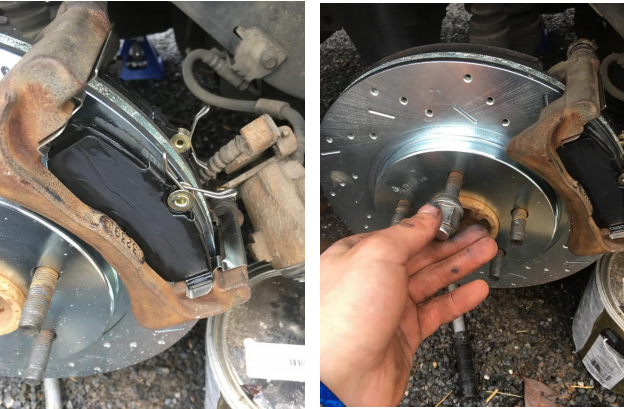
11. The brake pads should be greased on the outside surface. DO NOT GET GREASE ON THE PAD-ROTOR SIDE. Make sure the pins on the brake pad are facing up. Place the caliper onto the caliper bracket over the brake pads. Place the bolts back through and remount the wheel. To keep the rotor steady place a lug nut or two on the rotor.
12. Be sure to check the master cylinder (in the engine compartment right hand corner) ensuring that the brake fluid remains high otherwise the brakes will not work properly. If the brakes still do not work properly consider bleeding the brake lines and removing residual air.
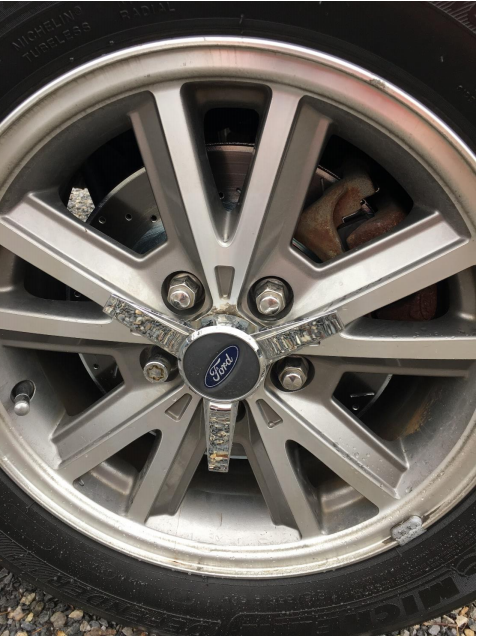
13. To brake in these new rotors and pads perform 10-20 stops from 50 mph to 15 mph allowing brief cooling time between stops. There maybe vibrations and pad noise during this procedure.
Installation Instructions Written by AmericanMuscleCustomer Yuriy Snyder 02/16/2019
