 FREE 1 to 3-Day Delivery on Orders $149+ Details
Hawk Brake Pad Installation Guide (2005-2011)
Installation Time
60 minutes
Tools Required
- 12mm Socket Wrench
- 4" Adjustable C-Clamp
- Jack Stands
- Floor Jack
- Wheel chock
- Thin wire or string that can be used to secure the brake caliper once unbolted
- Small flat blade screwdriver (optional)

Shop Parts in this Guide
Installation
Preparation:
- Apply anti-squeak compound to the back side of the brake pads (NOT on the side that will be touching the rotor).
- Place a wheel chock behind each of the rear wheels.
- Loosen each of the five lug nuts on the wheel you are about to remove.
- Raise the car using the scissor jack located with the spare tire in trunk.
- Remove the lug nuts, then take the wheel off and set it aside. For safety reasons you should place a jack stand under the frame rail as an extra precaution.
- This is what you’ll see:
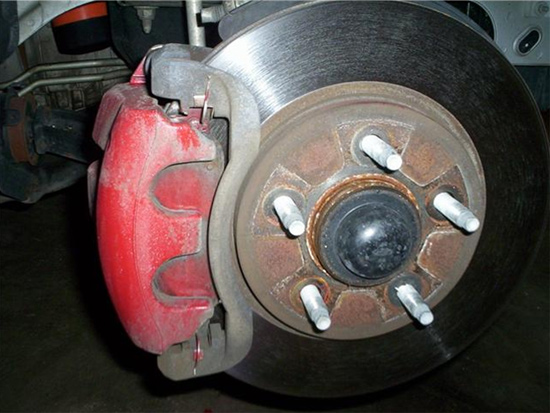
Figure 1
Removal of original pads:
1. Remove the two 12mm bolts that hold the brake caliper in place. One bolt is placed on the top back side of the caliper. The second bolt is located directly below it (see figure 2 & 3). Apply moderate pressure to loosen the bolts. Once loose, you can remove them by hand
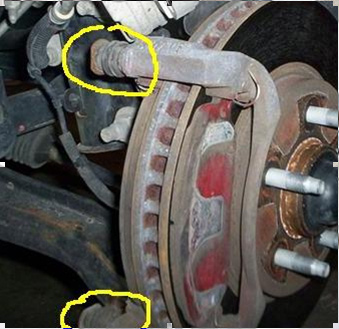
Figure 2
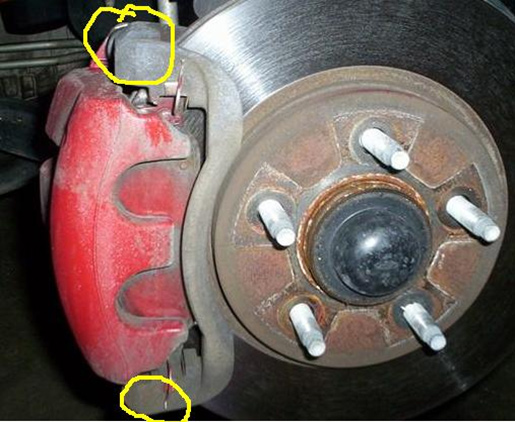
Figure 3
2. Gently pull the caliper straight off of the rotor. The brake pads will remain in place on the rotor as opposed to coming off with the caliper.
3. Secure the caliper out of the way by hanging it with a piece of wire from the spring/strut assembly (see figure 4). You may also simply set it on top of the rotor. However, caution is necessary to ensure that the caliper does not drop, or that the rubber brake hose does not crack. If either of those occurs it may present a serious safety risk.
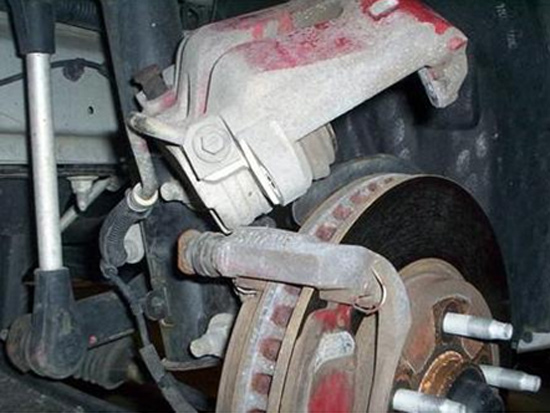
Figure 4
4. Remove the original brake pads by tilting them slightly inwards towards the center of the rotor and pulling them straight out.
5. Check the rotor for any cracks, grooves, or unusual wear. If excessive wear or damage is present you will either need to have the rotors machined, or replace them. When installing the Hawk HPS brake pads on my 2006 Mustang with about 50,000 miles I did not see any indication of excessive wear, therefore I did not remove the rotor(s). Your findings may vary depending on driving habits and variables.
Installation of new pads:
1. Use the 4” C-clamp to compress both of the brake caliper pistons. Do this by placing the disc on the adjustable portion of the clamp on the inner ring of the piston. The fixed portion of the clamp should be placed on the outer back portion of the caliper. Compress the piston by turning the handle of the clamp. Make about a half rotation at a time and wait a moment or two before turning the handle again. This is to ensure that the brake fluid in the piston is not forced back into the system too quickly as it may result in a fluid overflow or leak. The piston will stop moving once fully compressed. Do not force the piston after it stops. See figure 5.
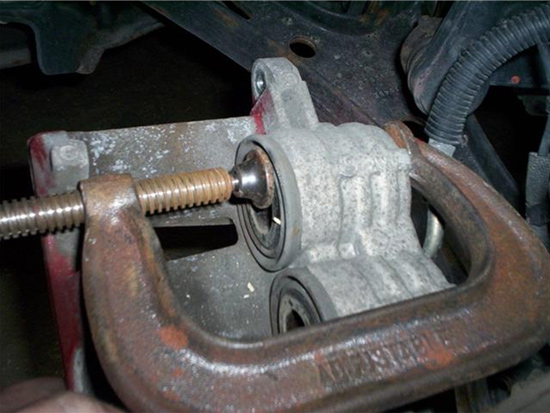
Figure 5
2. Install the new brake pads by gently pushing them into the caliper bracket (NOT the caliper itself. As when removing it, you will likely need to tilt them inwards towards the center of the rotor. They should push in easily. If force is required, then they are likely not aligned correctly.
3. Reinstall the caliper. It may be necessary to use your hand to compress the brake pads, or the caliper guide/mounting pins in order to slide the caliper back on. Once in place – install the top 12mm caliper bolt. Do not tighten. Install the bottom bolt, and then tighten both. The bolt should turn in almost completely by hand. Tighten with the 12mm socket. Be careful not to over tighten or strip the threads. This is the end result:
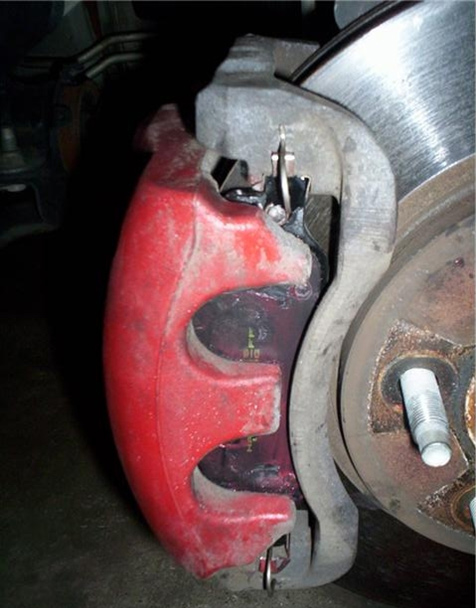
Figure 6
Project Completion and Verification:
- Install wheel/tire on car.
- Install lug nuts. While car is in the air still you will not be able to fully tighten the lug nuts. The pattern in tightening them should alternate in a crisscrossing pattern (not clockwise or counterclockwise) in order to ensure the wheel is seated correctly.
- Lower the car
- Finish tightening the lug nuts
- Follow the break in instructions on the outside of the Hawk box that the pads came in
- Re-torque the lug nuts
- Enjoy your better braking Mustang!
Installation instructions provided by AmericanMuscle customer Ron Babington

