 FREE 1 to 3-Day Delivery on Orders $149+ Details
Mustang V6 Cold Air Intake Installation Guide (1994-1998)
Shop Parts in this Guide
Installation
1. Removing the stock air filter and assembly:
Unplug or disconnect any wires or plugs coming out or going into the inlet system. Next loosen or remove the bolt directly above the air box which is bolted directly into the body. Then loosen the hose clamp which clamps onto the throttle body and pull the rubber tube off of the throttle body so it is loose. There are two pegs wedged into rubber grommets in the frame rail below the air box. To release these simply wiggle the air box back and forth while pulling up. It may be tough to get out but if you pull hard enough it will come out. Once the pegs are pulled out of the rubber grommets the whole inlet system should come out with ease. Once out check the pegs to ensure the rubber grommets didn’t come out too. If they did then push them back into the frame rail as they will be needed to secure the new intake system.

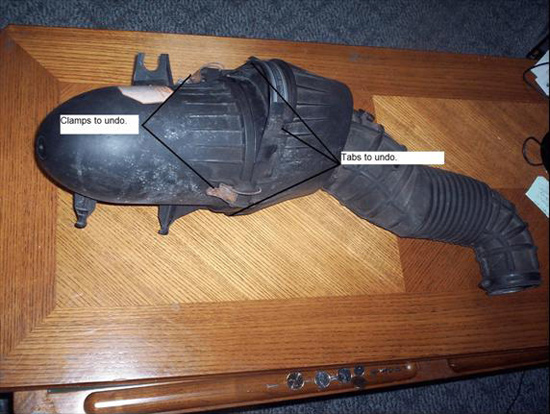
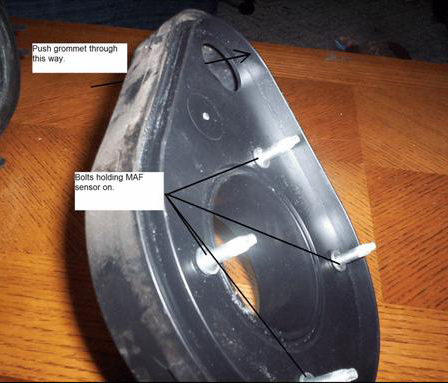
2. Removing the mass air flow sensor from stock air filter assembly:
Once you have removed the entire stock inlet system it is easy to remove the MAF sensor. Firstly remove the air box from the inlet tube. To do this unclamp the two clips and pull the tab out of it’s slot. Next use a flathead screwdriver to unclip the tabs holding the rest of the inlet tube assembly together. There should be four tabs. When you release the tabs pull out the MAF sensor with the plastic mount attached to it. This is what we’re after. You can set the inlet tube and air box aside now and concentrate on the MAF sensor. At some point you will have to push the rubber grommet with the wires going through it out. Be sure to push it from the opposite side of the MAF sensor so the connectors fit through the hole. You can cut this rubber grommet off if you wish or you can leave it on...I left it on in case I ever want to put the stock system back on. Now unscrew the four nuts securing the MAF sensor. You will not need these nuts as they are supplied with the new system.
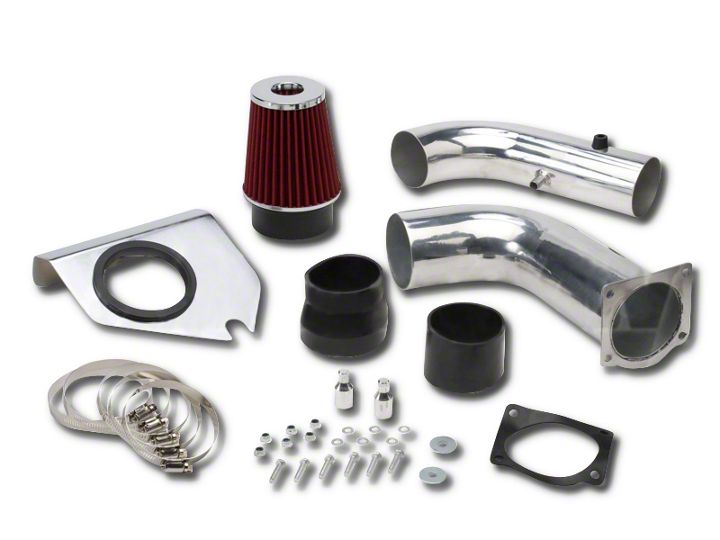
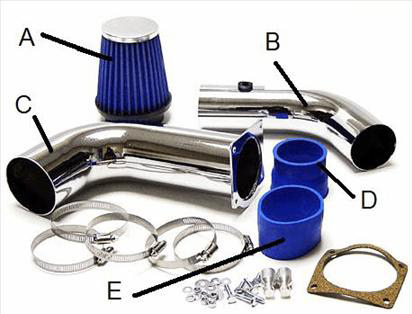
3. Preparing cold air intake for installation:
Install the MAF sensor onto the new intake with the supplied nuts bolts and rubber spacer. Be sure not to over-tighten because the aluminum may bend on the inlet tube. (Refer to the picture for this next section) The easiest way to prepare it is to clamp B with D onto the throttle body. C(already attached to MAF sensor with gasket) through the filter mount and onto A. Be sure to use clamps in all the appropriate places.
4. Installing cold air intake:
It is important to secure each half and then slip together. On the American Muscle website they say to install the filter mount first then install the filter under the fender but I found it easier to install the filter mount after the filter is already on. As long as you can tighten the mounting bolts you can do it either way. Re-install all wires/plugs.

5. Final Notes:
If you have a strut bar like the one shown here it may require some creative thinking to fit the connections properly. I had to remove the strut bar then put it back on after the installation was complete. Remember to go back after a week or two and ensure everything is still secure.
Installation instructions provided by AmericanMuscle customer Mark Murphy

