 FREE 1 to 3-Day Delivery on Orders $149+ Details
How to Install ARP Wheel Studs on your 1979-2013 Mustang
Installation Time
2 hours
Tools Required
- Jack
- (2) Jack Stands
- A way to take your wheels off
- Socket Wrench
- 15mm Socket
- Torque Wrench
- (3-4) ½" Washers
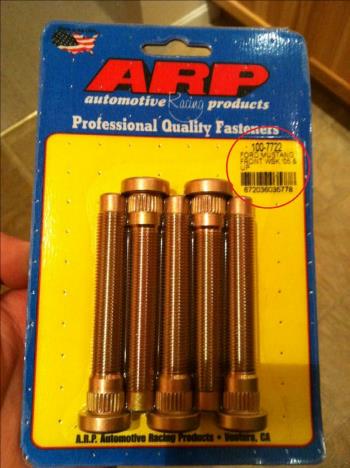
- (1) Open ended 1/2-20 lug nut that WILL get ruined.a. I used a 3/4" nut I picked up at a dealer for just over a buck.
- A Deep Well Impact Socket the size of the open ended socket above.
- Impact Wrench Side Cutters
- Wire/String (a way to support the weight of the caliper)
- BFH

Shop Parts in this Guide
Installation
Note: These studs are about one inch longer than the factory studs, so in most cases, the factory closed ended lug nuts will no longer fit. Make sure you have lug nuts available if needed.
1. Before opening the package, inspect it to ensure it is labeled as the proper part.
2. See list of tools required.
These will be referred to throughout this instruction manual by its corresponding letter.
*Note: If you have one or more lugs that have broken off, you will also need a punch to remove them.
3. Removing Wheels
- Make sure your car is in Park or Neutral with the emergency brake engaged.
- Break the lug nuts loose while on the ground (c)
- Jack the front wheels of the car off the ground (a)
- Use jack stands (b) in the recommended locations to safely support the car.
- Finish taking wheels off and set aside in a safe place, taking care to not to damage them.
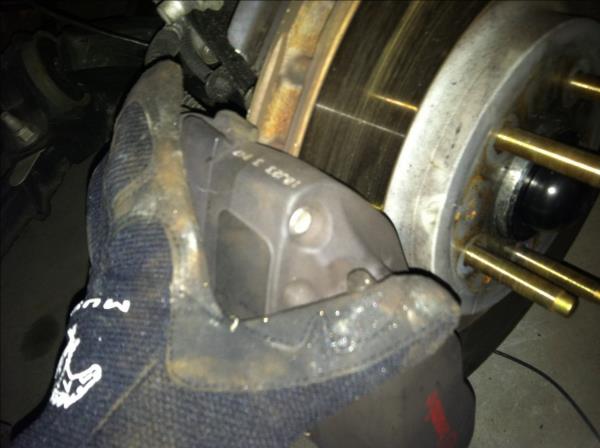
4. Removing Calipers
Note: It works best to turn the key on and turn the wheel for each side to allow easier access to the back of the caliper. (i.e. turn to the left when working on the right wheel, and right for the left)
1. Locate the two bolts holding the caliper on.
2. Use the 15mm Socket (e) and your Socket Wrench (d) to remove these two bolts.
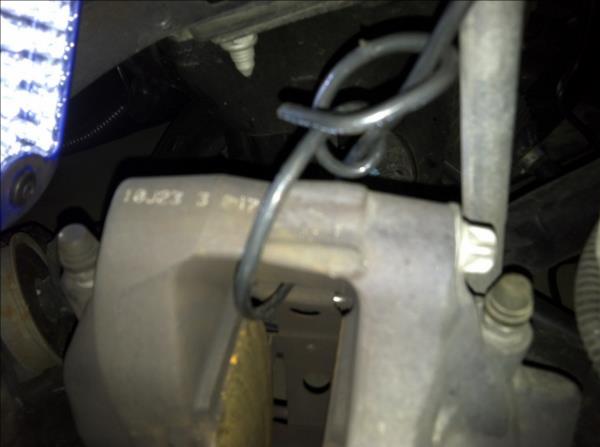
3. Remove caliper, DO NOT LET IT HANG BY THE BRAKE HOSE. Use the wire/string (l) to support the weight of the caliper. Make sure the hose is not kinked.
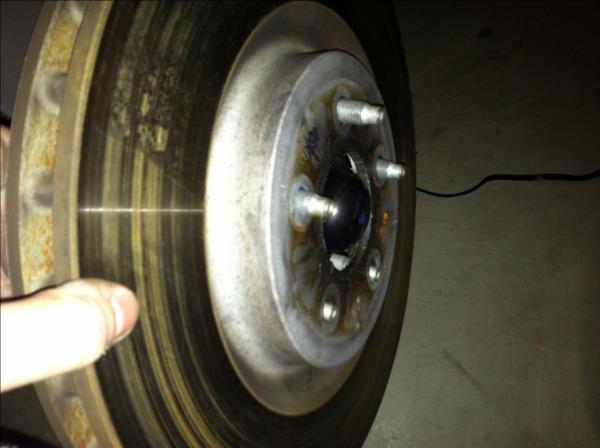
5. Removing the Rotor
- On the front of the rotor, you will see a locking washer on two of the factory lugs.
2. Using the side cutters (k), cut these off and discard. These will not be needed anymore.
3. Pull the rotor off and set away in a safe place.
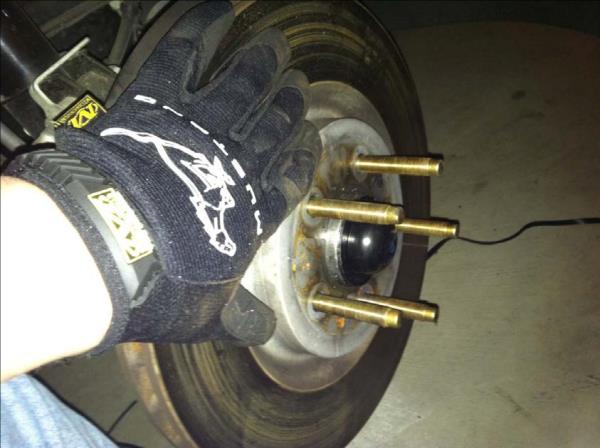
6. Removing Factory Lugs
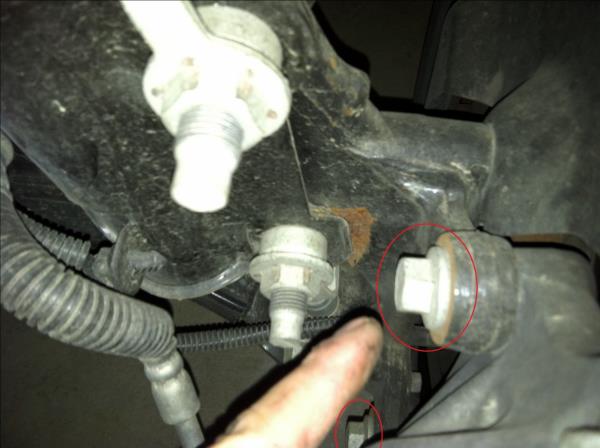
1. Turn the hub to where the first lug to be removed is lined up with the opening. (Red)
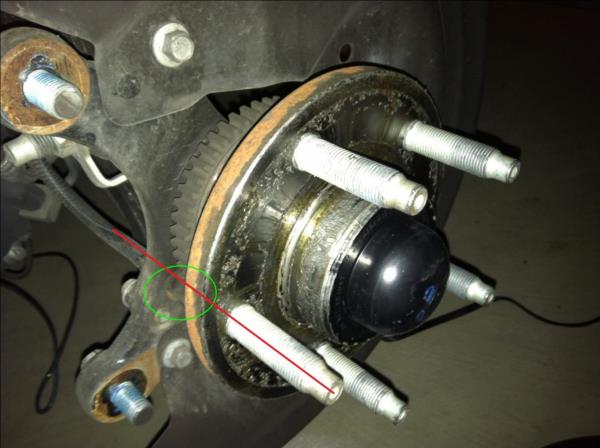
Note: Be careful not to hit the ABS sensor. (Circled in Green)
2. Take your BFH (m) and carefully drive out the stud.
*Note: This is where you will need to use the punch to remove the studs if youhave any that are broken off.
3. Repeat for the rest of the studs.
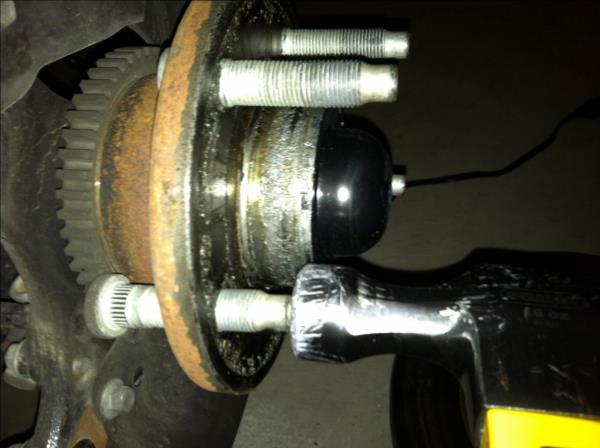
7. Installing ARP Studs
1. Remove new studs from the package
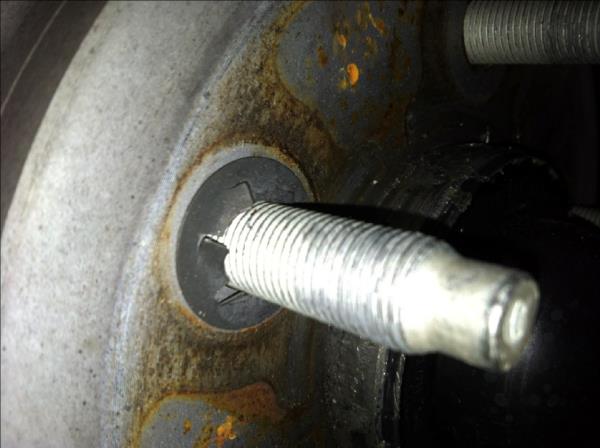
2. Slide first stud into place.
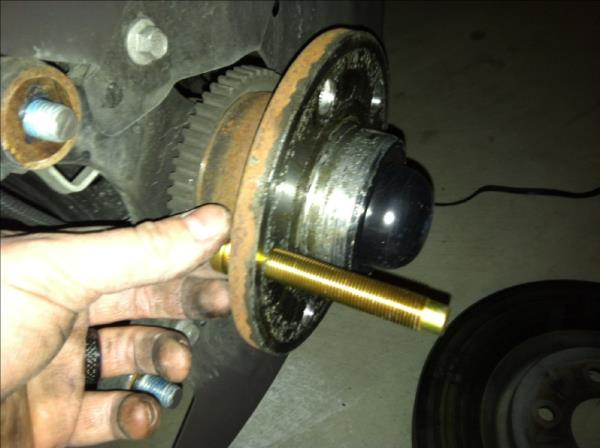
*Note: The Cut out at the base is to allow clearance for installation. There is no required direction when installing them.
3. Add the stack of washers (g), followed by the open ended lug nut (h).
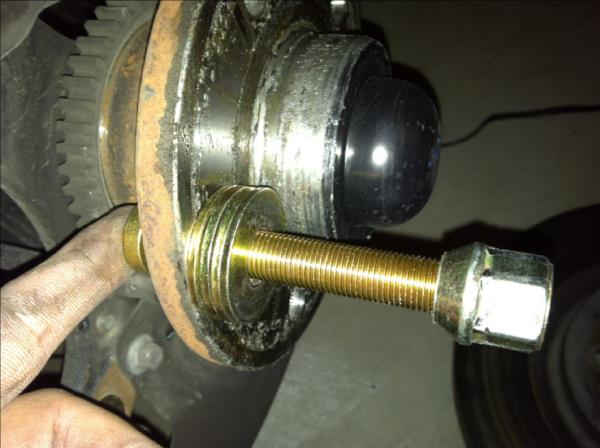
4. Take Impact Wrench (j) and corresponding Impact Socket (i) and tighten to pull the first stud through until base of the stud is tight against the back of the hub.
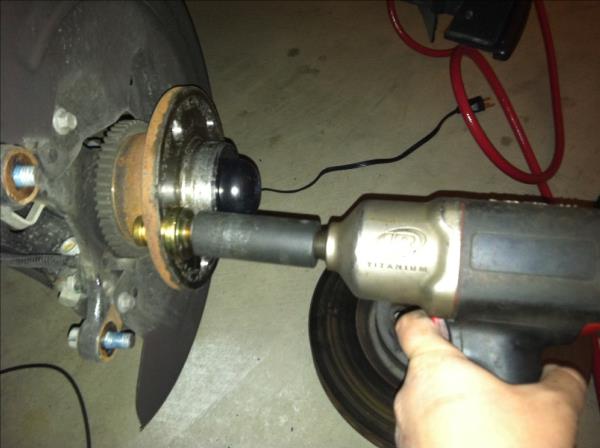
5. Set impact to reverse to remove the nut.
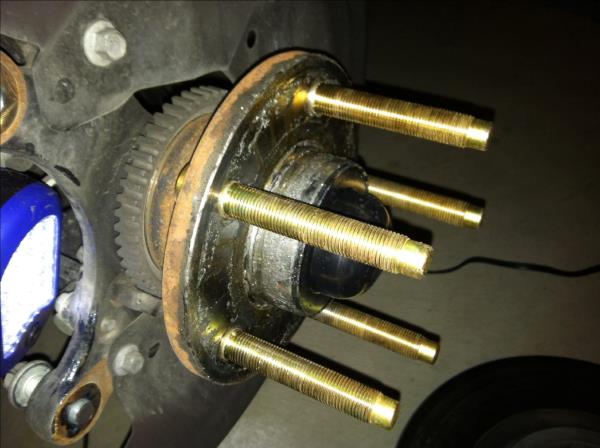
6. Repeat for the rest of the studs.
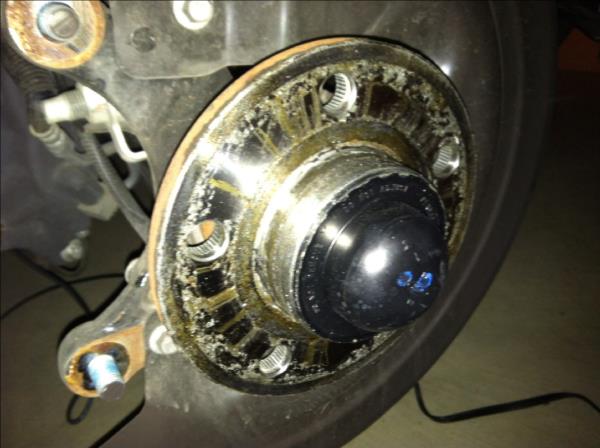
8. Reinstalling the Brakes
1. Slide Rotor back into place.
3. Thread the two caliper bolts into the caliper through the bracket
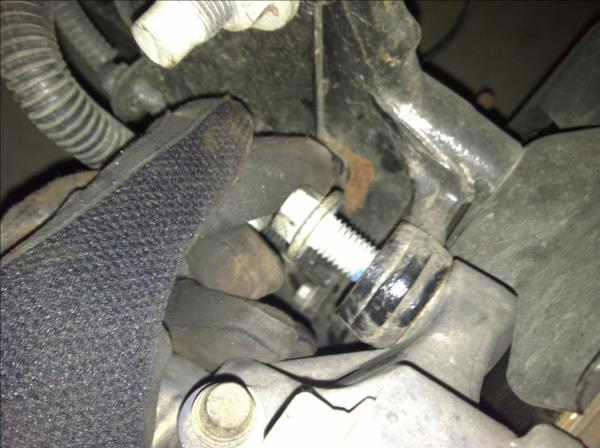
4. Using the Torque Wrench (f), torque the Caliper Bolts to 85 ft./lb.
9. Reinstall Wheels
1. Install wheel and lug nuts, snugging them while in the air.
2. Jack up each side and remove the jack stands, lowering slowly.
Note: Make sure all people around the vehicle are aware and safe when lowering.
3. Torque Wheels to proper specs.
Installation Instructions written by AmericanMuscle customer Philip Lifer 1/21/2013

