 FREE 1 to 3-Day Delivery on Orders $149+ Details
Bassani Axle-Back Exhaust ('05-'09 GT & GT500)- Installation Instructions
Installation Time
2 hours
Tools Required
- 1/2 Deep Socket
- 1/2 Shallow Socket
- 1/2 Wrench
- 1 Socket Wrench
- 1 Pipe Cutter or Chisel
Installation
1. Raise vehicle onto jack stands or car ramps to support vehicle for installation of the exhaust. It is recommended to let the car cool down for at least an hour before working on the exhaust.
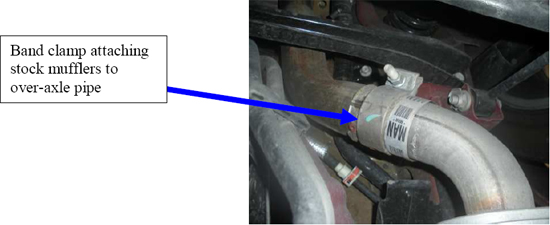
2. Loosen band clamps attaching stock mufflers to over-axle pipes. The 1/2” deep socket is required for this step. It is recommended to loosen the band clamp as much as possible as it will make the removal process of the muffler easier.
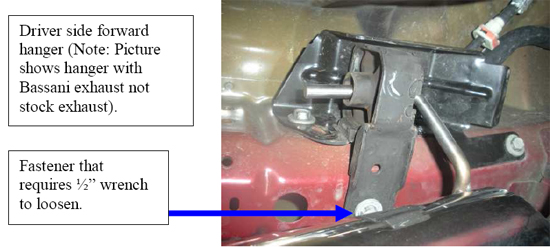
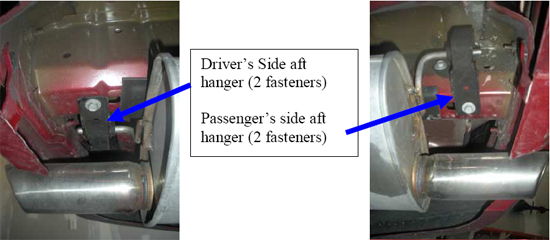
3. Remove fasteners (9 fasteners total) retaining muffler hangers (4 hangers total) to car. The driver side forward has 3 fasteners attaching the hanger to the car and is different from all the other hangers. You will need the 1/2” wrench for two of the fasteners due to the lack of clearance between the muffler and the car. For the other hangers the 1/2” regular socket and socket wrench can be used to remove fasteners.
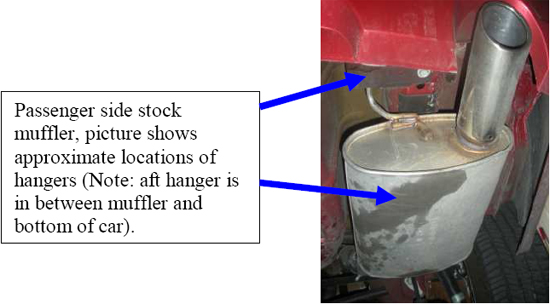
4. Remove mufflers with hangers attached from over-axle pipes and remove from car. It may require some “wiggling” of the muffler to remove from over-axle pipe (Note: there may be some condensation left in the pipes that will drip from the over-axle pipes or mufflers). After the mufflers are removed, remove the hangers from the stock mufflers and set them to the side. You will need these hangers for the new mufflers.
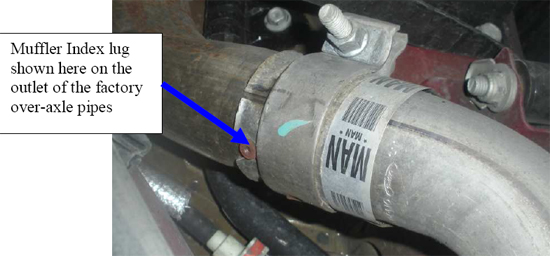
5. Remove muffler index lugs from outlet end of the factory over-axle pipes. A chisel or pipe cutter will required for this. The index lug can be seen on the outlet of the stock over-axle pipes. If after-market over-axle pipes are installed, you may not have index lugs, therefore this step can be ignored.
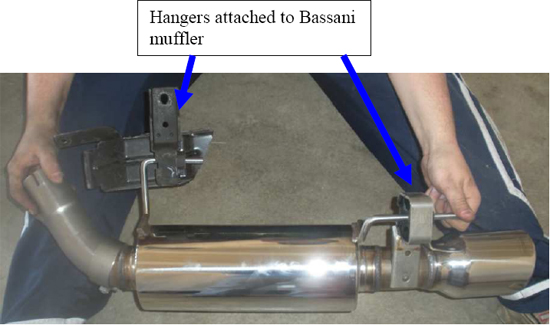
6. Install the stock hangers onto the Bassani mufflers in the same positions as stock mufflers prior to installation. By doing this it makes the installation of the new mufflers easier.
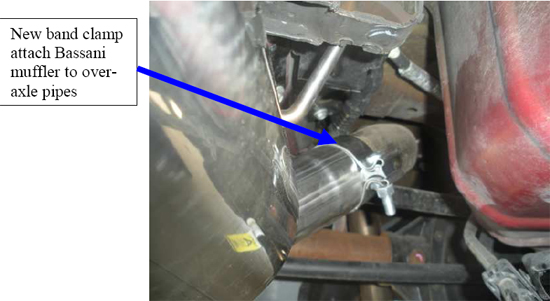
7. Prior to installation of new mufflers, apply the anti-seize compound provided to the inside of the muffler inlet pipe and all fasteners. Position the supplied clamps over the inlets of Bassani mufflers and install onto outlets of over-axle pipes. Make sure the band clamp is position towards the beginning of the muffler exhaust inlet to enable a tight fit onto the over-axle pipes when the band clamp is tightened.
8. Re-attach hangers to the bottom of the car with the previously removed stock fasteners. It is recommended to support the new muffler during this step, as you will be trying to attach the hangers to the car with the muffler attached to the hangers.
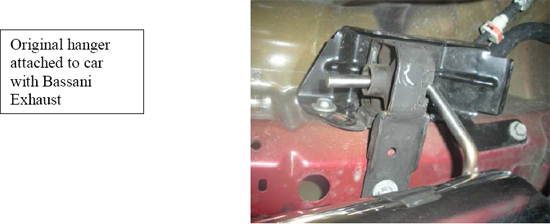
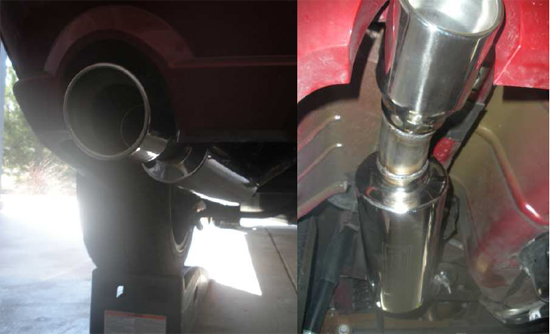
9. Align mufflers in a flat, horizontal position and the muffler so they equally protrude from the rear of the car. After it is aligned, tighten clamps and bolts. If further alignment is required to better set the muffler tips, a pry bar can be used to move the muffler left or right. Also the muffler can be removed from the car and bend or “tweak” the muffler hanger bars so that the muffler sits better in the New band clamp attach Bassani muffler to overaxle pipes Original hanger attached to car with Bassani Exhaust valance openings. Once the muffler is fully aligned tighten all bolts and fasteners for the hangers and band clamps.
10. Turn on the car enjoy your newly added power and great sound with your new Bassani axle-back mufflers!
Installation instructions provided by AmericanMuscle customer Kevin Wiedenmann 3.24.09
Related Guides
-
Installation
-
Installation
-
Installation

