 FREE 1 to 3-Day Delivery on Orders $149+ Details
Pypes Street-Pro Axle-Back Exhaust ('05-'10 V6) - Installation Instructions
Installation Time
2 hours
Tools Required
- 1/2" Socket Wrench
- 5/8" Socket Wrench
- 3/8" Socket Wrench
- Optional: New Stainless Steel Hangers

Shop Parts in this Guide
Installation
1. IMPORTANT! It is absolutely vital to make sure that before installing or even buying the Pypes muffler the exhaust hangers currently on your car will work with an aftermarket muffler. If your car is a 2005-2006 your hangers are sufficient. If you have a 2007 or later however you MUST make sure you have the correct metal hangers.
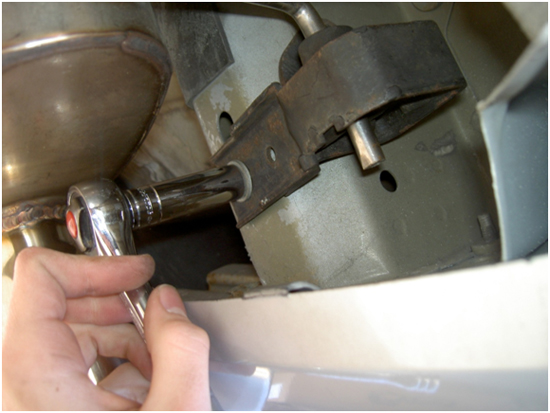
2. To check if your hangers will work look under your car at your current muffler. Look just to the left (driver’s side) of the exhaust tip. Bolted up into the chassis of your car should be a black metal hangar with a rubber hole where the muffler fits in as shown below in figures 1 and 2.
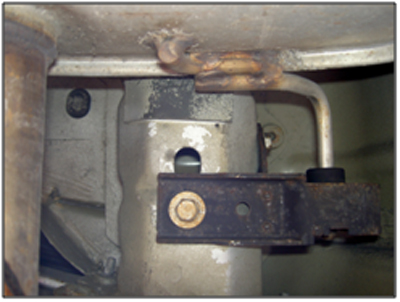
Figure 1: Depicting a metal muffler hanger bolted in place before installation. Rubber Muffler Hole
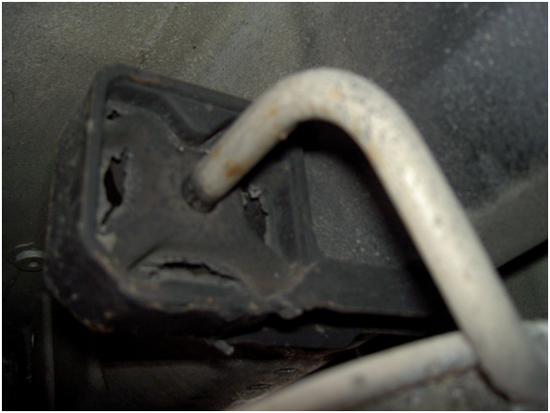
Figure 2: Depicting the rubber hole the muffler fits into.
3. After you have decided if you need new hangers or not it is time to move on to the installation of your new Pypes Street Pro axle back. Before beginning the actual install of the muffler you must first disconnect your car’s battery. Using a3/8” socket wrench loosen the bolts that are used to secure the battery and remove the connectors from the battery.
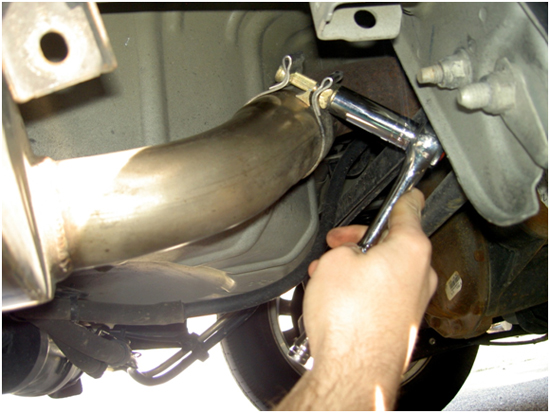
4. Using a 5/8” socket wrench loosen the bolt on the clamp that connects the back of your stock muffler to the factory Y-pipe
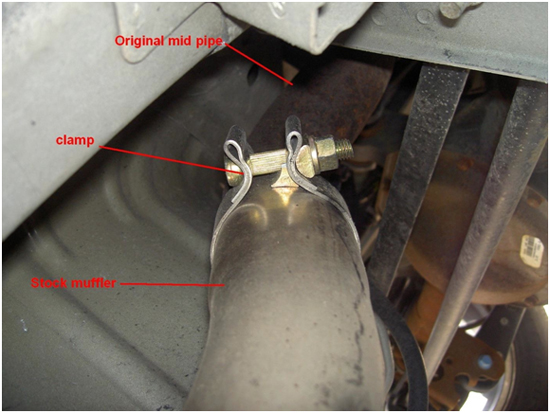
Figure 3: Depicting the clamp that connects the muffler to the mid pipe.
5. Locate a metal hanger that is curved around the back pipe of the muffler (in between the mid pipe and actual muffler) and is welded to the muffler. Using a 1/2 ” socket wrench unscrew both of the bolts connecting the hanger to the car. This hanger will NOT be used when installing the new muffler.
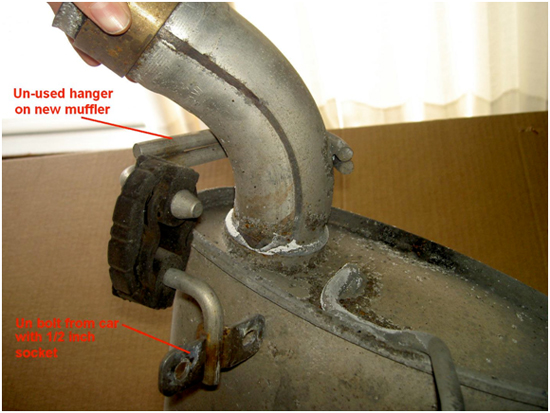
Figure 4: Depicting the hanger that will not be used on the new muffler and where to unbolt it from the car.
6. Moving from the front of the car to the back locate the next hanger and unbolt the hanger from the car using a 1/2 ” socket wrench. NOTE: This hanger only has one bolt connecting it to the car
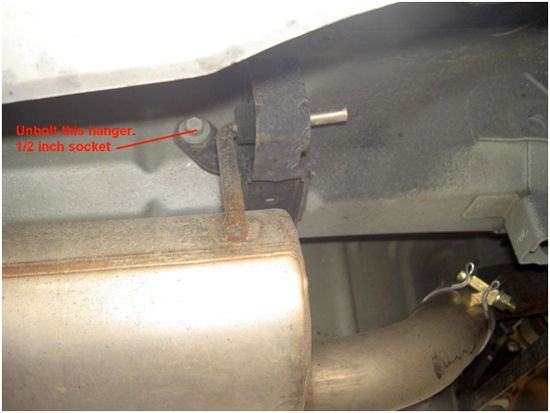
Figure 5: Depicting the hanger that is towards the mid pipe on the muffler with ONE bolt to remove.
7. Locate the final hanger closest to the exhaust tip and using a 1/2” socket unbolt the hanger from the car. NOTE: This hanger has TWO bolts that must be removed see figure 6.
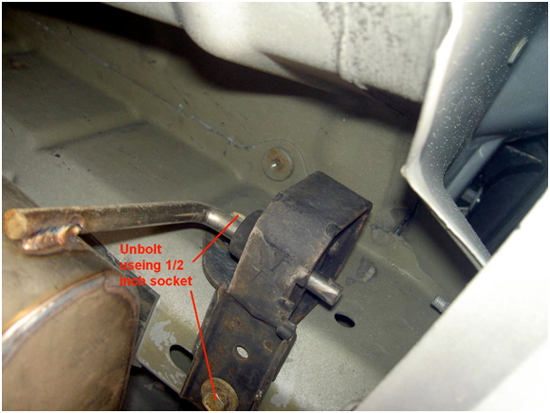
Figure 6: Depicting the last hanger with the TWO bolts that must be removed.
8. Once all the bolts are removed pull the muffler off of the factory mid-pipe and remove the stock muffler from the two black hangers (the ones you previously unbolted).
9. Take the Pypes Street Pro muffler out of the box and fit the supplied clamp over the 2.5" pipe on the back of the muffler so that it is flush with the edge of the pipe. Also fit the stock black hangers (the ones you previously removed) over the pegs on the Pypes muffler.
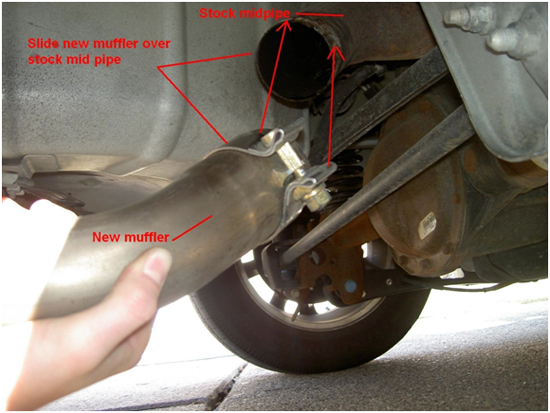
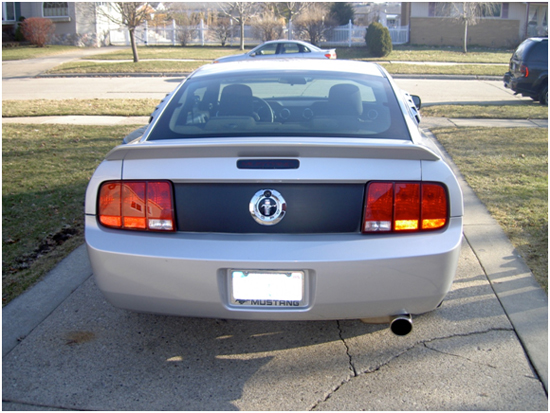
10. Line up the hangers with their original holes and slide the muffler pipe over the mid pipe making sure that all the holes in the hangers align with the holes in the car as well as making sure the tip of the exhaust is centered in the cut-out in the rear bumper.
11. Replace the two bolts in the hanger nearest the rear of the car. Then replace the one bolt in the hanger nearest the mid pipe (REMEMBER the hanger you removed in step 5 is NOT USED on the Pypes Street Pro) and tighten the bolt on the clamp that connects the muffler to the mid pipe (recommended that the bolt be tightened to about 55-65 lbs)

12. Reconnect your battery start her up and enjoy the sweet rumble of your 4.0L V6 Mustang. You have just successfully swapped out your stock muffler for the Pypes Street Pro Axle Back exhaust and you have netted your car about 8 RWHP! Be sure to check all of your bolts after about 50 or so miles of use just to make sure everything is tight.
Installation instructions provided by AmericanMuscle customer Brian Rissman 3.23.09
Related Guides
-
Installation
-
Installation
-
Installation

