
Installation Time
(approx) 4 Hours
Difficulty Level:
Mechanical expertise or professional installation required.
 FREE 1 to 3-Day Delivery on Orders $149+ Details

$119.95 - $279.95
CONFIRM THIS FITS YOUR VEHICLE!
Saved - View your saved items
We're sorry. We couldn't save this product at this time.
or use

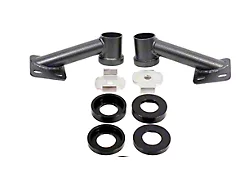
BMR Cradle Bushing Lockout Kit; Level 2; Black Hammertone (15-26 Mustang Fastback)
 122
122
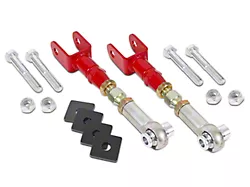
BMR On-Car Adjustable Rear Toe Links; Red (15-26 Mustang)
 286
286

MP Concepts Chin Spoiler (18-23 Mustang GT w/o Performance Pack, EcoBoost w/o Performance Pack)
 393
393
Features, Description, Reviews, Q&A, Specs & Installation
BMR BMR-SP086R
BMR-SP087R
BMR-SP088R
CA Residents:  WARNING: Cancer and Reproductive Harm - www.P65Warnings.ca.gov
Installation Info
Installation Time
(approx) 4 Hours
Difficulty Level:
Mechanical expertise or professional installation required.
What's in the Box
Complete Kit Option
Front Only Option
Rear Only Option
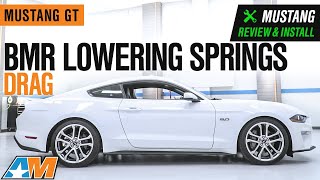
| Spring Rate: | Front: 150 lb/in. Rear: 800 lb/in. | Usage: | Drag |
| Year: | 2015-2021 GT | Model: | Coupe/Convertible |
| Progressive or Standard: | Standard (Linear) | Estimated Drop: | 1.2"F / 0.5" R |
