FREE 1 to 3-Day Delivery on Orders $149+ Details
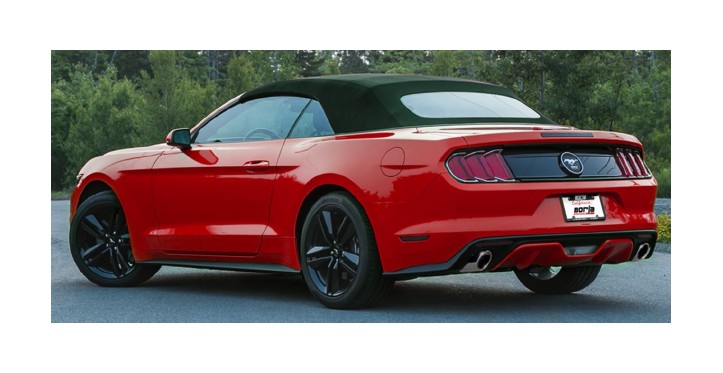
How to Install Borla Stinger S-Type Axle-Back Exhaust (15-17 EcoBoost) on your Ford Mustang
Installation Time
1 hours
Tools Required
- 3/8” Drive Ratchet
- 3/8” Drive Extension 3”
- 15mm Deep Well Socket
- 13mm Socket
- Metal Cutting Blade Saw
- Pry Bar
- Spray Lubricant

Shop Parts in this Guide
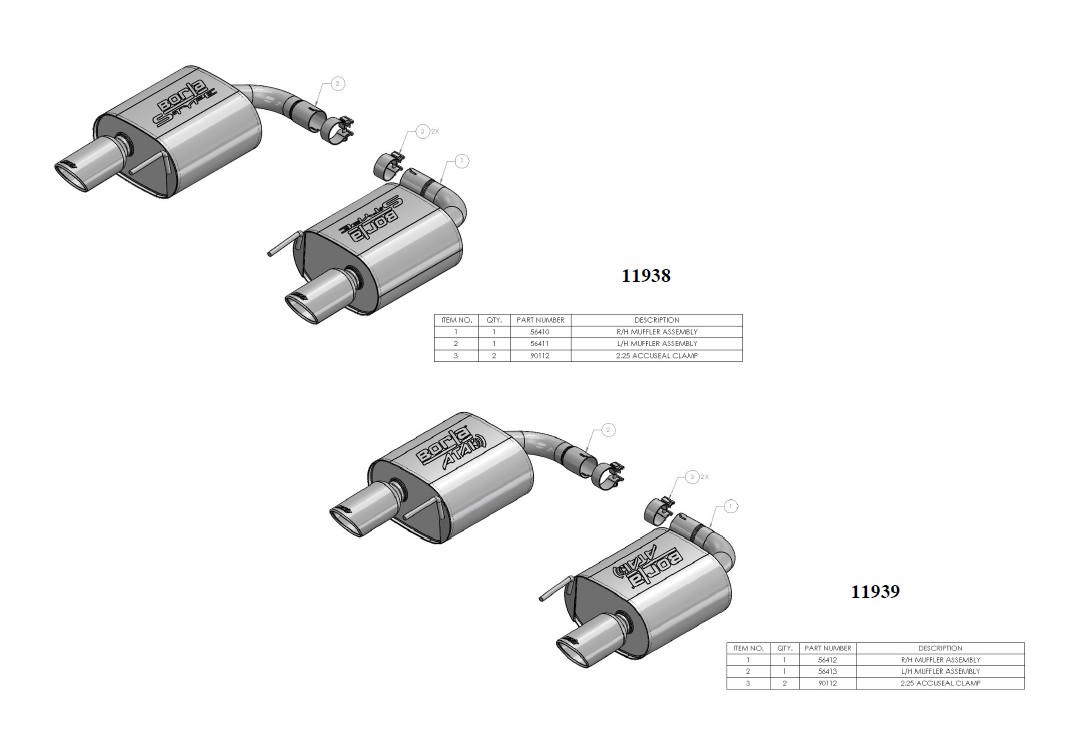
Borla Performance - Bill of Materials
Caution!!! Never work on a hot exhaust system. Serious injury in the form of burns can result If the vehicle has been in use and the exhaust system is hot, allow vehicle to cool for at least 1 hour. Always wear eye protection when working under any vehicle.
Note: It is our recommendation that you use a hoist or hydraulic lift to facilitate the installation of your new Borla Performance Exhaust System.
Taking all under car safety precautions, lift the vehicle using a hoist or hydraulic lift. Once this has been done, you may begin the removal of your old exhaust system from your vehicle.
Note: Before removing the original exhaust system from your vehicle, please compare the parts you have received with the bill of materials provided on the previous page to assure that you have all the parts neces-sary for the installation of your new Borla Performance Exhaust System.
Note: With a used vehicle, we suggest a penetrating spray lubricant to be applied liberally to all exhaust fasteners and allowing a significant period of time for the chemical to lubri-cate the threads before attempting to disassemble.
******* MUSTANG GT *******
CONVERTIBLE ONLY
Chassis Stiffener Removal
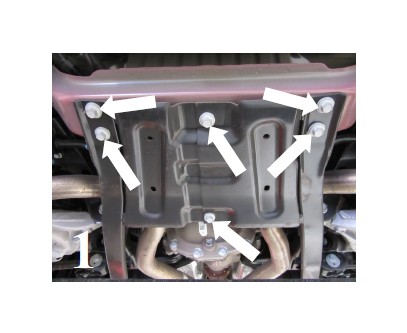
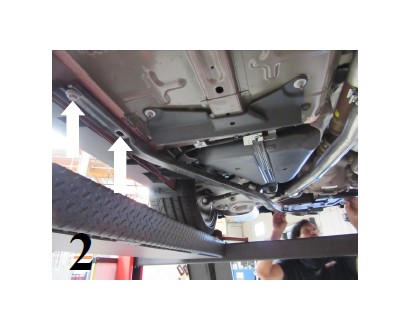
1. Remove on (2) sections the Chassis Stiffener, staring with right-side side. Place the hardware to the side for re-installation. (See Fig. 1& 2)
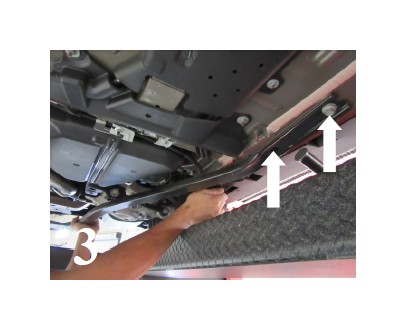
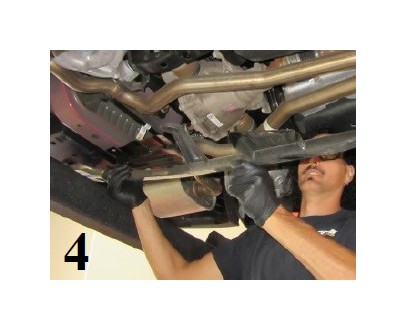
2. Repeat STEP-1 for the left-side side. (See Fig. 3 & 4)
3. Using a muffler stand or a additional person, to hold the Chassis Stiffener into position carefully remove from the vehicle.
Original Exhaust Removal
1. The factory under-axle pipe must be cut and rear muffler removed.
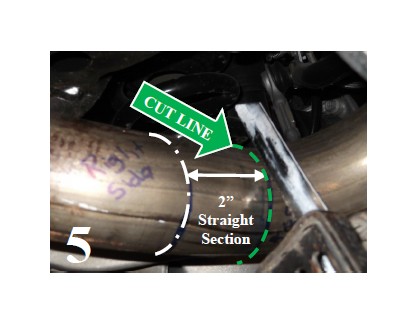
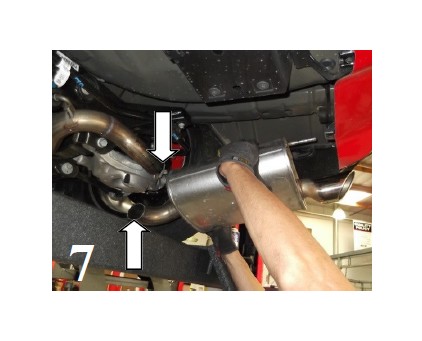
2. Starting on right-side under-axle pipe, measure and mark a perpen-dicular cut-line (indicated in green) 2” from pipe bend (indicated in white). Use a metal cutting bladed saw, carefully cut this right-side pipe at the cut line. (See Fig. 5)
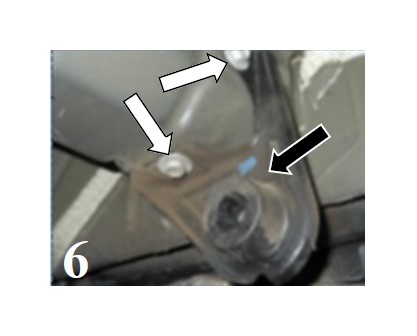
3. Remove hanger from rubber isolator and carefully remove the right-side muffler from the vehicle. (See Fig. 6 & 7)
4. Repeat STEP-2 to mark left-side cut-line. Cut the left side pipe and remove left-side muffler from vehicle.
5. Clean the under-axle pipes and de-burr the edges using a file or rota-ry grinder.
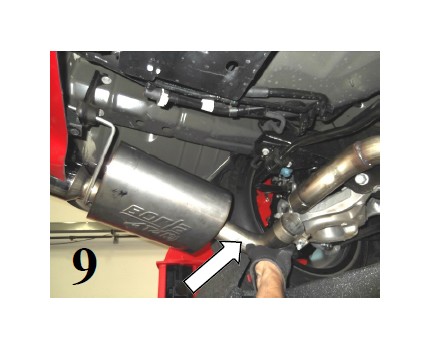
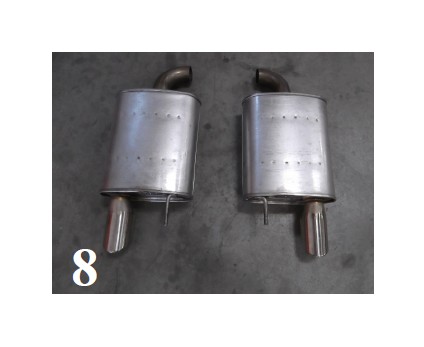
6. Original system removed. (See Fig. 8)
Borla Performance Axle Back System Installation
1. Orient components referencing page-2 drawings.
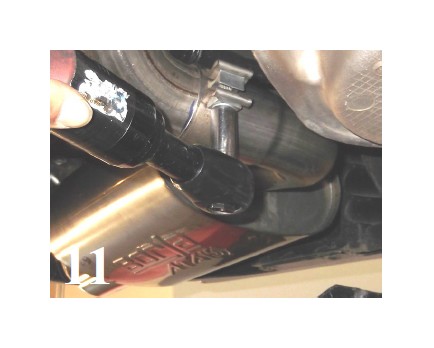
2. Beginning with the L/H Muffler Assembly, place a clamp over the inlet tube and insert (2) hangers into the rubber isolator. Insert L/H Muffler Assembly inlet tube over the (cut) under-axle pipe. (See Fig. 11 & 12) Do not Tighten the Clamp.
3. Repeat Step 1 for the installation of the R/H Muffler Assembly.
4. Using the original hardware, RE-INSTALL the chassis stiffener to vehicle.
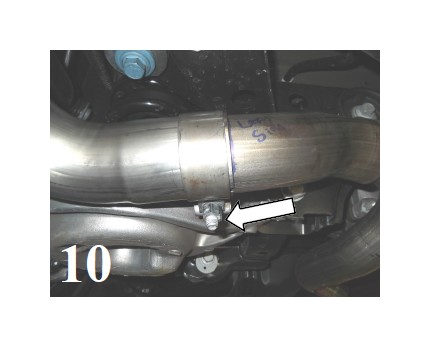
5. Check your exhaust system for proper clearance under the vehicle and also for tip alignment. Orient position of bolt (on supplied clamps) between (not over) pipe notches and tighten to 35 ft. lbs. torque. (See Fig. 13)
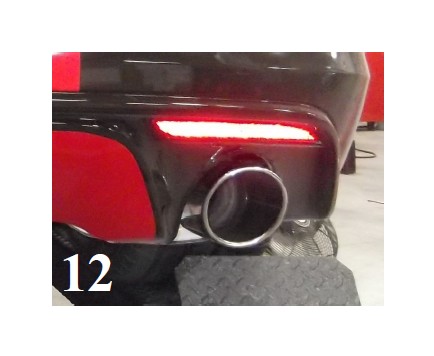
6. Align tips and tighten hardware. Loosen clamps to rotate or slide pipe for better alignment. (See Fig. 14)
7. Before starting your vehicle, make sure to check all wires, hoses, brake lines, body parts and tires for safe clearance from the exhaust system.
8. Start vehicle and check for any leaks. If any leaks are found, deter-mine cause (such as loose or incorrectly positioned clamp) and re-pair as necessary.
WARNING: Use extreme caution during installation. Torque all fasteners according to manufactur-er’s torque values and tightening sequence. DO NOT use air impact tools to tighten fasteners on Borla Performance Exhaust Systems. Use of such tools may result in bent flanges or gasket contact areas leading to exhaust leaks.
NOTE: When you first start your vehicle after the installation of your new Borla Performance Exhaust System, there may be some smoke and fumes coming from the system. This is a protective oil based coat-ing used in the manufacturing of mandrel bent performance exhaust tubing. This is not a problem and will disappear within a very short period of time after the exhaust has reached normal operating temper-atures.