 FREE 1 to 3-Day Delivery on Orders $149+ Details
How to Install C & L Racer Cold Air Intake (2018 GT) on your Ford Mustang
Tools Required
- Socket set (10, 15mm)
- Flat Screw Driver
- Plastic Pry Tool
- Phillips Screw Driver

Shop Parts in this Guide
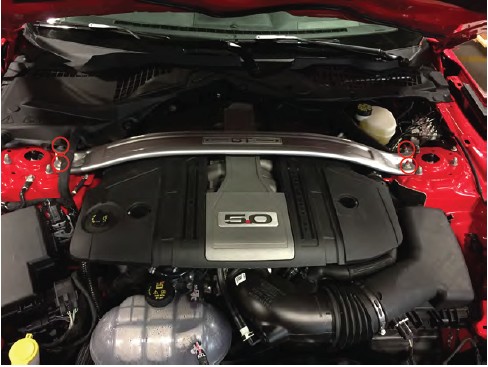
Step 1: Begin by removing the (4) 15mm strut tower brace nuts. The wiring harness clip on the passenger side simply pulls off the stud. Remove the strut bar from the vehicle.
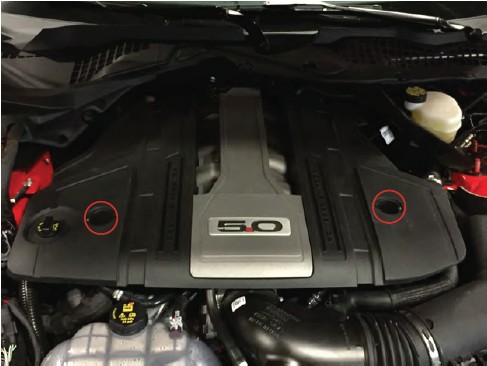
Step 2: Use a plasc pry tool to remove the (2) plasc covers on the engine cover. Then remove (2) 10mm nuts securing the cover to the engine. Firmly pull up on the engine cover to dislodge it from the rub retainers.
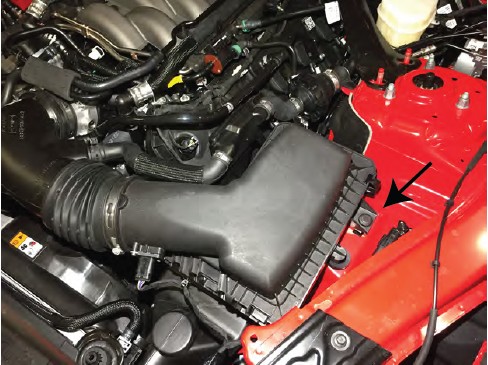
Step 3: Remove the 10mm bolt holding the air box to the fender. Unclip the (2) clips securing the lid of the factory air box.
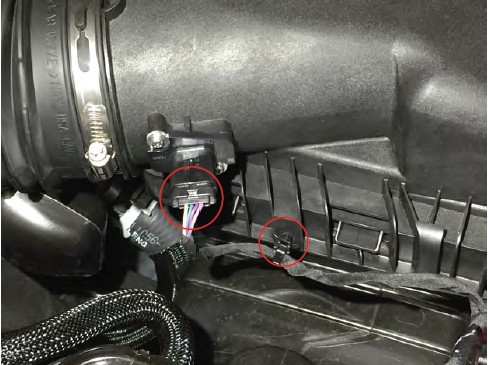
Step 4: Slide back the red locking clip on the MAF sensor plug. Then depress the locking tab to remove the plug from the sensor. Use a pry tool to remove the wiring harness retaining pin from the air box.
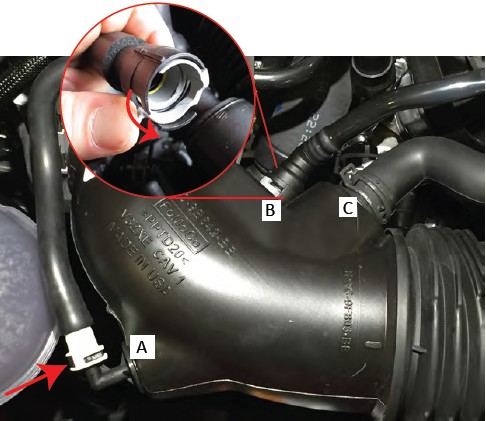
Step 5: Remove the vacuum lines from the air tube.
A- Depress the locking pin and pull the hose off the air tube.
B- Rotate the PCV retaining clip and pull the hose off the air tube.
C- Use pliers to remove the sound tube from the air tube.
Step 6: Use a flat head screw driver to loosen the hose clamp that secures the air intake to the throle body and remove the intake from the vehicle.

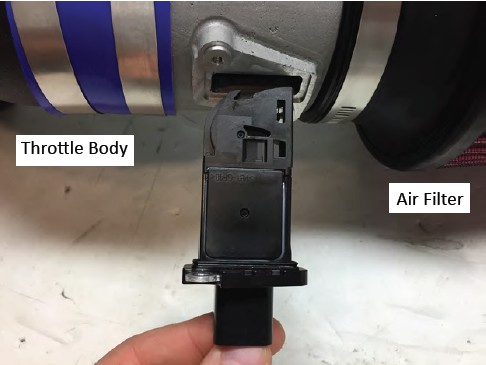
Step 7: Use the supplied torx bit to remove the MAF sensor from the factory intake. **Note: The orientaon of the sensor when removing it from the pipe. If reinstalled incorrectly the vehicle will not run correctly.
Reinstall the MAF sensor in the supplied aluminum housing using the provided machine screws.
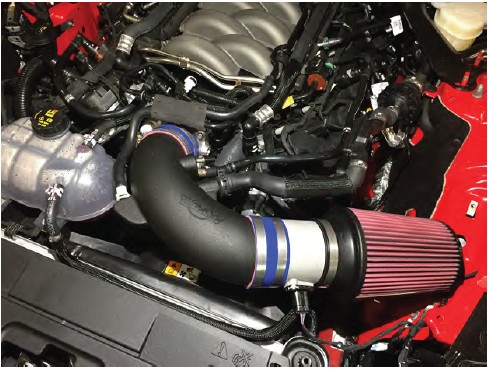
Step 8: Assemble the intake pipe as shown. Install the couplers to the intake tube. They are a ght fit. Install the aluminum MAF housing so the MAF sensor is facing the correct direcon. The sensor will only bolt in one way.

Step 9: Install the assembled intake to the throle body using the provided hose clamp. Re-aach the vacuum, PCV, and sound tube hoses. **Note: The end of the PCV hose rotates. Rotate the fing for the best fit on the intake tube. Install the supplied vacuum cap on the remaining open vacuum port. Reconnect the MAF sensor plug.
Contents:
(1) - Filter 8”
(1) - MAF Housing
(1) - Inlet Pipe
(1) - Coupler 3.5“ x 2” 3 Ply
(1) - Coupler 4“ x 2” 3 Ply
(2) - Clamps 3.5“
(2) - Clamps 4”
(1) - 3/8” Vacuum Cap
(2) - Phillips MAF Screws
(1) - T20 Tamper Proof Torx Bit
(1) - Install Sheet

