 FREE 1 to 3-Day Delivery on Orders $149+ Details
Cervini's Quarter Window Scoops (2005-2009) - Installation Instructions
Installation Time
60 minutes
Tools Required
- Clean Cloths
- Phillips Head Screwdriver
- Tin-Snips or Wire Cutters
- Painter's Tape (available at any Hardware Store)
- Scissors

Shop Parts in this Guide
Installation
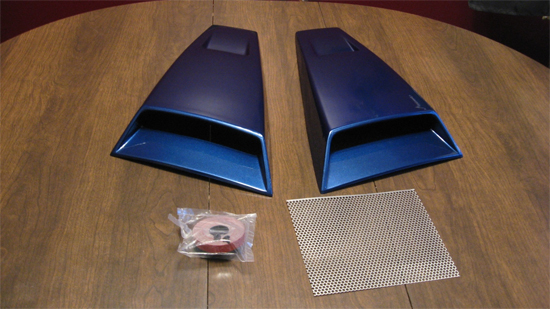
Preparing the Window Scoops
1. Get the window scoops professionally painted.
2. 3M tape adheres best in higher temperatures. Do not install window scoops in cold weather.
3. Clean window scoops with a moist cloth. Be sure to clean and dry the underside, where the 3M tape will adhere.
4. Before installing, hold the Window Scoop up to the Quarter Window to see positioning. The straight edge of the window scoop should be at the top, to follow the line of the car. The drainhole should be near bottom corner. Window should be covered completely by the window scoop.
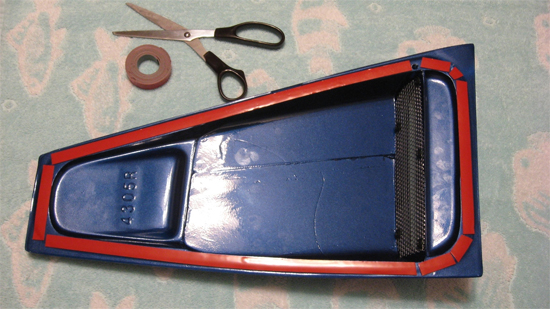
Assembling the Screen in the Window Scoop
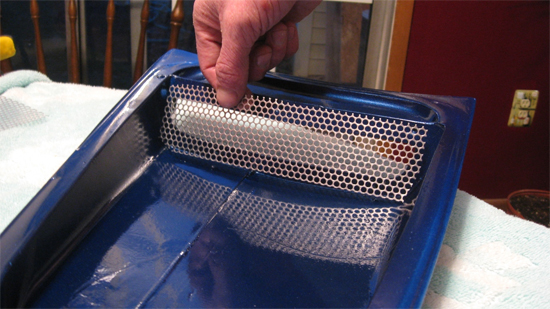
1. Turn window scoop upside down on a table on top of a towel or cloth (to keep paint from rubbing). Inside of window scoop will be facing up, with the opening facing you.
2. Position the shorter end of the rectangular screen into window scoop. The smoother side of the screen should be facing out, so that once it is installed, it shows on the outside. You will notice that the two corners do not allow it to fit down all the way. Trim these two corners at an angle with tin-snips or wire cutters. (If you do not have either one of these, you can also use the inside edge of needlenose pliers).
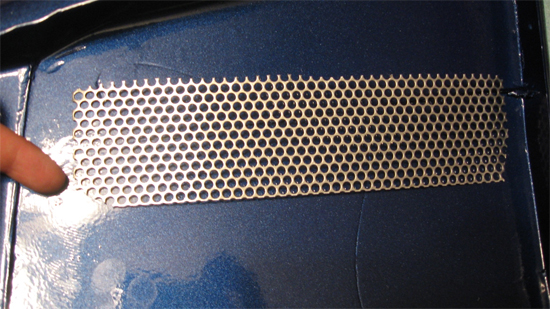
3. Position the screen, again, into the window scoop and check to make sure that the screw holes in the window scoop line up with holes in the screen. If they do not line up, then you can trim it again to match. Then cut the rest of the screen to size in a straight line.
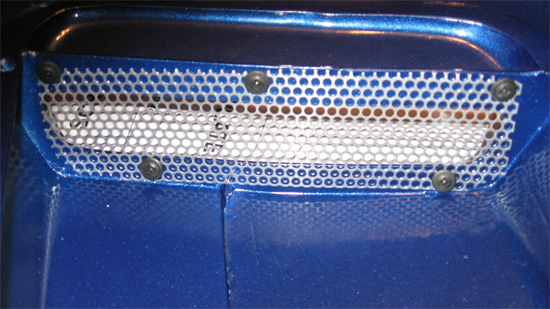
4. There are 5 screws for each window scoop. Insert each through holes in screen and tighten with Philips head screwdriver. (If you have trouble aligning the fourth screw, you may need to clip just the center piece of screen covering that hole so the screw will fit in). Tighten screws flush so that the head of the screws hold the screen in place. Repeat process for second window scoop.
Installing the Window Scoop
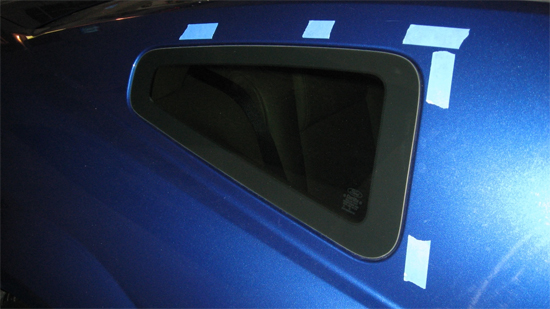
- At a couple of points above the back window, measure two inches from the top line of the car. Mark this off with painter’s tape. The bottom edge of the painter’s tape pieces should be at the 2" mark. (Do not use another type of tape, as it could damage the paint). This is where the top of the window scoop will be.
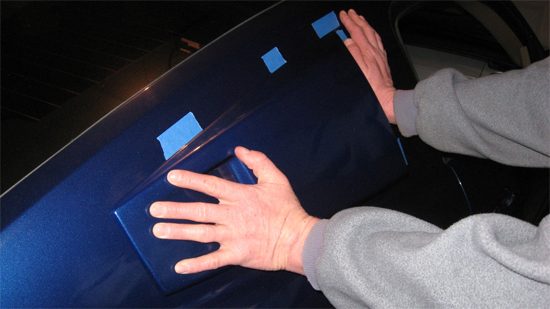
2. Hold up the window scoop to the window to double-check that your measurement was accurate and even. The window scoop should cover all edges of the window.
3. While the window scoop is being held up to cover window, mark off where the forward edge lies with painters tape. (A second set of hands is very helpful at this point). The tape now marks exactly where the scoop will be installed. Verify once more that the entire window is covered and that the top line of the scoop matches the top line of the car.
4. Cut strips of 3M tape to fit on underside of window scoop along the edges. Press down firmly. Remove red tape backing.
5. Align window scoop in place over window without actually touching it to the car. Align the top edge and the front top corner of the scoop to the painter’s tape. Press firmly on top corner and on all edges. Apply pressure and hold in place for 2 Mins.
6. Let set for 24 Hrs before driving. You’re done!
Installation instructions provided by AmericanMuscle customer Brian Franchi 4.15.09

