 FREE 1 to 3-Day Delivery on Orders $149+ Details
How to Install Cervini's Stalker 2 Hood - Unpainted (99-04 All) on your Ford Mustang

Shop Parts in this Guide
Notice: Install new, unpainted parts according to these instructions! Then remove parts, paint them and re-install. Painted or Altered Parts are Non-Refundable! (Excludes Cervini pre-painted parts)
Step 1: Adjust hood until proper alignment with matching panels is achieved.
Step 2: Adjust primary latch until it fits into the latch opening on the hood without hitting any perimeter edges of the opening. Make sure when the hood is closed you can hear the latch “click” onto the hood.
Step 3: After you here it click, test it to be sure it’s working properly by grabbing the front edge of the hood and slowly pulling upward with a steady even pressure. If the hood opens it’s not adjusted properly; repeat STEP 2 until hood cannot be pulled open after it’s closed.
Step 4: WARNING: MAKE SURE THE SAFETY CATCH IS WORKING PROPERLY!
To ensure the safety catch is working properly, close the hood, pull the hood release from inside the car and the hood will partially open. Slowly pull up on the hood while firmly shaking the hood up and down. If the hood opens without pulling the safety catch lever then the latch needs to be re-adjusted. The safety catch prevents the hood from opening in the event that the primary latch fails.
Step 5: Locate the hood stoppers located on each side of the radiator support. Adjust upward until they apply a small amount of pressure to the underside of the hood when it is closed. This will prevent the hood from shaking or rocking. For additional adjustment up and down, remove the primary latch from the radiator support. There are two dowels that interlock the latch to the radiator support. With a center punch and a hammer hit them and they will fall out.
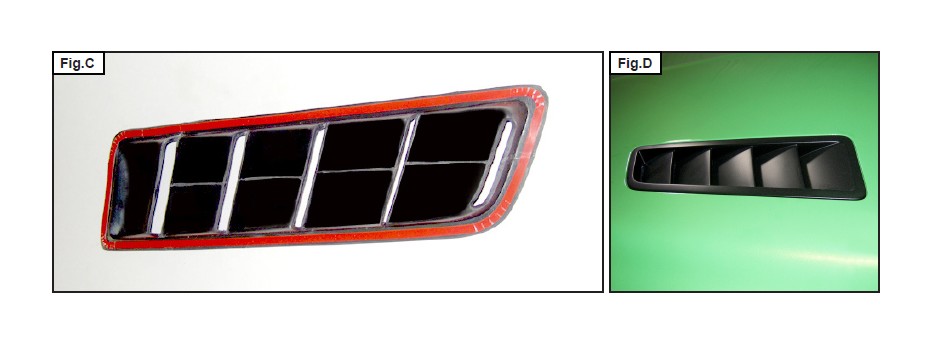
Step 6: Installing the Vent Inserts: Included in the hardware packet is a roll of 3M double sided tape. After the vent inserts have been painted, install the 3M double sided tape along the inside edge of the inserts as shown in Fig.C. After the hood has been painted remove the double sided tape backing from the vent inserts and place them in the openings located in the rear of the hood as shown in Fig D. Be sure to center the inserts in the opening. Firmly press on the edges of the trim ring to secure it to the hood.
URETHANE PAINTING INSTRUCTIONS
VERY IMPORTANT: The following painting procedures MUST be followed EXACTLY for PROPER ADHESION and to prevent fish eyes.
1. To remove any mold release contaminants, clean the back of the part fi rst. Using 2 new clean rags, saturate the fi rst rag with plastic prep cleaner* and begin cleaning. Then use the second rag to remove the prep cleaner. Continuously fold both rags to their clean sides during the process. Use 3 sets of new rags throughout the process. This prevents mold release contaminants from transferring to the painted surface.
2. Repeat step one on the front of the part.
3. Rinse the part with water. Apply a generous amount of Ajax® or sand fi x* to a red scuff pad* (3M Scotch Brite Brand) and scrub the surface to be painted THOROUGHLY (especially where the 2-sided tape is installed, on the back side of the part, and all the hard to reach areas). Then rinse with water and dry. The scrubbed surface should be dull. If any shiny spots show, repeat the process on those areas.
4. Using another set of clean new rags, again clean the surface to be painted with plastic prep cleaner.
5. Spray the surface to be painted with adhesion promoter* including the areas where the 2-sided tape is installed (follow the instructions on the can for application and drying time).
6. Apply 3 to 4 coats of urethane primer* with fl ex additive* (follow the instructions on the can for application and drying time).
7. Wet sand primer with 600 grit sandpaper. Be careful not to sand through the primer. If you do, you MUST clean those areas with plastic prep cleaner, apply adhesion promoter and prime. Once the primer has dried, wet sand the areas that were touched up. Your surface is now ready for paint.
